:max_bytes(150000):strip_icc()/TVinlivingroom-54414ed6e9b54b258593a2bbf6559e1d.jpg)
Designing News Outro Sequences
Designing News Outro Sequences
Nowadays, having a strong online presence is more important than ever. One of the best ways to do that is to create engaging content for your YouTube channel, and you can achieve this by adding a solid intro and outro to your videos.
To keep viewers engaged, the outros on your videos must be strong and captivating to make a positive impression and leave viewers wanting more.
In this article, we’ll discuss how to create news outro templates for your videos or get an editable or non-editable template online.
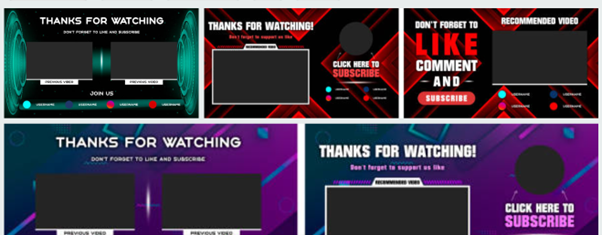
Part 1. Before Starting, Learn What Is a Good YouTube Outro?
Before we investigate where to find an appropriate News Style Outro for your video in Part 2, let’s figure out what elements a good outro should include firstly.
A good outro will typically include a call to action, such as subscribing to a channel, checking out a website, or following on social media. You can also use engaging music or make your outros visually appealing with graphics, animations, or both to keep your viewers hooked.
Furthermore, it should include a brief summary of the video, and what viewers can expect for the things to come. You can find outros templates online or make your own outstanding YouTube outros in just a few clicks.
Part 2. Recommendation: Where Can You Find News Style Outro?
Now that you’ve understood what a good YouTube outro is, you might wonder where you can find News Style outros for your videos/presentations to add a bit of flair.
Multiple platforms offer editable or non-editable news styles outros to content creators. Below we’ve recommended top websites/platforms where you can get your required templates without any issues. Some even offer non-copyright content to their users.
Editable News Outro Template Websites
An editable news outro template can provide a quick and easy way to create or customize an outro that is both professional and engaging. Here are four websites we have chosen for you to find editable news outro templates.
Filmstock
Filmstock is a platform offering free and paid editable templates for content creators. With dozens of editable templates to choose from on Filmstock , you can find the perfect news style outro for your videos in just a few clicks. First, however, you need to install Filmora on your PC to use the platform.
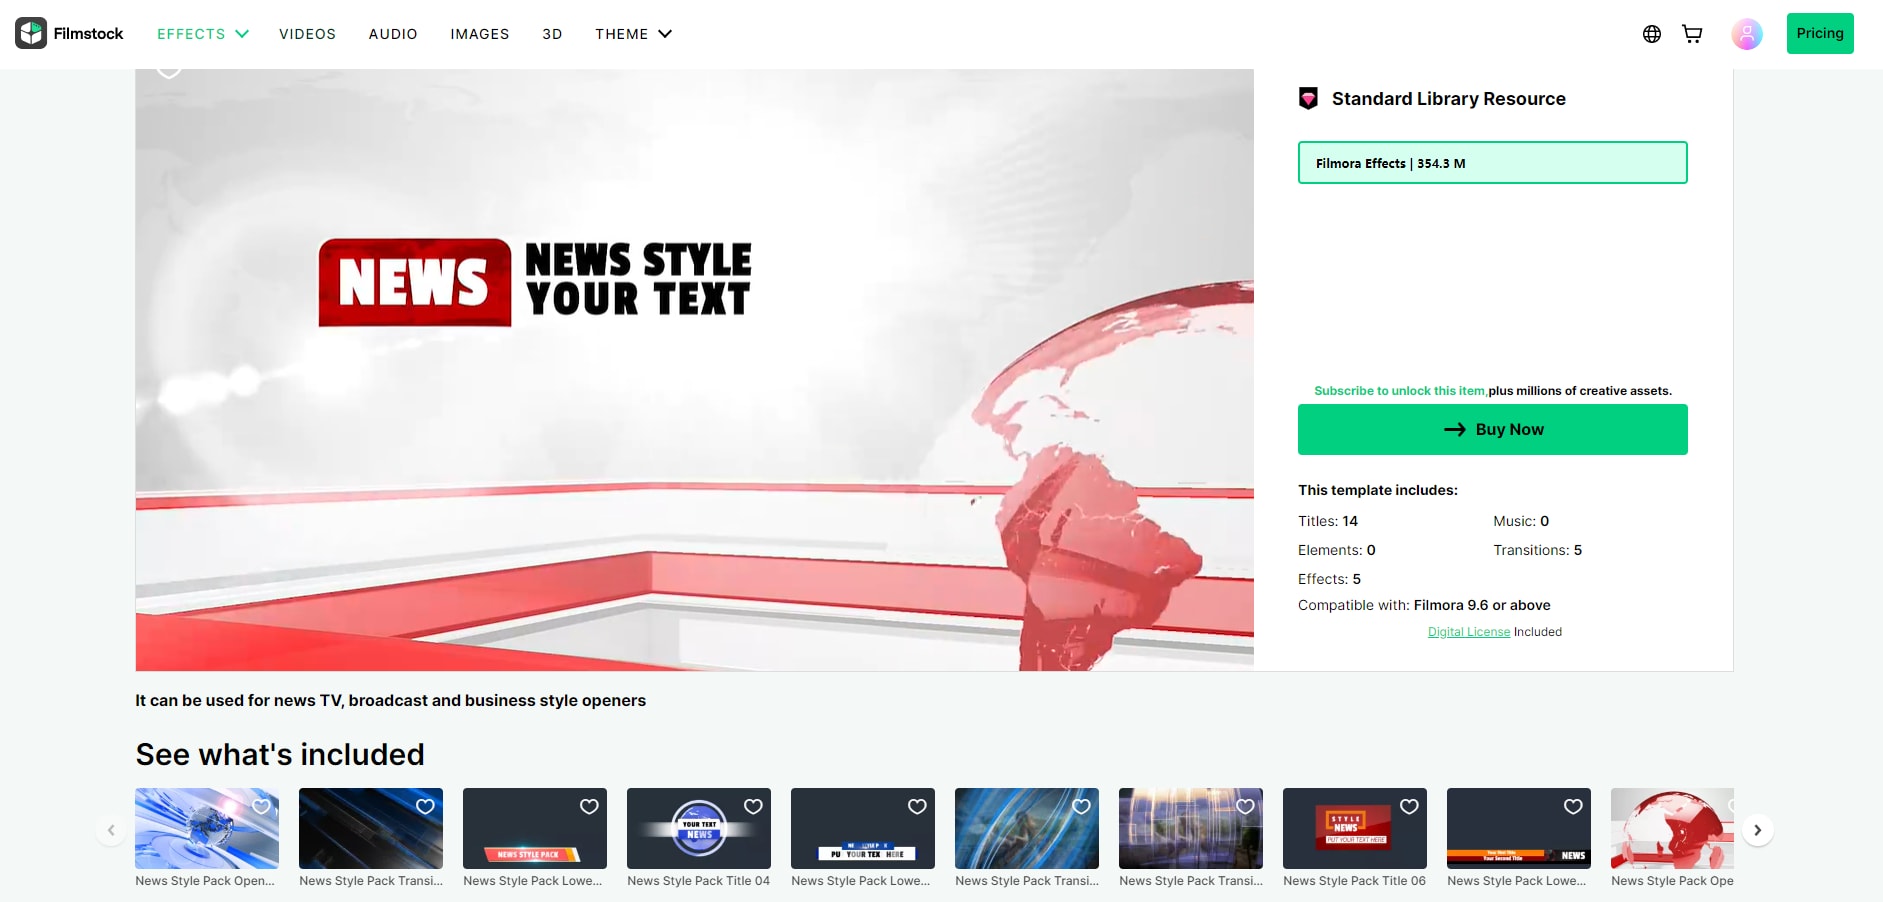
Filmora is a popular video editor with a built-in filmstock library offering hundreds of non-copyright editable templates for every occasion. With the software, you can find and add your news style outros to your videos with just a few clicks. The only disadvantage is that it isn’t completely free. The paid version offers two options: A standard plan that costs $9.99 per month and a Premium plan that will cost you $49.99 per month.
You can also find detailed video tutorials to facilitate your video creation through Filmora and Filmstock’s official YouTube Channels, as well as video sources set presentation on the two channels. Here is an example of News Set video on Filmora’s YouTube Channel. Go to watch it and check are there any ideal news outro!
Video of News Set in Filmora Effects Store
Canva
Canva is a user-friendly graphic design free and paid tool that is quickly becoming a popular choice for businesses of all sizes. Canva offers a range of templates for creating professional-looking designs.
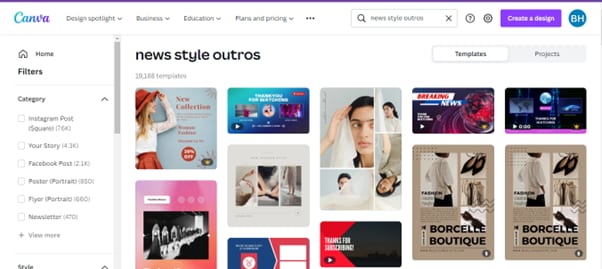
With a wide range of templates to choose from, you can easily find one that fits your needs and style. Best of all, you can create your outro template in minutes without hiring a designer or spending hours learning complex design software.
The software is easy-to-use and does not require any editor to customize and use the templates. The paid version is divided into 2 tiers: Canva Pro ($54.99 per year) and Canva for team ($84. 90/year). One disadvantage of the Canva free version is that it is limited resolution options when exporting your file.
Flexclip
Flexclip is a free, powerful, and easy-to-use online video maker that helps you create beautiful and engaging content for your business. With Flexclip, you can easily create editable news style outros for your videos from scratch or choose a template and edit it according to your requirements.
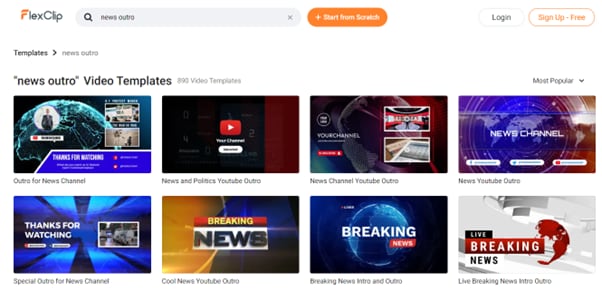
You can add text, music, elements, overlays, and branding to your templates to make them more stunning and captivating.
The platform offers 3 paid plans starting at $8.99/month. The con here is that the free version is only limited to the export quality of 480p, single royalty-free stock use, and 12 projects limit.
Placeit
Placeit is an online editor giving you the ability to create and customize your video content in no time. The editor also includes a stock image library, giving you access to several customizable templates.
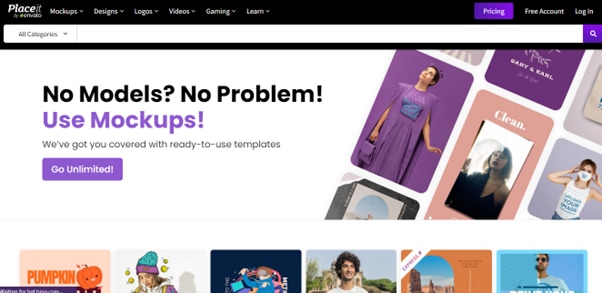
Placeit is easy to use and offers a variety of templates for different purposes, including outros for news stories, video blogs, and even gaming videos. The platform offers an unlimited subscription plan starting from $7.47 /month.
However, the design rendering process of the editor is slow, there is no AI tool, and you even cannot import fonts that are not available on the platform.
Non-Editable News Outro Template Websites
Some platforms offer non-editable high-resolution news outros that you can integrate into your videos using software programs like Filmora (guidance in Part 3), After Effects, etc.
Storyblock
Searching for high-quality templates for your next project?Storyblock is a website that comes with royalty-free, non-customizable news style outros.
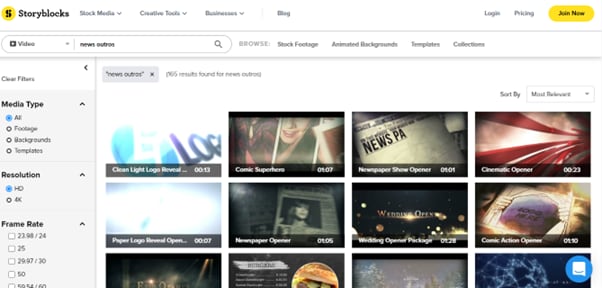
You can use these templates to create high-quality news intros and outros for your podcast or videos. The platform offers two pricing plans for individual content creators, starting at $15 per month. While businesses can customize their plans as per their requirements.
Limitations of the Storyblock are that the footage quality is very poor in the free version, and the paid versions might be tricky to avail sometimes.
Videvo
Videvo is a great resource for anyone looking for royalty-free video templates. They have over 300,000 free and premium videos, which you can download in clips or full with 4K resolution. However, their stock library is not much vast. The platform comes with a two-tier subscription plan starting from $14.99/month or $144/year.
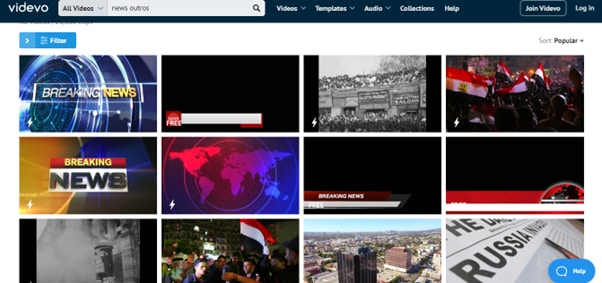
You can find templates for both commercial and non-commercial use, so whatever your needs are, Videvo is likely to have a template that will work for you, i.e., news style. Some features of the platform include high-resolution download options, numerous music, sound effects, images and videos library, and a video compression option.
Videezy
Videezy is a royalty-free video site that offers free and premium video templates. The website has a variety of options to choose from, including news style outros, all of which are geared towards creating engaging content.
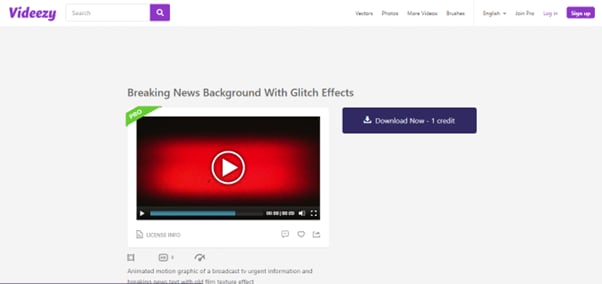
The templates are all ready-made and royalty-free. You can download them for use in your own projects and attach them to your video using any video editing app/software.
The pricing of the platform starts at $19/file, which might be expensive for some users. Moreover, in the free version, too many ads are displayed.
Shutterstock
Shutterstock has various affordable, royalty-free outro templates that you can use for your video/podcast. With a wide selection of styles and price points, this platform has the perfect content for your needs.
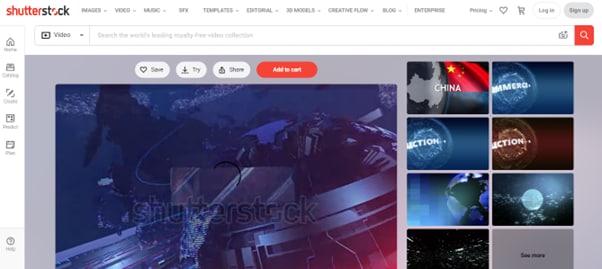
On Shutterstock, the free trial only offers 10 images, and you will be charged $0.22-$14.50/image once the trial limit is over. On the other hand, the Extended license will cost you $67.96-$99.50. The downside is that you have to purchase the content pack separately.
iStock
iStock is a premium website offering royalty-free stock photos, illustrations, and videos divided into numerous categories for easy access. The platform also offers a variety of non-editable news outro templates that you can add to your videos or podcasts.
The free trial on the platform is limited to 10 images, and after that, you will be charged $0.22-$9.90/image, while the Extended license will cost you $144-$216. The support system on the platform is slow and doesn’t respond on time.
Part 3. A Bonus Tip: How To Edit Your News Outro For Your YouTube Video?
After knowing the websites providing News Style Outro, we hope you can find an ideal outro successfully. However, how to use the material you have found, integrate it into your YouTube video, and improve the quality of it?
Like mentioned before, we highly recommend Filmora to fulfill all your editing needs and even provide royalty-free templates to use. Below are the steps to edit your news outros and make your content more appealing. Let’s start it without any hassle:
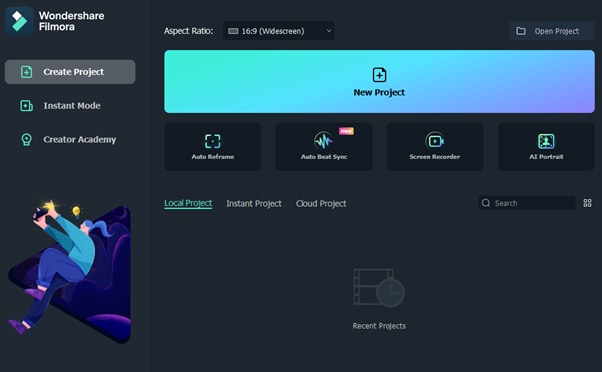
Step1 Download Filmora software from the official website and install it on your PC. Launch the software and click “New Project.”
Step2 Drag and drop your media file or import it using the “Click Here to Import Media File” option. Now, drag your file and drop it in the Timeline.
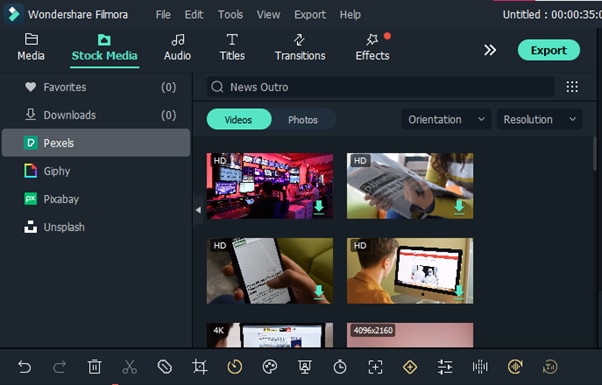
Step3 Adjust your clip in the Timeline and click the “Stock Media” option. Search for “News Outros,” select the one you like, and add it to the Timeline.
Step4 Next, adjust the template on your video, and once you are satisfied, click the “Export” option. Finally, do the necessary settings and click “Export” again or share your video directly to YouTube.
Free Download For Win 7 or later(64-bit)
Free Download For macOS 10.14 or later
Conclusion
In this article, we’ve provided a detailed guide on how to create news outro templates with simple and easy-to-follow instructions. We also discussed various platforms/editors where you can find customizable and non-customizable templates.
Hopefully, you find this guide informative and can now create strong news style outros for your videos.
Canva
Canva is a user-friendly graphic design free and paid tool that is quickly becoming a popular choice for businesses of all sizes. Canva offers a range of templates for creating professional-looking designs.
With a wide range of templates to choose from, you can easily find one that fits your needs and style. Best of all, you can create your outro template in minutes without hiring a designer or spending hours learning complex design software.
The software is easy-to-use and does not require any editor to customize and use the templates. The paid version is divided into 2 tiers: Canva Pro ($54.99 per year) and Canva for team ($84. 90/year). One disadvantage of the Canva free version is that it is limited resolution options when exporting your file.
Flexclip
Flexclip is a free, powerful, and easy-to-use online video maker that helps you create beautiful and engaging content for your business. With Flexclip, you can easily create editable news style outros for your videos from scratch or choose a template and edit it according to your requirements.
You can add text, music, elements, overlays, and branding to your templates to make them more stunning and captivating.
The platform offers 3 paid plans starting at $8.99/month. The con here is that the free version is only limited to the export quality of 480p, single royalty-free stock use, and 12 projects limit.
Placeit
Placeit is an online editor giving you the ability to create and customize your video content in no time. The editor also includes a stock image library, giving you access to several customizable templates.
Placeit is easy to use and offers a variety of templates for different purposes, including outros for news stories, video blogs, and even gaming videos. The platform offers an unlimited subscription plan starting from $7.47 /month.
However, the design rendering process of the editor is slow, there is no AI tool, and you even cannot import fonts that are not available on the platform.
Non-Editable News Outro Template Websites
Some platforms offer non-editable high-resolution news outros that you can integrate into your videos using software programs like Filmora (guidance in Part 3), After Effects, etc.
Storyblock
Searching for high-quality templates for your next project?Storyblock is a website that comes with royalty-free, non-customizable news style outros.
You can use these templates to create high-quality news intros and outros for your podcast or videos. The platform offers two pricing plans for individual content creators, starting at $15 per month. While businesses can customize their plans as per their requirements.
Limitations of the Storyblock are that the footage quality is very poor in the free version, and the paid versions might be tricky to avail sometimes.
Videvo
Videvo is a great resource for anyone looking for royalty-free video templates. They have over 300,000 free and premium videos, which you can download in clips or full with 4K resolution. However, their stock library is not much vast. The platform comes with a two-tier subscription plan starting from $14.99/month or $144/year.
You can find templates for both commercial and non-commercial use, so whatever your needs are, Videvo is likely to have a template that will work for you, i.e., news style. Some features of the platform include high-resolution download options, numerous music, sound effects, images and videos library, and a video compression option.
Videezy
Videezy is a royalty-free video site that offers free and premium video templates. The website has a variety of options to choose from, including news style outros, all of which are geared towards creating engaging content.
The templates are all ready-made and royalty-free. You can download them for use in your own projects and attach them to your video using any video editing app/software.
The pricing of the platform starts at $19/file, which might be expensive for some users. Moreover, in the free version, too many ads are displayed.
Shutterstock
Shutterstock has various affordable, royalty-free outro templates that you can use for your video/podcast. With a wide selection of styles and price points, this platform has the perfect content for your needs.
On Shutterstock, the free trial only offers 10 images, and you will be charged $0.22-$14.50/image once the trial limit is over. On the other hand, the Extended license will cost you $67.96-$99.50. The downside is that you have to purchase the content pack separately.
iStock
iStock is a premium website offering royalty-free stock photos, illustrations, and videos divided into numerous categories for easy access. The platform also offers a variety of non-editable news outro templates that you can add to your videos or podcasts.
The free trial on the platform is limited to 10 images, and after that, you will be charged $0.22-$9.90/image, while the Extended license will cost you $144-$216. The support system on the platform is slow and doesn’t respond on time.
Part 3. A Bonus Tip: How To Edit Your News Outro For Your YouTube Video?
After knowing the websites providing News Style Outro, we hope you can find an ideal outro successfully. However, how to use the material you have found, integrate it into your YouTube video, and improve the quality of it?
Like mentioned before, we highly recommend Filmora to fulfill all your editing needs and even provide royalty-free templates to use. Below are the steps to edit your news outros and make your content more appealing. Let’s start it without any hassle:
Step1 Download Filmora software from the official website and install it on your PC. Launch the software and click “New Project.”
Step2 Drag and drop your media file or import it using the “Click Here to Import Media File” option. Now, drag your file and drop it in the Timeline.
Step3 Adjust your clip in the Timeline and click the “Stock Media” option. Search for “News Outros,” select the one you like, and add it to the Timeline.
Step4 Next, adjust the template on your video, and once you are satisfied, click the “Export” option. Finally, do the necessary settings and click “Export” again or share your video directly to YouTube.
Free Download For Win 7 or later(64-bit)
Free Download For macOS 10.14 or later
Conclusion
In this article, we’ve provided a detailed guide on how to create news outro templates with simple and easy-to-follow instructions. We also discussed various platforms/editors where you can find customizable and non-customizable templates.
Hopefully, you find this guide informative and can now create strong news style outros for your videos.
Guides on Creating Cost-Free YouTube Beginnings & Conclusions
How to Create YouTube Intros & End Cards - Free and Easy

Shanoon Cox
Oct 26, 2023• Proven solutions
Part1: Intros
Elements of an Intro
Intros should only last about five seconds, and that can be cut down to two or three if you have a larger following.
When your intro video is longer than five seconds viewers are more likely to click away. The first 15 seconds of a video is when viewers are most likely to decide to click on one of the recommended videos, or go back to their search results and choose something else. The odds of them leaving within these first 15 seconds are greater if you do not get right to the main point of your video. That is why long intro sequences are bad for your watch time.
Whether it is better to put your intro at the very beginning of your video, or after you introduce your topic, will depend on your viewers. You may want to try it both ways and then look at your retention report (found in your YouTube Creator Studio under Analytics) to see which works best for you.
Top Intro Sites
There are a few different sites where you can download animated intros, customized to include your username or logo. Here are two of the best:
FlixPress.com
This is probably the most popular intro site. There are a lot of great animated intros available for under $5, or even for free.
IntroMaker.net
This is another site with really professional looking intros for $5. They only have two free options, though.
Creating an Intro in Filmora
You can create a simple intro card in Filmora.


- Choose your background. You may want to use a short clip as your intro, or you may just want a colored background.
- Drag your clip or background into the video track of your timeline and trim it down to five seconds.
- If you have a logo, import it into Filmora and drag it into your picture-in-picture track.
- With your logo selected, click on the Green Screen icon. In the pop-up, select the background of your logo to make it transparent. For this to work your logo cannot be the same color as its background.
- Click on the editing icon with your logo selected and choose an animation.
- Go to the Text/Titles menu and choose an animated title that suits your channel. Drag it into your text track and edit it to include your name.
- The last piece of your intro is sound. You can choose a song from Filmora’s library and cut it down to five seconds, or import your sound effect.
- Export your video and save it for use in all of your other videos.
Part 2: End Cards
When your video ends, YouTube will recommend a selection of videos users may want to watch next. Often, these recommendations will not include more of your videos.
To keep viewers on your channel, you can create your End Card which recommends other content you have created.
Elements of an End Card
An end card includes clips from two or three of your videos, muted, and shrunk down to thumbnail-size. Using spotlight annotations you can make these thumbnails click-able.
It is also important that your end card includes multiple calls to action. A call to action is meant to spur a viewer to some kind of action. Writing ‘Check out this video’ above one of your thumbnails is a call to action.
You should also have a subscribe link somewhere in your end card, ideally a very noticeable button with a proven call to action like ‘Subscribe Now!’.
Some creators will leave their end cards at that and play music overtop, but it can be even more effective to include a voiceover where you ask viewers to subscribe and watch your other videos.
How To Make an End Card
- Choose a static background. You may want to download an end card template or create one in a drawing program. If you do, make sure to include calls to action like ‘Watch more!’ and ‘Subscribe’.
- Drag your background into your timeline at the end of your video.
- Import two or three of your previous videos and drag them into your picture in picture tracks. Each clip should be on its track.
- Trim the clips in your picture in picture track down to the same length as your end card.
- Shrink your clips down to thumbnail-size by dragging their corners in the preview window.
- Position your clips so they are spaced evenly by dragging them in the preview screen.
- Mute your clips.
- If your background does not include any calls to action, choose a title from the Text/Titles menu in Filmora and create at least two – one asking viewers to subscribe, and one asking them to watch your suggested videos.
- Export your video from Filmora and upload it to YouTube.
- Go to your Video Manager and select Annotations in the drop-down menu next to your video.
- Go to your end card in the previewer, as that is where you want to add your annotations.
- Click Add Annotation and add a spotlight annotation to your video. Stretch it over one of your thumbnails and then check the Link box under your Annotation’s timing. Insert a link to the video you are previewing.
- Repeat for any other thumbnails. For your subscribe button, change where it said ‘Video’ to ‘Subscribe’ and enter your channel URL.
- Click Apply Changes.
Shanoon Cox
Shanoon Cox is a writer and a lover of all things video.
Follow @Shanoon Cox
Shanoon Cox
Oct 26, 2023• Proven solutions
Part1: Intros
Elements of an Intro
Intros should only last about five seconds, and that can be cut down to two or three if you have a larger following.
When your intro video is longer than five seconds viewers are more likely to click away. The first 15 seconds of a video is when viewers are most likely to decide to click on one of the recommended videos, or go back to their search results and choose something else. The odds of them leaving within these first 15 seconds are greater if you do not get right to the main point of your video. That is why long intro sequences are bad for your watch time.
Whether it is better to put your intro at the very beginning of your video, or after you introduce your topic, will depend on your viewers. You may want to try it both ways and then look at your retention report (found in your YouTube Creator Studio under Analytics) to see which works best for you.
Top Intro Sites
There are a few different sites where you can download animated intros, customized to include your username or logo. Here are two of the best:
FlixPress.com
This is probably the most popular intro site. There are a lot of great animated intros available for under $5, or even for free.
IntroMaker.net
This is another site with really professional looking intros for $5. They only have two free options, though.
Creating an Intro in Filmora
You can create a simple intro card in Filmora.
- Choose your background. You may want to use a short clip as your intro, or you may just want a colored background.
- Drag your clip or background into the video track of your timeline and trim it down to five seconds.
- If you have a logo, import it into Filmora and drag it into your picture-in-picture track.
- With your logo selected, click on the Green Screen icon. In the pop-up, select the background of your logo to make it transparent. For this to work your logo cannot be the same color as its background.
- Click on the editing icon with your logo selected and choose an animation.
- Go to the Text/Titles menu and choose an animated title that suits your channel. Drag it into your text track and edit it to include your name.
- The last piece of your intro is sound. You can choose a song from Filmora’s library and cut it down to five seconds, or import your sound effect.
- Export your video and save it for use in all of your other videos.
Part 2: End Cards
When your video ends, YouTube will recommend a selection of videos users may want to watch next. Often, these recommendations will not include more of your videos.
To keep viewers on your channel, you can create your End Card which recommends other content you have created.
Elements of an End Card
An end card includes clips from two or three of your videos, muted, and shrunk down to thumbnail-size. Using spotlight annotations you can make these thumbnails click-able.
It is also important that your end card includes multiple calls to action. A call to action is meant to spur a viewer to some kind of action. Writing ‘Check out this video’ above one of your thumbnails is a call to action.
You should also have a subscribe link somewhere in your end card, ideally a very noticeable button with a proven call to action like ‘Subscribe Now!’.
Some creators will leave their end cards at that and play music overtop, but it can be even more effective to include a voiceover where you ask viewers to subscribe and watch your other videos.
How To Make an End Card
- Choose a static background. You may want to download an end card template or create one in a drawing program. If you do, make sure to include calls to action like ‘Watch more!’ and ‘Subscribe’.
- Drag your background into your timeline at the end of your video.
- Import two or three of your previous videos and drag them into your picture in picture tracks. Each clip should be on its track.
- Trim the clips in your picture in picture track down to the same length as your end card.
- Shrink your clips down to thumbnail-size by dragging their corners in the preview window.
- Position your clips so they are spaced evenly by dragging them in the preview screen.
- Mute your clips.
- If your background does not include any calls to action, choose a title from the Text/Titles menu in Filmora and create at least two – one asking viewers to subscribe, and one asking them to watch your suggested videos.
- Export your video from Filmora and upload it to YouTube.
- Go to your Video Manager and select Annotations in the drop-down menu next to your video.
- Go to your end card in the previewer, as that is where you want to add your annotations.
- Click Add Annotation and add a spotlight annotation to your video. Stretch it over one of your thumbnails and then check the Link box under your Annotation’s timing. Insert a link to the video you are previewing.
- Repeat for any other thumbnails. For your subscribe button, change where it said ‘Video’ to ‘Subscribe’ and enter your channel URL.
- Click Apply Changes.
Shanoon Cox
Shanoon Cox is a writer and a lover of all things video.
Follow @Shanoon Cox
Also read:
- [New] 2024 Approved Windows PC Broadcasting Manual A Comprehensive Live TV Recording Guide
- [New] Break Free From Fee-Free Youtube - Start at 500+ Subscriber Level
- [New] Elevate Your Profit with These Top 10 Simplified YouTube Business Channels
- [New] How To Get Paid on YouTube - From AdSense to Your Bank Account
- [Updated] Achieve Financial Success on YouTube Start at 500 Views
- [Updated] Deciphering YouTube's Subscriber Code
- 2024 Approved Combining YouTube and iMovie for Professional Results
- Choosing Creativity's Canvas Youtube Vs. TikTok for 2024
- Delve Into the Upcoming Tesla Robotaxi – Latest Rumors on Pricing, Availability, and Features Unpacked
- Does Airplane Mode Turn off GPS Location On Oppo F23 5G? | Dr.fone
- Drives Unseen in Win 10/11 - Resolved Guide
- Effortless Sound Transformation From YouTube to WAV Format
- In 2024, Best 10 Mock Location Apps Worth Trying On Tecno Camon 20 Pro 5G | Dr.fone
- In 2024, Decoding the Core Contrasts Between YouTube and DailyMention
- In 2024, DIY Tripods| How to Stabilize Your Camera without Buying a Tripod
- Leaders in Learning Top 15 Online Science Hubs
- Tailored Touch-Up Top 6 Apps to Exclude Unwanted Elements From Photos for 2024
- The Hottest YouTube-to-MP3 Software Picks (Top 10)
- Ultimate Guide to Choosing the Perfect Google Pixel E (Assuming It Was Meant Instead of 'Pixel 7A') Phone Case Today: Expert Reviews and Top Recommendations
- Title: Designing News Outro Sequences
- Author: Brian
- Created at : 2024-12-05 01:55:09
- Updated at : 2024-12-10 04:16:05
- Link: https://youtube-video-recordings.techidaily.com/designing-news-outro-sequences/
- License: This work is licensed under CC BY-NC-SA 4.0.