"Cutting-Edge Techniques for Private YT Content Dissemination in Gmail for 2024"
Cutting-Edge Techniques for Private YT Content Dissemination in Gmail
How to Share a Private YouTube Video?

Richard Bennett
Oct 26, 2023• Proven solutions
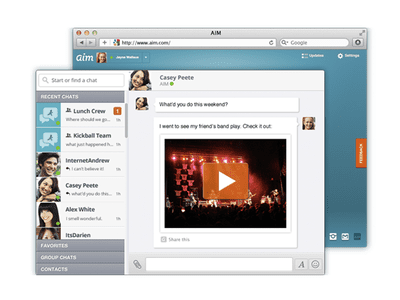
Want to share a private YouTube video? A private video is a video that is posted to YouTube, but only viewable to a select group of people who you choose to share it with. It could be that this is a personal video only intended for friends and family, or it could be that you want to get feedback from people you trust before making it public.
Private YouTube videos can be shared with 50 Google accounts.
- Part 1: How to Share a Private YouTube Video
- Part 2: Private Video Limitations on YouTube
- Part 3: How to Share Unlisted Videos on YouTube
Make Your YouTube Video with Wondershare Filmora
To make YouTube videos awesome, Wondershare Filmora has features like overlays & effects, Advanced color tuning, green screen, a power tool that would certainly help you create a video intended for a personal review. The tools and features on Wondershare Filmora are unbeatable in terms of quality and precision and you can use it for your YouTube video editing and directly upload them from the Wondershare Filmora dashboard itself to avoid that time-consuming process of transferring your videos device to device if you are using another system to edit your videos.


Part 1: How to Share a Private YouTube Video
You can make a YouTube video private either within the Creator studio or by choosing the option when you first upload a video.
When you mark a video as private you will be able to send the video out to up to 50 e-mail addresses, names of contacts on Google, or your circles on Google plus. As soon as you add a new contact to the list they will receive an invite link to view the video.
Unlike with an unlisted video, the contacts allowed to view a private video will not be able to share the URL of your video with their own friends and contacts.
Part 2: Private Video Limitations on YouTube
The video cannot be shared again and only the individuals invited can view the video at its URL.
Contacts that you send the private invite too will have to have a YouTube account and be signed in to it, in order to view your video.
Part 3: How to Share Unlisted Videos on YouTube
Another option that YouTube delivers for privacy is the chance to mark videos as unlisted. Unlisted videos will not be included in any of the Google search engine results and only individuals that have the link will be able to view the videos on YouTube. A person does not have to have a Google account or any type of password to see unlisted videos, only the link, which means the people you share the video with will also be able to share it with whoever they like.
To share an unlisted video, simply send its URL to anyone you want to watch it. This is easier than sharing private YouTube videos, but not quite as private.
Richard Bennett
Richard Bennett is a writer and a lover of all things video.
Follow @Richard Bennett
Richard Bennett
Oct 26, 2023• Proven solutions
Want to share a private YouTube video? A private video is a video that is posted to YouTube, but only viewable to a select group of people who you choose to share it with. It could be that this is a personal video only intended for friends and family, or it could be that you want to get feedback from people you trust before making it public.
Private YouTube videos can be shared with 50 Google accounts.
- Part 1: How to Share a Private YouTube Video
- Part 2: Private Video Limitations on YouTube
- Part 3: How to Share Unlisted Videos on YouTube
Make Your YouTube Video with Wondershare Filmora
To make YouTube videos awesome, Wondershare Filmora has features like overlays & effects, Advanced color tuning, green screen, a power tool that would certainly help you create a video intended for a personal review. The tools and features on Wondershare Filmora are unbeatable in terms of quality and precision and you can use it for your YouTube video editing and directly upload them from the Wondershare Filmora dashboard itself to avoid that time-consuming process of transferring your videos device to device if you are using another system to edit your videos.
Part 1: How to Share a Private YouTube Video
You can make a YouTube video private either within the Creator studio or by choosing the option when you first upload a video.
When you mark a video as private you will be able to send the video out to up to 50 e-mail addresses, names of contacts on Google, or your circles on Google plus. As soon as you add a new contact to the list they will receive an invite link to view the video.
Unlike with an unlisted video, the contacts allowed to view a private video will not be able to share the URL of your video with their own friends and contacts.
Part 2: Private Video Limitations on YouTube
The video cannot be shared again and only the individuals invited can view the video at its URL.
Contacts that you send the private invite too will have to have a YouTube account and be signed in to it, in order to view your video.
Part 3: How to Share Unlisted Videos on YouTube
Another option that YouTube delivers for privacy is the chance to mark videos as unlisted. Unlisted videos will not be included in any of the Google search engine results and only individuals that have the link will be able to view the videos on YouTube. A person does not have to have a Google account or any type of password to see unlisted videos, only the link, which means the people you share the video with will also be able to share it with whoever they like.
To share an unlisted video, simply send its URL to anyone you want to watch it. This is easier than sharing private YouTube videos, but not quite as private.
Richard Bennett
Richard Bennett is a writer and a lover of all things video.
Follow @Richard Bennett
Perfecting Stability: A No-Tripod Guide
DIY Tripods| How to Stabilize Your Camera without Buying a Tripod
Richard Bennett
Oct 26, 2023• Proven solutions
When you’re trying to grow a channel on YouTube it can feel like equipment is a barrier, but it shouldn’t be. If you can’t afford a high-end tripod, for example, there are loads of ways to get by without one.
DIY Your Video with Wondershare Filmora
Wondershare Filmora has the best video stabilization tool is your videos have a bad frame or were recorded in dim lights. If a video is shot in bad weather or unfriendly situation where you don’t have all the equipment required for a quality recording, Wondershare Filmora can help you in the background to edit your videos like a pro. And it has all the relevant tools like effects, transitions, background removal, overlays, and background music that could turn your normal video to a professional one.
Here are 3 of our favorite DIY tripods.
DIY smartphone tripod using binder clips or hair clips
You’re a solo operation and your best camera is on your phone. That’s pretty common.
If you have a DSLR then you can set it down on any stable surface while filming yourself, but your phone can’t stand up by itself. It needs something or someone to hold it. Do you just accept that and shoot everything as a selfie?
No. No, you don’t, because there are common household items that can help you out of this problem. For this DIY tripod, you need either 2 binder clips or 2 ‘claw clips’ (also called ‘hair jaws’).
Hold your phone in landscape mode (horizontally, so it’s long rather than tall) and attach clips to the bottom corners. If you are worried about scratching your screen, fold up some paper to place between your clip and your phone.
Here it is with binder clips:

And here it is with hair clips:

Now you can set your smartphone upon any stable surface, like a table or a stack of books.
Here are some more cool ideas!
DIY adjustable tripod using books and a towel
You’ve probably heard a million times that you can stabilize your camera by sitting it down on any stable surface – on your desk, on a stack of books, up in a tree, etc. This is very true!
But if you can use any stable surface, why do people buy tripods?
Because it isn’t convenient to rearrange your furniture whenever you want to make a video, and also because tripods are adjustable. You can change their height, you can use them to pan or tilt, and it’s pretty easy to move them a bit forwards or backward while you’re setting up your shot.
To get similar functions from the ‘any stable surface’ solution you can use a table, a stack of books, and a towel.
- Set up the area where you’re going to sit while you’re filming on one end of the table.
- Put the towel down over the approximate spot you want your camera to be.
- Stack your books on top of the towel.
- Put your camera on top of the books.
Now if your camera isn’t up high enough, or is too high, you can adjust it just by adding or taking away books. If you want to move it closer or farther away from you, just pull the towel forwards or backward.
DIY gripping ‘Gorillapod’ using wire and tape
Gorillapod’s are cool because you can use them like normal tripods, carry them around like selfie sticks, or attach them to things like fences and posts. Here’s how you can make something similar using wire, electrical tape or duct tape, and a 1/4 bolt.
Your wire should be fairly stiff and you’ll need three pieces the same length, which should be at least 10 inches. Old clothes hangers work well. This needs to be something strong enough to support the weight of your camera, but soft enough that it’s not impossible for you to bend.

All of your supplies plus the finished product.
Readying your legs
Step 1: Bend 2 inches at one end of each wire into a ‘U’ shape. You will probably need pliers for this.
Step 2: Pick up one of your pieces of wire and wrap one end with electrical tape. Go around 5-10 times (to prevent it from coming undone at the end) and then, without cutting your tape, start moving up and wrapping the rest of your wire. Stop before your ‘U’ section.
Repeat this with the other two wires.
Attaching your legs
Step 1: Place the ‘U’ section of a leg against your bolt. The bolt’s threading should be pointing away from the leg. Now, use your tape to attach them. Wind it around 2 or 3 times, then repeat the process with both of the other legs individually.
Step 2: After all the legs are attached, wrap some more tape around all 3 as tightly as you can.
Your camera will mount onto the bolt! You’ll be able to use this as a normal table-top tripod or use the flexible legs to grab onto different things like a Gorillapod. Read more at Instructables.
Note: make sure the bolt is a fit for your camera before you get too far into this process.
Richard Bennett
Richard Bennett is a writer and a lover of all things video.
Follow @Richard Bennett
Richard Bennett
Oct 26, 2023• Proven solutions
When you’re trying to grow a channel on YouTube it can feel like equipment is a barrier, but it shouldn’t be. If you can’t afford a high-end tripod, for example, there are loads of ways to get by without one.
DIY Your Video with Wondershare Filmora
Wondershare Filmora has the best video stabilization tool is your videos have a bad frame or were recorded in dim lights. If a video is shot in bad weather or unfriendly situation where you don’t have all the equipment required for a quality recording, Wondershare Filmora can help you in the background to edit your videos like a pro. And it has all the relevant tools like effects, transitions, background removal, overlays, and background music that could turn your normal video to a professional one.
Here are 3 of our favorite DIY tripods.
DIY smartphone tripod using binder clips or hair clips
You’re a solo operation and your best camera is on your phone. That’s pretty common.
If you have a DSLR then you can set it down on any stable surface while filming yourself, but your phone can’t stand up by itself. It needs something or someone to hold it. Do you just accept that and shoot everything as a selfie?
No. No, you don’t, because there are common household items that can help you out of this problem. For this DIY tripod, you need either 2 binder clips or 2 ‘claw clips’ (also called ‘hair jaws’).
Hold your phone in landscape mode (horizontally, so it’s long rather than tall) and attach clips to the bottom corners. If you are worried about scratching your screen, fold up some paper to place between your clip and your phone.
Here it is with binder clips:
And here it is with hair clips:
Now you can set your smartphone upon any stable surface, like a table or a stack of books.
Here are some more cool ideas!
DIY adjustable tripod using books and a towel
You’ve probably heard a million times that you can stabilize your camera by sitting it down on any stable surface – on your desk, on a stack of books, up in a tree, etc. This is very true!
But if you can use any stable surface, why do people buy tripods?
Because it isn’t convenient to rearrange your furniture whenever you want to make a video, and also because tripods are adjustable. You can change their height, you can use them to pan or tilt, and it’s pretty easy to move them a bit forwards or backward while you’re setting up your shot.
To get similar functions from the ‘any stable surface’ solution you can use a table, a stack of books, and a towel.
- Set up the area where you’re going to sit while you’re filming on one end of the table.
- Put the towel down over the approximate spot you want your camera to be.
- Stack your books on top of the towel.
- Put your camera on top of the books.
Now if your camera isn’t up high enough, or is too high, you can adjust it just by adding or taking away books. If you want to move it closer or farther away from you, just pull the towel forwards or backward.
DIY gripping ‘Gorillapod’ using wire and tape
Gorillapod’s are cool because you can use them like normal tripods, carry them around like selfie sticks, or attach them to things like fences and posts. Here’s how you can make something similar using wire, electrical tape or duct tape, and a 1/4 bolt.
Your wire should be fairly stiff and you’ll need three pieces the same length, which should be at least 10 inches. Old clothes hangers work well. This needs to be something strong enough to support the weight of your camera, but soft enough that it’s not impossible for you to bend.
All of your supplies plus the finished product.
Readying your legs
Step 1: Bend 2 inches at one end of each wire into a ‘U’ shape. You will probably need pliers for this.
Step 2: Pick up one of your pieces of wire and wrap one end with electrical tape. Go around 5-10 times (to prevent it from coming undone at the end) and then, without cutting your tape, start moving up and wrapping the rest of your wire. Stop before your ‘U’ section.
Repeat this with the other two wires.
Attaching your legs
Step 1: Place the ‘U’ section of a leg against your bolt. The bolt’s threading should be pointing away from the leg. Now, use your tape to attach them. Wind it around 2 or 3 times, then repeat the process with both of the other legs individually.
Step 2: After all the legs are attached, wrap some more tape around all 3 as tightly as you can.
Your camera will mount onto the bolt! You’ll be able to use this as a normal table-top tripod or use the flexible legs to grab onto different things like a Gorillapod. Read more at Instructables.
Note: make sure the bolt is a fit for your camera before you get too far into this process.
Richard Bennett
Richard Bennett is a writer and a lover of all things video.
Follow @Richard Bennett
Also read:
- [New] 2024 Approved Seamless OBS Broadcast Setup on FB
- [New] Cloaking in Content An Introduction to Video Smoothing
- [Updated] Analyzing User Interface and Features in YouTube Mobile App
- [Updated] Deciding the Optimal Social Media Platform TikTok Vs. YouTube Shorts
- [Updated] DIY Movie Making YouTube's Boutique Method
- 1. Best Practices for Enhancing Your Streams with ManyCam - Top-Notch Live Broadcasting and Virtually Realistic Webcam Experiences
- 2024 Approved Time-Honored Treasures, Free of Restrictions
- A Step-by-Step Approach to Crafting Your Video' Market Standouts for 2024
- Audiovisual Excellence The Premier Video Formats for YouTube for 2024
- Enriching YouTube Content with Improved Sound Quality
- Epubor Chirp Converter
- Experience Top-Notch Messaging on Tango – Free Calls and Conversations Unveiled
- How To Unlock SIM Cards Of Xiaomi Redmi Note 12 Pro+ 5G Without PUK Codes
- Ideal Audio Transformer Devices for YouTube Experts
- In 2024, Unlocking YouTube Success Top Video Strategies to Explode Views
- In 2024, Veiled Realities An Insight Into Story Viewers' World
- Is the Galaxy S24 Ultra Maintaining Its Throne as the Top Android Device After Half a Year?
- Perfecting YT Aesthetics In-Depth Guide to Banner & Art Sizing
- Solving the Problem of QuickTime Player Unable to Play MP4 Files in Windows
- Title: Cutting-Edge Techniques for Private YT Content Dissemination in Gmail for 2024
- Author: Brian
- Created at : 2024-12-05 03:31:57
- Updated at : 2024-12-10 08:24:44
- Link: https://youtube-video-recordings.techidaily.com/cutting-edge-techniques-for-private-yt-content-dissemination-in-gmail-for-2024/
- License: This work is licensed under CC BY-NC-SA 4.0.