
"Cutting-Edge Techniques Elevating Your YouTube Edits Using iMovie"
Cutting-Edge Techniques: Elevating Your YouTube Edits Using iMovie
Easy Way to Edit YouTube Videos in iMovie

Richard Bennett
Mar 27, 2024• Proven solutions
iMovie is the built-in video editor that allows you to combine several video clips. It is available for both Mac and iOS devices. This app was first released in 1999 when it came with the iMac DV model.
With the use of the iMovie, you are able to create movies that include sound effects, menus, transitions, titles, themes, and music, just to name a few. The resulting movie can be saved onto physical media or as a file on the hard drive.
If you are a Mac user, then you can easily edit YouTube videos in iMovie. All you need to do is to follow the simple steps below. In this article, you will learn how to import videos, organize videos, add YouTube titles and add transitions.
Part 1. Steps on Editing YouTube Videos Using iMovie
To edit a video for YouTube with iMovie, you can follow these steps.
Step 1: Import Video Clips into iMovie
If you have recorded the video clips with the use of a videocam, then connect the camera to the Mac and open the app. You can import the videos by manually selecting the clips that will be part of the YouTube video.
Note: If you want to import videos that you have already published on your YouTube channel, then you can download them from the channel, and save them as MP4. However, if the videos were uploaded by other users, then you need to use a video converter, this article will let you know the 8 best video converters to convert video to MP4.
Step 2: Edit the Video Clips
Once you have all the clips that you need, the next step is to edit YouTube videos in iMovie. When you import the clips, you have created an Event in the app. If you want to include a clip in your final video, just drag the file to the project browser, where you can edit the video.

You can also add videos from other Events into the current project. You can select the parts of the video by dragging across the video from the chosen start to stop points. Edit the video until you are satisfied with the results.
Step 3: Enhance the Video
Once you have edited the video, you can then add background music, themes, sound effects, onscreen text, transitions between clips, and photos. The best thing about iMovie is that it comes with a sound effects library. It also allows you to upload audio from your iTunes library, iLife, and GarageBand.
iMovie allows you to add text to any part of the video, whether it is a title screen at the start, credits at the end, and everything in between. Try to enhance the video until you think it is ready to be uploaded to YouTube.
- Add YouTube title : If you want to add a title for YouTube Video, all you need to do is click Title in the toolbar, and then highlight My Movie on the left. From here, enter the title you like.
- Organize videos : You also can rearrange video clips in the timeline. Just drag the video on the timeline to wherever you want.
- Add transitions : If you have more than one video clip, you definitely need transitions between them. Click the Transitions tab, and then select one transition you like. In the end, drag it to stop between two clips.
Step 4: Export and Upload the Video to YouTube

When you edit YouTube videos in iMovie, you have the option to export the video straight to the video streaming website. All you need to do is to click on the Share button found at the top of the screen. Then select YouTube. Add your YouTube account in iMovie by entering your username and password. Then you choose a title, description, and tags for the video.
You can choose the resolution and size of the video that includes HD 720p and HD 1080p, mobile, medium, and large. Click on Publish to upload the video to YouTube. Uploading the video will take several minutes to a couple of hours, depending on the resolution and size of the video.
Part 2. A Better Choice to Edit YouTube Videos
There’s a better way to edit YouTube videos. It involves the use of Wondershare Filmora . It is user-friendly and allows beginners to make videos professional-looking videos.


This software has more than 300 video effects for family, weddings, love, and travel, etc. You can also add animated captions to photos that will help tell the story. It comes with an array of intro and credit templates that will enhance your video.
Lastly, you can easily share the resulting movie on YouTube, DVD, other devices, and a lot more.
Richard Bennett
Richard Bennett is a writer and a lover of all things video.
Follow @Richard Bennett
Richard Bennett
Mar 27, 2024• Proven solutions
iMovie is the built-in video editor that allows you to combine several video clips. It is available for both Mac and iOS devices. This app was first released in 1999 when it came with the iMac DV model.
With the use of the iMovie, you are able to create movies that include sound effects, menus, transitions, titles, themes, and music, just to name a few. The resulting movie can be saved onto physical media or as a file on the hard drive.
If you are a Mac user, then you can easily edit YouTube videos in iMovie. All you need to do is to follow the simple steps below. In this article, you will learn how to import videos, organize videos, add YouTube titles and add transitions.
Part 1. Steps on Editing YouTube Videos Using iMovie
To edit a video for YouTube with iMovie, you can follow these steps.
Step 1: Import Video Clips into iMovie
If you have recorded the video clips with the use of a videocam, then connect the camera to the Mac and open the app. You can import the videos by manually selecting the clips that will be part of the YouTube video.
Note: If you want to import videos that you have already published on your YouTube channel, then you can download them from the channel, and save them as MP4. However, if the videos were uploaded by other users, then you need to use a video converter, this article will let you know the 8 best video converters to convert video to MP4.
Step 2: Edit the Video Clips
Once you have all the clips that you need, the next step is to edit YouTube videos in iMovie. When you import the clips, you have created an Event in the app. If you want to include a clip in your final video, just drag the file to the project browser, where you can edit the video.
You can also add videos from other Events into the current project. You can select the parts of the video by dragging across the video from the chosen start to stop points. Edit the video until you are satisfied with the results.
Step 3: Enhance the Video
Once you have edited the video, you can then add background music, themes, sound effects, onscreen text, transitions between clips, and photos. The best thing about iMovie is that it comes with a sound effects library. It also allows you to upload audio from your iTunes library, iLife, and GarageBand.
iMovie allows you to add text to any part of the video, whether it is a title screen at the start, credits at the end, and everything in between. Try to enhance the video until you think it is ready to be uploaded to YouTube.
- Add YouTube title : If you want to add a title for YouTube Video, all you need to do is click Title in the toolbar, and then highlight My Movie on the left. From here, enter the title you like.
- Organize videos : You also can rearrange video clips in the timeline. Just drag the video on the timeline to wherever you want.
- Add transitions : If you have more than one video clip, you definitely need transitions between them. Click the Transitions tab, and then select one transition you like. In the end, drag it to stop between two clips.
Step 4: Export and Upload the Video to YouTube
When you edit YouTube videos in iMovie, you have the option to export the video straight to the video streaming website. All you need to do is to click on the Share button found at the top of the screen. Then select YouTube. Add your YouTube account in iMovie by entering your username and password. Then you choose a title, description, and tags for the video.
You can choose the resolution and size of the video that includes HD 720p and HD 1080p, mobile, medium, and large. Click on Publish to upload the video to YouTube. Uploading the video will take several minutes to a couple of hours, depending on the resolution and size of the video.
Part 2. A Better Choice to Edit YouTube Videos
There’s a better way to edit YouTube videos. It involves the use of Wondershare Filmora . It is user-friendly and allows beginners to make videos professional-looking videos.
This software has more than 300 video effects for family, weddings, love, and travel, etc. You can also add animated captions to photos that will help tell the story. It comes with an array of intro and credit templates that will enhance your video.
Lastly, you can easily share the resulting movie on YouTube, DVD, other devices, and a lot more.
Richard Bennett
Richard Bennett is a writer and a lover of all things video.
Follow @Richard Bennett
Leveraging YouTube’s CC for High-Quality Video Creation
What’s YouTube Creative Commons and How to Use it to Make Video
Richard Bennett
Mar 27, 2024• Proven solutions
Creative Commons is a non-profit organization internationally active in providing free licenses that creators can use in order to make their work available to the public. With the creative commons (CC) licenses, the creator has basically given others permission in order to use their work but under specific conditions.
Whenever a work is created, an article or a photograph was taken, there is a copyright that protects it so that it cannot be used in certain ways. On the other hand, the CC licenses allow the creator to choose how they would want others to use their creativity.
If you are new to the video editing world, and want to make your YouTube videos more beautiful, here I recommend an easy-to-use video editing software - Wondershare Filmora which not only allows you cut, crop, rotate, and split your videos in minutes, but also simplify the advanced video editing like green screen effect and PIP. You can also find over 300 video effects
Download Mac Version ](https://tools.techidaily.com/wondershare/filmora/download/ )
- Part 1: What is YouTube Commons
- Part 2: How to Find Creative Commons (CC) Licensed Videos
- Part 3: Can You Download Creative Commons-licensed YouTube videos to Edit
- Part 4: How to Use YouTube Creative Commons to Make Videos
Part 1: What is YouTube Creative Commons
YouTube utilizes CC licenses in its content. With it, the content creators can grant others to use their work as sort of a standard. YouTube users can use the Creative Commons CC BY license in marking their videos. When they use the CC By license, the system will generate a signature to the video automatically. This indicates that you are using Creative Commons content and will show the source video’s titles below the video player. The creator retains the copyright of the video while others can reuse your video but under the terms of the license.
You May Also Like: Standard YouTube License vs. Creative Commons>>
Part 2: How to Find Creative Commons (CC) Licensed Videos
If you are looking for Creative Commons licensed videos, there are different ways or rather, different websites you can go to. These websites are the best place you can find CC-licensed videos and ensure that what you are sharing is legal.
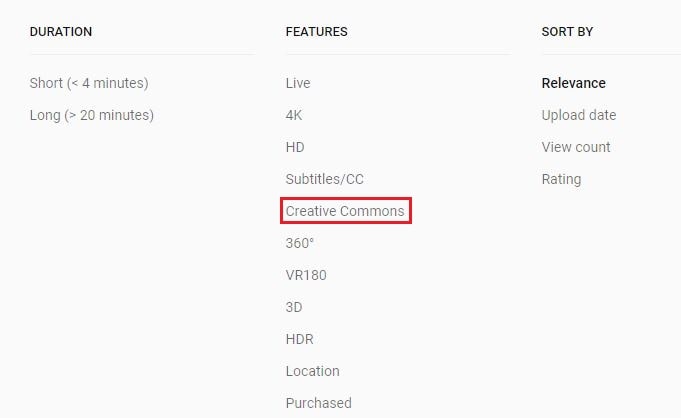
- **YouTube **– YouTube is one of the most common websites you can find CC licensed videos. The easy way to search for CC licensed videos on YouTube is simply to search ‘creative commons’ to the end of the search term you are going for.
- Vimeo – This site offers different licenses complete with an explanation for each in the right side of the main page. Underneath each license, you can find a link to browse all the videos of the specific type of license you chose. You can also search using the Advance Option to find the right video you are looking for.
- SpinXpress – Lets you search for CC licensed videos using just a search term and the kind of Creative Commons license you are looking for. As long as it’s one of the sources they use, you can also specify the media source of the video.
Part 3: Can You Download Creative Commons-licensed YouTube videos to Edit
Many people are asking that can I edit creative commons videos? Well, this is a tricky question because it really depends on what creative commons license is used. If the video is CC-BY, it is no doubt that you can download and edit it. CC-BY-SA means you can edit video under the condition of you also allow others to edit it after you upload it to YouTube. If it is non-commercial, you are definitely not allowed to edit it.
Part 4: How to Use YouTube Creative Commons to Make Videos
YouTube Creative Commons provides you a simple way of using creative works to make your own videos. All you simply need is the YouTube Video Editor and the expanded library of Creative Commons videos o YouTube. There you can choose what videos to edit and then incorporate in your own projects. To find what videos to use, you simply have to search in the YouTube search bar from YouTube Video Editor.
Visit youtube.com/editor and then select CC tab to get started. In order to mark your video with CC license, select the ‘Creative Commons Attribution license’ on the Video Description page or upload page. When using a Creative Commons content to incorporate in your video, you will see the source title of the videos underneath your video player. With that a well, any or all of the videos you used with Creative Commons license, others will be able to share and remix your own creation as long as they give credit for your work.
Richard Bennett
Richard Bennett is a writer and a lover of all things video.
Follow @Richard Bennett
Richard Bennett
Mar 27, 2024• Proven solutions
Creative Commons is a non-profit organization internationally active in providing free licenses that creators can use in order to make their work available to the public. With the creative commons (CC) licenses, the creator has basically given others permission in order to use their work but under specific conditions.
Whenever a work is created, an article or a photograph was taken, there is a copyright that protects it so that it cannot be used in certain ways. On the other hand, the CC licenses allow the creator to choose how they would want others to use their creativity.
If you are new to the video editing world, and want to make your YouTube videos more beautiful, here I recommend an easy-to-use video editing software - Wondershare Filmora which not only allows you cut, crop, rotate, and split your videos in minutes, but also simplify the advanced video editing like green screen effect and PIP. You can also find over 300 video effects
Download Mac Version ](https://tools.techidaily.com/wondershare/filmora/download/ )
- Part 1: What is YouTube Commons
- Part 2: How to Find Creative Commons (CC) Licensed Videos
- Part 3: Can You Download Creative Commons-licensed YouTube videos to Edit
- Part 4: How to Use YouTube Creative Commons to Make Videos
Part 1: What is YouTube Creative Commons
YouTube utilizes CC licenses in its content. With it, the content creators can grant others to use their work as sort of a standard. YouTube users can use the Creative Commons CC BY license in marking their videos. When they use the CC By license, the system will generate a signature to the video automatically. This indicates that you are using Creative Commons content and will show the source video’s titles below the video player. The creator retains the copyright of the video while others can reuse your video but under the terms of the license.
You May Also Like: Standard YouTube License vs. Creative Commons>>
Part 2: How to Find Creative Commons (CC) Licensed Videos
If you are looking for Creative Commons licensed videos, there are different ways or rather, different websites you can go to. These websites are the best place you can find CC-licensed videos and ensure that what you are sharing is legal.
- **YouTube **– YouTube is one of the most common websites you can find CC licensed videos. The easy way to search for CC licensed videos on YouTube is simply to search ‘creative commons’ to the end of the search term you are going for.
- Vimeo – This site offers different licenses complete with an explanation for each in the right side of the main page. Underneath each license, you can find a link to browse all the videos of the specific type of license you chose. You can also search using the Advance Option to find the right video you are looking for.
- SpinXpress – Lets you search for CC licensed videos using just a search term and the kind of Creative Commons license you are looking for. As long as it’s one of the sources they use, you can also specify the media source of the video.
Part 3: Can You Download Creative Commons-licensed YouTube videos to Edit
Many people are asking that can I edit creative commons videos? Well, this is a tricky question because it really depends on what creative commons license is used. If the video is CC-BY, it is no doubt that you can download and edit it. CC-BY-SA means you can edit video under the condition of you also allow others to edit it after you upload it to YouTube. If it is non-commercial, you are definitely not allowed to edit it.
Part 4: How to Use YouTube Creative Commons to Make Videos
YouTube Creative Commons provides you a simple way of using creative works to make your own videos. All you simply need is the YouTube Video Editor and the expanded library of Creative Commons videos o YouTube. There you can choose what videos to edit and then incorporate in your own projects. To find what videos to use, you simply have to search in the YouTube search bar from YouTube Video Editor.
Visit youtube.com/editor and then select CC tab to get started. In order to mark your video with CC license, select the ‘Creative Commons Attribution license’ on the Video Description page or upload page. When using a Creative Commons content to incorporate in your video, you will see the source title of the videos underneath your video player. With that a well, any or all of the videos you used with Creative Commons license, others will be able to share and remix your own creation as long as they give credit for your work.
Richard Bennett
Richard Bennett is a writer and a lover of all things video.
Follow @Richard Bennett
Also read:
- [New] 2024 Approved Audience-Centric Approaches to Voiceover on Slides
- [New] Crafting an Efficient YouTube Subscription Path
- [New] In 2024, From Clicks to Cash The Systematic Triple Pathway for YouTube Revenue Tracking
- [New] In 2024, Photo Story Platinum - Best Photo Movie Story Maker | Wondershare
- [Updated] 10 Essential Vlog Editing Hacks for Novice Creators
- [Updated] Best Vector Illustration Software A Must-Have List for Artists
- [Updated] Delve Into YouTube Metrics Using the Power of Social Blade
- 2024 Approved Unlock 3D Text Magic with Adobe's Creative Suite
- Elevating Views, Amplifying Impact A Youtube Case Study
- How to Soft Reset Realme C67 5G phone? | Dr.fone
- Resolving the 'GTX 43 Code' Issue on NVIDIA GeForce 950 Under Windows 10 Operating System
- Strategies for Monetizing Your Content Without Infringement for 2024
- Unveiling the Leading YouTube to Mp3 Tools
- Title: Cutting-Edge Techniques Elevating Your YouTube Edits Using iMovie
- Author: Brian
- Created at : 2024-12-05 16:26:58
- Updated at : 2024-12-10 10:52:20
- Link: https://youtube-video-recordings.techidaily.com/cutting-edge-techniques-elevating-your-youtube-edits-using-imovie/
- License: This work is licensed under CC BY-NC-SA 4.0.