
:max_bytes(150000):strip_icc()/corinne-kutz-tMI2_-r5Nfo-unsplash-aec79963aac341289ac3bb16be99df9b.jpg)
"Champion's Tech The Ultimate Gaming Toolkit"
Champion’s Tech: The Ultimate Gaming Toolkit
YouTube Equipment for Gaming Channels - Best Gaming Gears

Richard Bennett
Mar 27, 2024• Proven solutions
You love gaming, you have a lot of know-how to pass on, and you have a magnetic personality: you are ready to become a great YouTube gaming commentator. All you need is gaming gear. We have already listed some of the best YouTube video shooting equipment lists for starting recording videos, here we will run through some of the best YouTube equipment for gaming channels, sorted into categories for game recording, audio, and video (facecam).
YouTube Equipment You Should Have for Gaming Channels [Gaming Gears]
1. Game Recording [Capture Card & Game Recording Software]

Game recording software, or hardware, is what you will use to capture your in-game footage. The worst thing you can do is try to point a camera at the screen of your computer or television; recording your screen directly is a must. What kind of game capture gear you need will depend on what kind of game you are playing.
For recording games on your computer screen, you may only need software, and there are a few quality game recording software out there for free. One popular option among YouTube gamers is called OBS , or ‘Open Broadcaster Software’. OBS is free to download from Obsproject.com. The thing that makes it great for gamers is it can be used for live streaming to YouTube, or other sharing sites like Twitch.tv (which has a focus on gaming videos).
For those who want to record the gameplay with ease and edit the recorded gameplay footage with the same tool, we recommend you to try Filmora , which is a 2-in-1 gameplay recording software and video editor on both Windows and Mac.
The advantages of using Filmora to record YouTube Gameplay video:
- Record 4K gameplay and high-space game
- Record gameplay and webcam at the same time
- Mark the important moment with the Marker feature when playing the game
- Basic video editing tools provide trimming, cutting, and merging features as well as annotation effects


If you are going to be making videos more related to consol games then you may need to invest in a Capture device. One of the best is the Elgato Game Capture HD60 featured above. It captures video directly onto either your Mac or PC, while a lot of the other top capture devices only work with a PC. It can record in 1080p with 60fps, and you can even live stream. The Elgato HD60 is compatible with PS4, Xbox One, Xbox 360, and the Wii U.
2. Audio Recording Devices
Your audio recording is extremely important. The thing that will set you apart from other people posting gaming commentary is your personality, and that will only come across if your videos have clear audio. It does not do you much good to be hilarious in a fuzzy commentary track.
A lot of YouTube gamers, especially gamers who are just starting to make videos, go with the Zalman ZM-Mic1 which can be used in combination with headphones. The Zalman might pick up background sounds, like mouse clicks, which is not ideal. However, it will give you significantly better audio than recording directly from your computer, and at under $10 it will not be a purchase you regret. The Zalman is a great starter-mic, especially if you download the free audio editing program Audacity and use it to clean up the little imperfections in your recording. Audacity can be downloaded at Audacityteam.org.
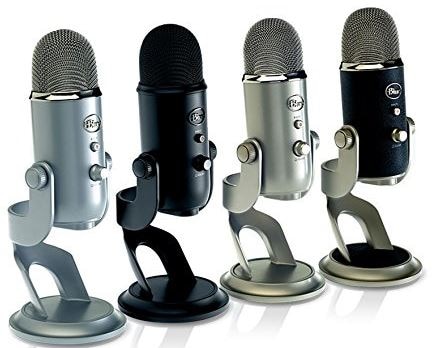
If you are looking for more control over your recording then you should consider the Blue Yeti Mic, which is featured above. This standalone mic is also used by a lot of vloggers and YouTube gamers. It has volume control and even a mute button. It plugs right into the USB drive of your computer using a ten-foot cable, which means you can take it pretty far from your computer. The Blue Yeti USB mic costs about $130.
Check our best list of audio recording devices: Best Microphones for YouTubers
3. Video Recording Devices

If you are going to add a facecam into your videos then it should be high quality, but it does not need to be a top-of-the-line 4K recording. Rather than buying a $1000 DSLR for reaction shots, you should go with a reliable webcam. Before you make a decision about what kind of webcam to get consider how often you will be using your facecam. Not all gaming videos need one. If you play a lot of survival horror games then your reactions will be a key element in your videos, but if you are not playing games that will cause you to have amusing reactions then a facecam will not really add anything to a viewer’s experience.
You may also like: how to use DSLR as a webcam
If your facecam is going to be an important element in your channel then you should expect to spend around $100 on your webcam. The above image is the Logitech C920, which is one of the best at this price point. It performs well in low light, has a good auto-focus feature, and the quality of its video recordings is quite high.
If you are only going to use a facecam occasionally then consider the Genius WideCam F100, which can be found online for around $30. Its 1080p HD recordings are not as smooth as they should be, but it performs very well at 720p and that is all you should need.
Check more options for the Best webcams for YouTuber
Conclusion
Once you have these gaming recording devices, you can now go to record a gameplay and upload it to YouTube. Before you move on, do check these 10 tips for shooting professional YouTube videos . In case you need to trim and edit the recorded gameplay video and present the most exciting moments, you can use some of the best video editing software for YouTube . Here, we recommend you try the Filmora video editor to achieve your goal.
Why choose Filmora to edit recorded YouTube gameplay videos?
- Intuitive interface for saving time
- Trim Video and Audio Quickly
- Record commentary and voiceover with ease or add royalty-free music sound from the Music Library
- 300+ stylish video effects built-in and more in Filmora Effect Store
- Upload to YouTube directly
In case you didn’t know Filmora before, here is a video tutorial for beginners about Filmora video editor, check and download it to edit your YouTube today.
Richard Bennett
Richard Bennett is a writer and a lover of all things video.
Follow @Richard Bennett
Richard Bennett
Mar 27, 2024• Proven solutions
You love gaming, you have a lot of know-how to pass on, and you have a magnetic personality: you are ready to become a great YouTube gaming commentator. All you need is gaming gear. We have already listed some of the best YouTube video shooting equipment lists for starting recording videos, here we will run through some of the best YouTube equipment for gaming channels, sorted into categories for game recording, audio, and video (facecam).
YouTube Equipment You Should Have for Gaming Channels [Gaming Gears]
1. Game Recording [Capture Card & Game Recording Software]
Game recording software, or hardware, is what you will use to capture your in-game footage. The worst thing you can do is try to point a camera at the screen of your computer or television; recording your screen directly is a must. What kind of game capture gear you need will depend on what kind of game you are playing.
For recording games on your computer screen, you may only need software, and there are a few quality game recording software out there for free. One popular option among YouTube gamers is called OBS , or ‘Open Broadcaster Software’. OBS is free to download from Obsproject.com. The thing that makes it great for gamers is it can be used for live streaming to YouTube, or other sharing sites like Twitch.tv (which has a focus on gaming videos).
For those who want to record the gameplay with ease and edit the recorded gameplay footage with the same tool, we recommend you to try Filmora , which is a 2-in-1 gameplay recording software and video editor on both Windows and Mac.
The advantages of using Filmora to record YouTube Gameplay video:
- Record 4K gameplay and high-space game
- Record gameplay and webcam at the same time
- Mark the important moment with the Marker feature when playing the game
- Basic video editing tools provide trimming, cutting, and merging features as well as annotation effects
If you are going to be making videos more related to consol games then you may need to invest in a Capture device. One of the best is the Elgato Game Capture HD60 featured above. It captures video directly onto either your Mac or PC, while a lot of the other top capture devices only work with a PC. It can record in 1080p with 60fps, and you can even live stream. The Elgato HD60 is compatible with PS4, Xbox One, Xbox 360, and the Wii U.
2. Audio Recording Devices
Your audio recording is extremely important. The thing that will set you apart from other people posting gaming commentary is your personality, and that will only come across if your videos have clear audio. It does not do you much good to be hilarious in a fuzzy commentary track.
A lot of YouTube gamers, especially gamers who are just starting to make videos, go with the Zalman ZM-Mic1 which can be used in combination with headphones. The Zalman might pick up background sounds, like mouse clicks, which is not ideal. However, it will give you significantly better audio than recording directly from your computer, and at under $10 it will not be a purchase you regret. The Zalman is a great starter-mic, especially if you download the free audio editing program Audacity and use it to clean up the little imperfections in your recording. Audacity can be downloaded at Audacityteam.org.
If you are looking for more control over your recording then you should consider the Blue Yeti Mic, which is featured above. This standalone mic is also used by a lot of vloggers and YouTube gamers. It has volume control and even a mute button. It plugs right into the USB drive of your computer using a ten-foot cable, which means you can take it pretty far from your computer. The Blue Yeti USB mic costs about $130.
Check our best list of audio recording devices: Best Microphones for YouTubers
3. Video Recording Devices
If you are going to add a facecam into your videos then it should be high quality, but it does not need to be a top-of-the-line 4K recording. Rather than buying a $1000 DSLR for reaction shots, you should go with a reliable webcam. Before you make a decision about what kind of webcam to get consider how often you will be using your facecam. Not all gaming videos need one. If you play a lot of survival horror games then your reactions will be a key element in your videos, but if you are not playing games that will cause you to have amusing reactions then a facecam will not really add anything to a viewer’s experience.
You may also like: how to use DSLR as a webcam
If your facecam is going to be an important element in your channel then you should expect to spend around $100 on your webcam. The above image is the Logitech C920, which is one of the best at this price point. It performs well in low light, has a good auto-focus feature, and the quality of its video recordings is quite high.
If you are only going to use a facecam occasionally then consider the Genius WideCam F100, which can be found online for around $30. Its 1080p HD recordings are not as smooth as they should be, but it performs very well at 720p and that is all you should need.
Check more options for the Best webcams for YouTuber
Conclusion
Once you have these gaming recording devices, you can now go to record a gameplay and upload it to YouTube. Before you move on, do check these 10 tips for shooting professional YouTube videos . In case you need to trim and edit the recorded gameplay video and present the most exciting moments, you can use some of the best video editing software for YouTube . Here, we recommend you try the Filmora video editor to achieve your goal.
Why choose Filmora to edit recorded YouTube gameplay videos?
- Intuitive interface for saving time
- Trim Video and Audio Quickly
- Record commentary and voiceover with ease or add royalty-free music sound from the Music Library
- 300+ stylish video effects built-in and more in Filmora Effect Store
- Upload to YouTube directly
In case you didn’t know Filmora before, here is a video tutorial for beginners about Filmora video editor, check and download it to edit your YouTube today.
Richard Bennett
Richard Bennett is a writer and a lover of all things video.
Follow @Richard Bennett
Effective Use of AdSense on YouTube to Boost Channel Income
How to Use AdSense for YouTube
Richard Bennett
Mar 27, 2024• Proven solutions
Now, since your YouTube channel has a large of subscribers and views, you start thinking to make money by using YouTube AdSense. However, do you really know YouTube AdSense very well? Or even, do you even know what it is exactly. In order to let you better understand it and make money, we have rounded up all information here to explain the basic knowledge of AdSense to you. Keeping reading to learn more!
- Part1: What is Adsense
- Part2: How to Link YouTube Account to Adsense
- Part3: How to Use AdSense for YouTube
Part 1: What is Adsense?
You might have noticed several ads displayed on the videos on various social platforms. AdSense is a part of Google that is responsible for placing such ads in the videos. You can sign in from YouTube account directly.
When you wish to place an ad, you may publish it on various media through Adsense. As an advertiser, you may publish anything in videos, images or texts on the websites and pay per impression or per click or per conversion.
Having a YouTube Adsense account or your website connected to Adsense account can help you earn money when Google places ads to your channel.
Do not worry, creating a Google Adsense account is free and when you create one, your YouTube channel or your website gets free eligibility for Google Ads. You just need to copy a code and paste it to start. The AdSense returns calculation is on pay per click or on a per-impression basis. However, if you want to receive the payment, you need to set up AdSense account first.
Part 2: How to Link YouTube Account to Adsense
Step 1: Link YouTube Account To Adsense
- Click on Setup YouTube AdSense or from monetization option, click on Setup Adsense option for your channel. Press Next. You are directed to Adsense sign up page.
- Select your email account, you wish to sign up with. You may also sign up with existing id or create a new one

- In case, you are using your existing email, sign in to YouTube Adsense with the same id. Once signed up, fill personal details form with information like address, name, etc.
- While filling your payee name be very careful and fill exactly as in your bank account name.

- Submit the form. Your application goes under review and might be under process for 2-3 hours to a few days depending on your Google Adsense and channel quality.
Step 2: Enable Monetization
- Click on My Channel from the menu option. Next, click on monetization to monetize your videos
- From monetization, click on monetize videos option for selecting the type of ads to monetize the video content or your channel.

- You may also monetize videos individually selecting the one you like from Video Manager segment if you do not wish to monetize all videos at once.
- Click monetize from the Action drop-down menu. Select ad type as per your wish. Press the monetize button.

- If you need to change monetization setting for a specific video, edit from the video manager or click on the dollar icon.
- To edit, click monetization option and select monetize with ads. Select the format of ads to monetize the particular video. Save the changes made.
Part 3: How to Use AdSense for YouTube
1. Finding Your Money in AdSense
Intuitively, many YouTube creators think that the first thing they see when they open up AdSense should be their daily earnings. This is not the case. Besides how much money you have made, AdSense keeps track of a lot of things the average YouTuber will not find useful. Getting to a report on your daily earnings actually takes a bit of navigation.
First, click on Performance Report near the top of your screen in AdSense. In the next page there will be a dropdown menu that says Days. Click on that menu and change it to Products.
In Products, scroll down until you get to a chart where there are two options: Hosted AdSense for Content and AdSense for Content. AdSense for Content relates to a personal website. For information about your YouTube channel click on Hosted AdSense for Content.

The next page is a report of how much money you have made from monetizing your YouTube channel. Your earnings will be organized by date. The money you see in this report has already had YouTube’s 45% commission deducted.
2. How are my earnings determined?
How much money you make through AdSense depends on your CPMs and EPMs. CPM is an acronym for “cost per mille” and indicates how much money and advertiser is paying for 1000 impressions of an ad. RPM is your revenue per 1000 impressions.
A lot of YouTubers new to AdSense assume that “per thousand impressions” means “per thousand views”, and that is incorrect. Besides the fact that not all views are monetized, impressions are not views. They are ad clicks. For long, skippable, video ads an “impression” is when a viewer watches the ad to the end instead of skipping it.
CPMs vary depending on the type of ad, where it is being run, and current advertising trends. Advertisers pay more for certain kinds of ads or for ad space in more popular videos. Beware of MCN scams claiming they can guarantee you a certain CPM; they cannot. Which ads are displayed in your videos is determined automatically by YouTube’s system and depends on factors like how you categorized your videos and how many views they have.
3. How do I get paid?
There are five different ways to get paid through AdSense: Check, Western Union Quick Cash, Wire Transfer, Rapida, or an Electronic Funds Transfer (EFT). Generally, AdSense will begin the process of paying you your monthly earnings on the 21st of the following month. How long it takes to get your money after that depends on your payment method.
Using Western Union Quick Cash you can pick your cash up at your Western Union branch the same day.
EFTs get your money to you within seven business days after the 21st.
Checks can take two to four weeks to arrive in the mail.
Wire Transfers and Rapida can each take up to 15 days.

In order to be paid you will have to earn enough to reach the payment threshold, which is $100. So, if you only earn $5 in a month, you should not expect to receive a payment for that month. You will receive your first payment after you earn $100.
Conclusion
Making money with YouTube Adsense is one of the best media that is reliable, easy to use, and better than any other ways of creating money. With Adsense, you can create various size and kinds of ad units to add it to your website. Those ad spaces are filled by Google with the content and traffic relevant to your site. There are also some YouTuber influencer marketing platforms such as InflueNex , which enables YouTubers to learn about their own channels, their competitors’ channels, and join the platform for establishing replationship with the brands.
Richard Bennett
Richard Bennett is a writer and a lover of all things video.
Follow @Richard Bennett
Richard Bennett
Mar 27, 2024• Proven solutions
Now, since your YouTube channel has a large of subscribers and views, you start thinking to make money by using YouTube AdSense. However, do you really know YouTube AdSense very well? Or even, do you even know what it is exactly. In order to let you better understand it and make money, we have rounded up all information here to explain the basic knowledge of AdSense to you. Keeping reading to learn more!
- Part1: What is Adsense
- Part2: How to Link YouTube Account to Adsense
- Part3: How to Use AdSense for YouTube
Part 1: What is Adsense?
You might have noticed several ads displayed on the videos on various social platforms. AdSense is a part of Google that is responsible for placing such ads in the videos. You can sign in from YouTube account directly.
When you wish to place an ad, you may publish it on various media through Adsense. As an advertiser, you may publish anything in videos, images or texts on the websites and pay per impression or per click or per conversion.
Having a YouTube Adsense account or your website connected to Adsense account can help you earn money when Google places ads to your channel.
Do not worry, creating a Google Adsense account is free and when you create one, your YouTube channel or your website gets free eligibility for Google Ads. You just need to copy a code and paste it to start. The AdSense returns calculation is on pay per click or on a per-impression basis. However, if you want to receive the payment, you need to set up AdSense account first.
Part 2: How to Link YouTube Account to Adsense
Step 1: Link YouTube Account To Adsense
- Click on Setup YouTube AdSense or from monetization option, click on Setup Adsense option for your channel. Press Next. You are directed to Adsense sign up page.
- Select your email account, you wish to sign up with. You may also sign up with existing id or create a new one
- In case, you are using your existing email, sign in to YouTube Adsense with the same id. Once signed up, fill personal details form with information like address, name, etc.
- While filling your payee name be very careful and fill exactly as in your bank account name.
- Submit the form. Your application goes under review and might be under process for 2-3 hours to a few days depending on your Google Adsense and channel quality.
Step 2: Enable Monetization
- Click on My Channel from the menu option. Next, click on monetization to monetize your videos
- From monetization, click on monetize videos option for selecting the type of ads to monetize the video content or your channel.
- You may also monetize videos individually selecting the one you like from Video Manager segment if you do not wish to monetize all videos at once.
- Click monetize from the Action drop-down menu. Select ad type as per your wish. Press the monetize button.
- If you need to change monetization setting for a specific video, edit from the video manager or click on the dollar icon.
- To edit, click monetization option and select monetize with ads. Select the format of ads to monetize the particular video. Save the changes made.
Part 3: How to Use AdSense for YouTube
1. Finding Your Money in AdSense
Intuitively, many YouTube creators think that the first thing they see when they open up AdSense should be their daily earnings. This is not the case. Besides how much money you have made, AdSense keeps track of a lot of things the average YouTuber will not find useful. Getting to a report on your daily earnings actually takes a bit of navigation.
First, click on Performance Report near the top of your screen in AdSense. In the next page there will be a dropdown menu that says Days. Click on that menu and change it to Products.
In Products, scroll down until you get to a chart where there are two options: Hosted AdSense for Content and AdSense for Content. AdSense for Content relates to a personal website. For information about your YouTube channel click on Hosted AdSense for Content.
The next page is a report of how much money you have made from monetizing your YouTube channel. Your earnings will be organized by date. The money you see in this report has already had YouTube’s 45% commission deducted.
2. How are my earnings determined?
How much money you make through AdSense depends on your CPMs and EPMs. CPM is an acronym for “cost per mille” and indicates how much money and advertiser is paying for 1000 impressions of an ad. RPM is your revenue per 1000 impressions.
A lot of YouTubers new to AdSense assume that “per thousand impressions” means “per thousand views”, and that is incorrect. Besides the fact that not all views are monetized, impressions are not views. They are ad clicks. For long, skippable, video ads an “impression” is when a viewer watches the ad to the end instead of skipping it.
CPMs vary depending on the type of ad, where it is being run, and current advertising trends. Advertisers pay more for certain kinds of ads or for ad space in more popular videos. Beware of MCN scams claiming they can guarantee you a certain CPM; they cannot. Which ads are displayed in your videos is determined automatically by YouTube’s system and depends on factors like how you categorized your videos and how many views they have.
3. How do I get paid?
There are five different ways to get paid through AdSense: Check, Western Union Quick Cash, Wire Transfer, Rapida, or an Electronic Funds Transfer (EFT). Generally, AdSense will begin the process of paying you your monthly earnings on the 21st of the following month. How long it takes to get your money after that depends on your payment method.
Using Western Union Quick Cash you can pick your cash up at your Western Union branch the same day.
EFTs get your money to you within seven business days after the 21st.
Checks can take two to four weeks to arrive in the mail.
Wire Transfers and Rapida can each take up to 15 days.
In order to be paid you will have to earn enough to reach the payment threshold, which is $100. So, if you only earn $5 in a month, you should not expect to receive a payment for that month. You will receive your first payment after you earn $100.
Conclusion
Making money with YouTube Adsense is one of the best media that is reliable, easy to use, and better than any other ways of creating money. With Adsense, you can create various size and kinds of ad units to add it to your website. Those ad spaces are filled by Google with the content and traffic relevant to your site. There are also some YouTuber influencer marketing platforms such as InflueNex , which enables YouTubers to learn about their own channels, their competitors’ channels, and join the platform for establishing replationship with the brands.
Richard Bennett
Richard Bennett is a writer and a lover of all things video.
Follow @Richard Bennett
Also read:
- Life Lessons Visualized Storytelling on Your Channel
- 2024 Approved Dive Into Filmmaking The Role of Lenses in Videos
- In 2024, Constructive Communication Leads to More Subscribers
- Fixed Eclipsed YouTube Short Video
- Filmmaker Tips YouTube Trailers Using Filmora
- Decoding the Undisclosed World of YouTube Videos for 2024
- Crafting Powerful Video Titles & Sizes for 2024
- YouTube's Golden Rule for Profit Partnership
- 2024 Approved Creating Customized URLs for Channel Subscribers
- Ubiquitous Display Dynamics Choosing a Media Company
- [New] Diving Into Video Quality DSLR vs Mirrorless Cameras
- Bursting Laughter Crafting Engaging Reaction Videos on YouTube (3 Methods)
- In 2024, Boost Your Visual Storytelling Key Strategies for Solo Videos
- The Ultimate Guide to Producing Hysterical YouTube Video Reactions (3 Key Techniques)
- [New] 2023'S Favorite Animated Channels on YouTube (Daytime Vibes)
- In 2024, Digital Dominance Who Has the Largest Fanbase?
- 10 Quick Setup Ideas for Successful YouTube Business Ventures
- [Updated] Efficiently Balancing Professional Commitments & Creativity
- [New] Boosting Your Short-Form Video Content on Youtube
- A Comprehensively Reviewed List of YouTube Video Extractor Apps (Android)
- [Updated] Best Alternatives to Blockbuster Flicks
- Subscribe Smart - Hundreds for Under $5
- Instagram Integration with YouTube Video Sharing
- Dissecting Revenue Allocation for Shortform Content Makers
- Top 12 YouTube Game Openers Both Free & Fee-Based Options
- [Updated] Beginning a Blogging Journey Profit From Your Passion
- In 2024, Are Authentic Engagement Strategies More Valuable?
- Discovering the Speedy Scaling Channels Among YouTube Titans for 2024
- [New] Enhance Video Storytelling with Smart Chapter Insertion Techniques on YouTube
- In 2024, Download YouTube Gallery Files Instantly
- Beat Matcher's Playlist Selecting Flawless DJ Videos
- Cross-Platform Creative Dimensioning Techniques for 2024
- In 2024, A Visual Guide to Subtitling Techniques for Effective Dialogue Placement
- Thriving as a Novice YouTuber? Sidestep These 8 Crucial Pitfalls!
- Crafting Winning Titles & Tags for Your YouTube Videos
- Entryway Investments Cost-Effective Channels for Newbies for 2024
- [New] Breaking the Mold High-Fidelity Sound without a Microphone
- Essential Science YouTube Networks Expand Your Mind for 2024
- [Updated] Cutting-Edge Filmmaking Techniques YouTube's Insights & Competitors
- In 2024, Brightening Up Your Online Videos
- Crafting Motivational Life Vlogs for Fan Engagement
- 2024 Approved 10 Premier Travel Blogs to Watch Online
- The Essential List of YouTube Editors Ranked #1-10
- [New] A Comprehensive Review Camera Lenses for YouTube
- [Updated] Behind the Screen A Strategic Approach for Secret YouTube Videos
- [New] Does Instant Subscription Strategy Improve User Engagement?
- In 2024, Dive Into the World of Expertise with YouTube's Top 10 Makeup Vloggers
- Ace Your Viewing Experience Onboarding AV1 in YouTube for 2024
- 2024 Approved Editor's Assistant Top 5 Portable Devices for VFX Artists
- Crafting a Profitable YouTube Content Strategy for 2024
- How to Convert WhatsApp Audio to MP3 in the Quickest Way, In 2024
- 2024 Approved Perfecting MP4 Conversion IPV Techniques for High-Quality Videos
- Essential LOL Live Stream Setups - 3 Strategies
- [New] From TikTok to Twitter A 2023 Blueprint for 2024
- [Updated] Superior Facebook Extras Secure Video Grab & Firefox Use for 2024
- [Updated] 2024 Approved Unlocking Viral Videos 2 Powerful Ways to Master TikTok React Creation in Filmora
- 2024 Approved Learn the Mechanics Behind Self-Playing Videos in Fb
- How To Open Your Apple iPhone 7 Without a Home Button | Dr.fone
- In 2024, Full Guide to Unlock Your Realme GT 5 Pro
- [Updated] Solving Problems Missing Facebook Video Suggestions
- New In 2024, Download Facebook Audio as MP3 Top Online Converters
- In 2024, How To Unlock Apple iPhone 14 Plus Official Method to Unlock Your Apple iPhone 14 Plus
- [Updated] 2024 Approved Enhancing Virtual Meetings How to Use Discord for Screenshots
- Updated 2024 Approved Get the Most Out of Your Music The 12 Best Audio Converters Explained
- In 2024, Top 15 Augmented Reality Games Like Pokémon GO To Play On Oppo A2 | Dr.fone
- Perfecting the Journey A Guide to Integrating Visual Sequences
- In 2024, How To Enable USB Debugging on a Locked Realme GT Neo 5 SE Phone
- In 2024, 11 Best Location Changers for Honor Magic Vs 2 | Dr.fone
- 2 Ways to Transfer Text Messages from Vivo Y28 5G to iPhone 15/14/13/12/11/X/8/ | Dr.fone
- New 2024 Approved Chromebooks Best Android Video Editors You Need to Try
- How to Cast Motorola Moto G73 5G to Computer for iPhone and Android? | Dr.fone
- [New] In 2024, Best Twitter Tools for Purifying & Personalizing Your Timeline
- In 2024, 8 Best Apps for Screen Mirroring OnePlus 12R PC | Dr.fone
- [New] Most Acclaimed PC Screen Recording Apps
- Speedy View of Vimeo Videos
- In 2024, Revolutionary DiscoThemes - A Top 10 Showcase
- In 2024, How to Access Your Apple iPhone 8 Plus When You Forget the Passcode?
- Choosing Frame Rate Wisely Is 30 or 60 FPS Better, In 2024
- [New] User-Friendly Mac Gadget Visuals & Voices Recorded
- Craftsmanship Hub Top After Effects Template Deals
- Facebook Live & Video to MP3 in Seconds, No Boundaries for 2024
- [New] In 2024, Quick Reference How to Insert Vimeo Media Into PowerPoint Files
- [Updated] 2024 Approved BlitzBurst FreezeFrame Video
- [New] 2024 Approved Crafting Perfect TikTok Vids on Mac A Step-by-Step Guide
- Gmail Not Working on Itel S23+ 7 Common Problems & Fixes | Dr.fone
- [New] In 2024, Boost Your Business Through Smart Monetization Techniques
- Easy Guide to Nubia Red Magic 9 Pro+ FRP Bypass With Best Methods
- In 2024, Top Apps and Online Tools To Track Nokia G22 Phone With/Without IMEI Number
- Achieving Professional Streams with OBS, Android Style for 2024
- Top 4 Android System Repair Software for Itel P55 5G Bricked Devices | Dr.fone
- In 2024, Pokemon Go Error 12 Failed to Detect Location On Tecno Camon 20 Pro 5G? | Dr.fone
- New In 2024, Top 5 Best Free MPEG Video Splitters
- [Updated] 2024 Approved Transformational Techniques Bold Borders on Instagram Photos
- 5 Easy Ways to Copy Contacts from Vivo V30 to iPhone 14 and 15 | Dr.fone
- 2024 Approved Best Academy for Storytellers – [Top 8 Recommendations]
- Title: "Champion's Tech The Ultimate Gaming Toolkit"
- Author: Brian
- Created at : 2024-05-25 11:28:01
- Updated at : 2024-05-26 11:28:01
- Link: https://youtube-video-recordings.techidaily.com/champions-tech-the-ultimate-gaming-toolkit/
- License: This work is licensed under CC BY-NC-SA 4.0.
