

"Capturing the Unseen 9 Must-Have CamGear for Aspiring Vloggers"
Capturing the Unseen: 9 Must-Have CamGear for Aspiring Vloggers
Smartphone Camera Accessories Vloggers Should Try to Improve Recording

Richard Bennett
Oct 26, 2023• Proven solutions
As smartphone camera technology is rapidly advancing, more and more people are using smartphones as their primary vlogging device. They’re convenient and they draw the least amount of attention. But since most smartphones weren’t made specifically for vlogging, there’s a lot of room to make them more suitable for that purpose. Here is a list of the nine best smartphone camera accessories for vloggers.
| Table of Contents 1. PORTABLE CHARGER2. TRIPOD MOUNT3. ANTI-GRAVITY CASE4. SELFIE RING LIGHT5. DIRECTIONAL MICROPHONE6. LENS SET7. FILMMAKING RIG8. FILMMAKING RIG9. GIMBAL |
|---|
1. RAVPower Portable Charger

Vlogging uses a lot more power. If you’re planning to vlog all throughout your day with your phone, you need a portable way to charge it back up. RAVPower has a great line up of portable chargers with multiple USB inputs that hold a total charge of more than 20,000 mAh. With that amount, you can fully charge your smartphone more than 6 times! I own one myself and it’s been great for me during my travels. A 22,000 mAh charger goes for about $42 USD.
2. Arkon Tripod Mount

The Arkon tripod mount is a great portable tripod option that you can get at the fair price of around $20 USD. Not only does it have bendable legs, like the more expensive Joby GorillaPod tripod, that you can wrap around all kinds of structures, but it also comes with the smartphone mount, which Joby sells separately. Another great thing about the Arkon tripod is that its smartphone mount can be rotated so that you can position your phone to film in either widescreen or portrait mode.
3. Mega Tiny Anti-Gravity Case

For all the flat surfaces that the bendable legs of the Arkon tripod mount can’t wrap around, Mega Tiny’s anti-gravity cases will do the job of holding your iPhone or Android phone in one fixed position. These cases can stick to glass, mirrors, metal, and more. They range from $20 to $30 USD.
4. FLII Selfie Ring Light

As much as smartphone camera technology has advanced, phone cameras still underperform when it comes to filming video in low-light. In low-light, your footage is very grainy because your phone is equipped with a small camera sensor, an engineering choice by the manufacturers to keep the size of the phone small. A handy accessory that you can use to get more light is the FLII selfie ring light. This ring light clamps onto your phone and emits a neutral white light. You can clamp this light to either side of your phone, depending on whether you want to use your rear-facing camera or your front-facing camera. This selfie ring light sells for around $16 USD.
5. RODE VideoMic Me

The mic that is already built into your phone is equally sensitive to the sounds that come from behind the phone as it is to the sounds that are in front of the phone. This can be problematic when you’re trying to vlog in selfie mode while there’s a loud concert on the other side. One smartphone accessory that can improve the sound that you record from your phone in these situations is the RODE VideoMic Me. This mini directional shotgun mic plugs right into your phone’s headphone jack and sells for around $60 USD. In windy conditions, the dead cat windshield that it comes with does a great job of minimizing noise from the wind. In quiet, indoor conditions where you are the only person speaking, this device performs no better than your phone’s internal microphone. Your phone will also have to be in airplane mode to prevent the Rode VideoMic Me from recording unwanted clicking noise caused by background processes performed by your phone. So you wouldn’t want to use this for livestreaming.
6. Aukey Optic 3-in-1 Smartphone Lens Set

Aukey makes a 3-in-1 lens set that you can clamp onto your smartphone so that you can vlog at different focal lengths. The 3-in-1 set comes with a wide-angle lens, a fisheye lens, and a macro lens. The clamp it comes with is long enough for these lenses to reach any camera on a smartphone, not just those of iPhones which are positioned close to the phone’s outer edge. To get the most out of these lenses, you’ll have to use them without your phone’s protective case on. Although you are free to use this lens set on either your phone’s rear-facing camera or front-facing camera, the metal housing of these lenses is likely to show up in your footage when you use them with your front-facing camera. So, instead of having your recorded image stretch to the ends of a 16:9 ratio rectangular frame, your recorded image will look as if it is contained inside a circle. This lens set sells for around $30 USD.
7. iOgrapher Go for Android and iPhone

There’s many more accessories that you can take advantage of if you don’t limit yourself to just smartphone camera accessories. Sound and lighting equipment made for stand-alone cameras perform much better too. Many of these accessories are meant to connect to the camera “shoe” (a bracket on top of the camera that accessories can be attached to). Smartphones don’t come with these kinds of shoes. So, to take advantage of these higher quality accessories, you’ll need some kind of camera rig for your smartphone that also comes with shoes. The iOgrapher Go offers this at around $60 USD. This accessory comes with three shoes.
8. Manfrotto TwistGrip System

Manfrotto’s TwistGrip System does a similar job to the above iOgrapher Go. This system also comes with three shoes. An advantage the TwistGrip System has over the iOgrapher Go is that it is much more portable. Its three connected parts can be detached to take up less space in your bag. This system sells for around $50 USD.
9. Zhiyun Smooth-Q 3-Axis Handheld Gimbal Stabilizer for Smartphones

My favorite smartphone camera accessory that I own is the Zhiyun Smooth-Q gimbal stabilizer. This gimbal is very effective in helping you record smooth video. Using the app that it comes with, you can even preset this gimbal to smoothly pan and rotate from a starting position to an ending position, giving you the opportunity to film beautiful time lapses. You can get this device at around $100 USD.
Polish Your YouTube Videos with Filmora
As one of the most widely used video editing software in YouTube video editing, Filmora provides lots of templates and effects with an intuitive interface, which saves much time. Download the free trial version and get started now.


Richard Bennett
Richard Bennett is a writer and a lover of all things video.
Follow @Richard Bennett
Richard Bennett
Oct 26, 2023• Proven solutions
As smartphone camera technology is rapidly advancing, more and more people are using smartphones as their primary vlogging device. They’re convenient and they draw the least amount of attention. But since most smartphones weren’t made specifically for vlogging, there’s a lot of room to make them more suitable for that purpose. Here is a list of the nine best smartphone camera accessories for vloggers.
| Table of Contents 1. PORTABLE CHARGER2. TRIPOD MOUNT3. ANTI-GRAVITY CASE4. SELFIE RING LIGHT5. DIRECTIONAL MICROPHONE6. LENS SET7. FILMMAKING RIG8. FILMMAKING RIG9. GIMBAL |
|---|
1. RAVPower Portable Charger
Vlogging uses a lot more power. If you’re planning to vlog all throughout your day with your phone, you need a portable way to charge it back up. RAVPower has a great line up of portable chargers with multiple USB inputs that hold a total charge of more than 20,000 mAh. With that amount, you can fully charge your smartphone more than 6 times! I own one myself and it’s been great for me during my travels. A 22,000 mAh charger goes for about $42 USD.
2. Arkon Tripod Mount
The Arkon tripod mount is a great portable tripod option that you can get at the fair price of around $20 USD. Not only does it have bendable legs, like the more expensive Joby GorillaPod tripod, that you can wrap around all kinds of structures, but it also comes with the smartphone mount, which Joby sells separately. Another great thing about the Arkon tripod is that its smartphone mount can be rotated so that you can position your phone to film in either widescreen or portrait mode.
3. Mega Tiny Anti-Gravity Case
For all the flat surfaces that the bendable legs of the Arkon tripod mount can’t wrap around, Mega Tiny’s anti-gravity cases will do the job of holding your iPhone or Android phone in one fixed position. These cases can stick to glass, mirrors, metal, and more. They range from $20 to $30 USD.
4. FLII Selfie Ring Light
As much as smartphone camera technology has advanced, phone cameras still underperform when it comes to filming video in low-light. In low-light, your footage is very grainy because your phone is equipped with a small camera sensor, an engineering choice by the manufacturers to keep the size of the phone small. A handy accessory that you can use to get more light is the FLII selfie ring light. This ring light clamps onto your phone and emits a neutral white light. You can clamp this light to either side of your phone, depending on whether you want to use your rear-facing camera or your front-facing camera. This selfie ring light sells for around $16 USD.
5. RODE VideoMic Me
The mic that is already built into your phone is equally sensitive to the sounds that come from behind the phone as it is to the sounds that are in front of the phone. This can be problematic when you’re trying to vlog in selfie mode while there’s a loud concert on the other side. One smartphone accessory that can improve the sound that you record from your phone in these situations is the RODE VideoMic Me. This mini directional shotgun mic plugs right into your phone’s headphone jack and sells for around $60 USD. In windy conditions, the dead cat windshield that it comes with does a great job of minimizing noise from the wind. In quiet, indoor conditions where you are the only person speaking, this device performs no better than your phone’s internal microphone. Your phone will also have to be in airplane mode to prevent the Rode VideoMic Me from recording unwanted clicking noise caused by background processes performed by your phone. So you wouldn’t want to use this for livestreaming.
6. Aukey Optic 3-in-1 Smartphone Lens Set
Aukey makes a 3-in-1 lens set that you can clamp onto your smartphone so that you can vlog at different focal lengths. The 3-in-1 set comes with a wide-angle lens, a fisheye lens, and a macro lens. The clamp it comes with is long enough for these lenses to reach any camera on a smartphone, not just those of iPhones which are positioned close to the phone’s outer edge. To get the most out of these lenses, you’ll have to use them without your phone’s protective case on. Although you are free to use this lens set on either your phone’s rear-facing camera or front-facing camera, the metal housing of these lenses is likely to show up in your footage when you use them with your front-facing camera. So, instead of having your recorded image stretch to the ends of a 16:9 ratio rectangular frame, your recorded image will look as if it is contained inside a circle. This lens set sells for around $30 USD.
7. iOgrapher Go for Android and iPhone
There’s many more accessories that you can take advantage of if you don’t limit yourself to just smartphone camera accessories. Sound and lighting equipment made for stand-alone cameras perform much better too. Many of these accessories are meant to connect to the camera “shoe” (a bracket on top of the camera that accessories can be attached to). Smartphones don’t come with these kinds of shoes. So, to take advantage of these higher quality accessories, you’ll need some kind of camera rig for your smartphone that also comes with shoes. The iOgrapher Go offers this at around $60 USD. This accessory comes with three shoes.
8. Manfrotto TwistGrip System
Manfrotto’s TwistGrip System does a similar job to the above iOgrapher Go. This system also comes with three shoes. An advantage the TwistGrip System has over the iOgrapher Go is that it is much more portable. Its three connected parts can be detached to take up less space in your bag. This system sells for around $50 USD.
9. Zhiyun Smooth-Q 3-Axis Handheld Gimbal Stabilizer for Smartphones
My favorite smartphone camera accessory that I own is the Zhiyun Smooth-Q gimbal stabilizer. This gimbal is very effective in helping you record smooth video. Using the app that it comes with, you can even preset this gimbal to smoothly pan and rotate from a starting position to an ending position, giving you the opportunity to film beautiful time lapses. You can get this device at around $100 USD.
Polish Your YouTube Videos with Filmora
As one of the most widely used video editing software in YouTube video editing, Filmora provides lots of templates and effects with an intuitive interface, which saves much time. Download the free trial version and get started now.
Richard Bennett
Richard Bennett is a writer and a lover of all things video.
Follow @Richard Bennett
Youthful Youtuber’ Writers’ Handbook: Creating Channels, Clutching Cash
Hello, I’m looking to start my journey as a YouTuber, but I do not know how the process works. Please, can you share with me how I can create a YouTube channel and make money from it? Kindly, help.
Starting a successful YouTube channel is very tricky. So, if you’re wondering how to create a YouTube channel and make money, worry less, we understand your struggle, and that is why we’ve created this YouTube beginners guide.
Regardless of whether you’re looking to start a tech YouTube channel, a money-making online YouTube channel, a lifestyle YouTube channel, or other topics, this guide will walk you through the simple process of how to create a YouTube channel and make money from it.
Part 1: Why choose YouTube to make money?
Boasting over 2 billion active users globally, YouTube remains the most used video-playing platform on the internet with all kinds of videos.
Today, many folks use YouTube as a means of generating income because it offers users more opportunities to reach a wide range of audiences, and the means of generating income via YouTube easily. As of when this article is written, research shows that an average YouTuber could earn up to $10,000 yearly.
Also, YouTube is a free marketing platform. So, if you have a website, you can add links to your website in the video description, thus enabling you to boost your website traffic via the platform. And it’ll allow you to advertise your product or services 100% free.
Part 2: 5-Step Formula to Start a YouTube Channel
Now you understand why you should choose YouTube to make money, the following steps will teach you how to create a YouTube channel within a few clicks. So, read on.
Step1 Create a google account
To get started, you need to create a google account. But if you already have a Google account you can skip this step.
Head to Google Account and click Create Account at the top right corner.

On the new screen, enter the necessary details and click Next.

Provide your phone number and other required details. Then, click Next.

On the new page, click I Agree to accept Google’s terms and conditions. Then finish the Google Account setup.

Step2 Create a YouTube account
Once you’ve successfully created a Google account, the next thing is to create your YouTube account. You just have to do the following to carry out the operation;
Open YouTube’s official website in your browser and click Sign in from the top right corner.

On the new page, sign in to the Google account that you want to use in creating your YouTube channel.
After you sign in to your Google account, you’ll be prompted back to the YouTube home interface. Click on your profile icon from the top right corner and select Create A Channel from the drop-down list.

Choose the Name you want to appear on your YouTube channel profile and upload a preferred Picture. Then, click Create Channel to proceed.

Step3 Customize your YouTube channel
After you’ve successfully created the channel, the next thing is to customize the channel as per requirement. Click Customise Channel from the left-hand side.

You’ll be prompted to the YouTube creator studio. There, you’ll find Layout, Branding, and Basic Info options displayed at the top of the page.
In the Layout section, you’ll be allowed to apply customization of how you want your YouTube channel homepage to look.

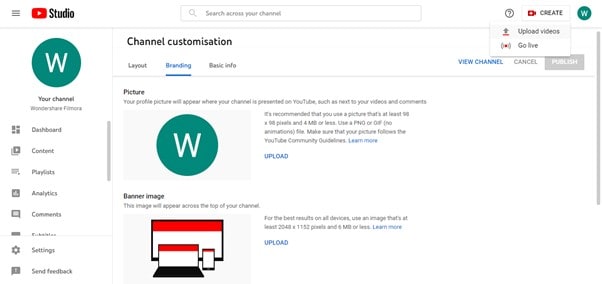
Under Branding, you can upload your brand logo as a profile photo, upload a banner image, and add the video watermark that you want to appear on all videos you upload on YouTube.

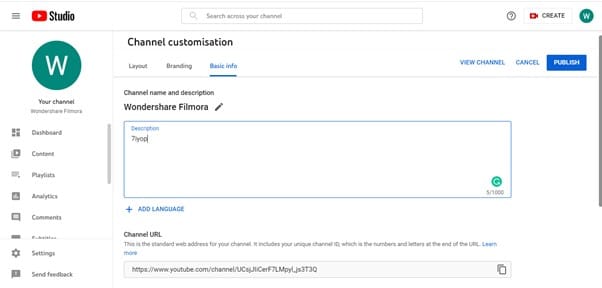
Under Basic Info, you’ll be able to enter a description for your YouTube channel, edit your channel URL, and do lots more. However, remember to always use the PUBLISH button to save customization.
Step4 Upload your first YouTube video
Now, it’s to upload your first YouTube video. To do so, navigate to the top-right corner of the page and click Create New. Select Upload Video.
If you have a video ready, click Select Files and upload the video you want to post.

Complete the required editing/settings after the video is uploaded.

Speaking of videos, you upload on YouTube, there are certain types of videos that can make you popular within a short time. Such YouTube video category includes;
- Singing
- Teaching
- Fashion Advice
- Cooking Tutorial
- Make-Up Tutorial
Step5 Make your YouTube channel discoverable
It’s time to start making your YouTube channel discoverable online. You need the subscribers, views, and all that a creator like you is worth having. However, to make this possible, you need to do the following;
Optimize Video Titles
Using Google-friendly titles for your videos is vital to allow them to rank well on Google search ranking. It should be catchy and compelling that users will be prompted to want to know what the video is about. Make sure it contains keywords too.

Optimize Video Description
Adding descriptions to your video is as important as the title. This will help search engines understand what your video is all about. So, make sure you add rich keywords to your video description and keep it concise.

Promote Your Channel on Other Social Media Platforms
You shouldn’t limit yourself to just creating videos and uploading them on YouTube. Make sure you always make it a priority to promote your YouTube videos on other platforms like Facebook, Twitter, or Instagram. This will help you give your existing fans a heads-up that you’re starting a YouTube channel.

Add Tags to your videos
When we say add tags to your videos, it does not mean you should add any tag to any video you upload on YouTube. Only add tags that’s relating to the theme of your video.
Tags will help YouTube understand the kind of video you’re uploading, and it’ll help you maintain the quality of not just your videos but your YouTube channel.

Use Keywords in Your Videos
Using rich keywords in your YouTube videos is a great way to increase the chances of your videos being seen online. Make sure you use the right keyword in the video title, as it’ll help guide viewers to your video when they search for similar words or phrases online.

Part 3: YouTube Must-Have Tools: What Are They?
Congratulations on creating your YouTube channel. But, before you get over-excited, there are essential tools you need as a YouTuber to help you stand out in the industry. These tools include the following;
1. Video Editor – Wondershare Filmora
As a YouTuber, regardless of your niche of expertise, you need an efficient video editing tool like Wondershare Filmora to create quality videos. Filmora is different from the regular video editor you find online, and it offers a plethora of video editing features that you can rely on to edit your videos and spice them up without requiring any kind of video editing knowledge.
See how you can use Filmora video editor on your YouTube videos;
Free Download For Win 7 or later(64-bit)
Free Download For macOS 10.14 or later
Step1 Go to the official website and install the Filmora video editing software on your computer. Then, launch the tool and import the video you want to edit using the Import button.

Drag-n-drop the video to the timeline.

Step2 Click Effects from the top of the screen. Select AI Portrait from the left-hand side and find a preferred AI Portrait effect. Then, click on it and drag-n-drop the effect to the Timeline.

Adjust the effect starting and ending point of where you want the AI Portrait effect to be displayed.
Step3 Again, adjust the AI Portrait effect settings by double-clicking on it, then, from the pop-up, apply the preferred settings.

Step4 You can also add a “Subscribe” watermark to your YouTube video. To do so, just click the >> icon next to Export at the top of the screen, then select Element.

Select the ‘Social Media Show Element 07’ Effects. Then, drag-n-drop it to the Timeline.

Step5 Lastly, preview the edited video, and if you’re okay with it, click Export from the top bar and select Burn DVD from the drop-down list.
From the pop-up window that appears on your PC screen, select the Folder Path and give the video file a preferred name. Then, click Export to complete the operation.

2. Google Keyword Planner
The Google keyword planner is vital to help you do keyword research and see the trends of how a particular keyword is searched in a particular month, within a given year, or more. It’ll help you understand how people are searching for a particular keyword and what time of the year it usually has more searches from folks.
By using Google Keyword planner, you’ll put yourself ahead of your competitors by using the right keyword that you need for your SEO and PPC strategies at the right time. From search volume to trends, CPC, competition scores, and more, it’s crucial you have this tool at your fingertips. Besides, it’s 100% free to use.
3. YouTube Studio
YouTube Studio is a crucial analytic tool that can come in handy to help you improve your video as you grow your YouTube channel. It is like Google Analytics in a way. It’ll allow you to track the analytics of how people view your videos, comment on your video, and more. YouTube Studio is available for free. You can use it through the Android App, on your PC or online from YouTube itself.

4. VidIQ
Are you looking for a tool to grow your YouTube channel efficiently? Then VidIQ is the ideal tool for you. Yes, with VidIQ, you’ll get access to essential tools to grow your YouTube audience faster than you can think. It’s just a scorecard that offers you in-depth analytics of how your YouTube videos are performing compared to your competitors, thus allowing you to get helpful info on how you can get ahead of them and stand out in the industry.
With VidIQ, you’ll get access to a checklist that will highlight titles, descriptions, cards, end screens, closed captions, and lots more in your videos. And of all, it’ll suggest tags that you can use in your videos to get more traffic and improve SEO.

Part 4: Tips & Tricks to Make your YouTube Grow Faster
Stay Consistent
There’s no doubt that the key to succeeding in whatever you do is to stay consistent. It can be quite hard for anyone, especially newbies to keep up with different difficulties encountered in the pursuit to create a successful YouTube channel.
So, for you to achieve your dreams of being a popular YouTuber, you must keep up with the consistency of creating quality videos, promoting your videos, and doing the right thing that’s needed for your YouTube channel to stand out online.
Collaborate With Other YouTubers
Don’t be shy to reach out to your fellow YouTubers for collaboration. Yes, by collaborating with popular YouTubers, you get to enhance your online presence, thereby increasing your subscriber base and increasing your video views.
YouTube SEO Is Crucial
You might have heard of SEO (Search Engine Optimization) being crucial for websites to rank well, but the truth is it also applies to YouTube channels. YouTube SEO is a great way to optimize your YouTube channel and video to make it rank well on online search results.
It’s important you understand how YouTube SEO works and implement it in your YouTube channel, as it’ll increase your chances of more viewers visiting your channel and watching your videos.
Final Words
That’s all you need to know about creating a successful YouTube channel. If you fancy creating videos, the above tips will teach you how to create a YouTube channel and make money. Also, if you read the article to this point, we believe you’ve understood different ways you can make your YouTube channel stand out and enhance your chances of making more money on YouTube. Don’t hesitate to start your journey now For Win 7 or later(64-bit)
Free Download For macOS 10.14 or later
Part 1: Why choose YouTube to make money?
Boasting over 2 billion active users globally, YouTube remains the most used video-playing platform on the internet with all kinds of videos.
Today, many folks use YouTube as a means of generating income because it offers users more opportunities to reach a wide range of audiences, and the means of generating income via YouTube easily. As of when this article is written, research shows that an average YouTuber could earn up to $10,000 yearly.
Also, YouTube is a free marketing platform. So, if you have a website, you can add links to your website in the video description, thus enabling you to boost your website traffic via the platform. And it’ll allow you to advertise your product or services 100% free.
Part 2: 5-Step Formula to Start a YouTube Channel
Now you understand why you should choose YouTube to make money, the following steps will teach you how to create a YouTube channel within a few clicks. So, read on.
Step1 Create a google account
To get started, you need to create a google account. But if you already have a Google account you can skip this step.
Head to Google Account and click Create Account at the top right corner.
On the new screen, enter the necessary details and click Next.
Provide your phone number and other required details. Then, click Next.
On the new page, click I Agree to accept Google’s terms and conditions. Then finish the Google Account setup.
Step2 Create a YouTube account
Once you’ve successfully created a Google account, the next thing is to create your YouTube account. You just have to do the following to carry out the operation;
Open YouTube’s official website in your browser and click Sign in from the top right corner.
On the new page, sign in to the Google account that you want to use in creating your YouTube channel.
After you sign in to your Google account, you’ll be prompted back to the YouTube home interface. Click on your profile icon from the top right corner and select Create A Channel from the drop-down list.
Choose the Name you want to appear on your YouTube channel profile and upload a preferred Picture. Then, click Create Channel to proceed.
Step3 Customize your YouTube channel
After you’ve successfully created the channel, the next thing is to customize the channel as per requirement. Click Customise Channel from the left-hand side.
You’ll be prompted to the YouTube creator studio. There, you’ll find Layout, Branding, and Basic Info options displayed at the top of the page.
In the Layout section, you’ll be allowed to apply customization of how you want your YouTube channel homepage to look.
Under Branding, you can upload your brand logo as a profile photo, upload a banner image, and add the video watermark that you want to appear on all videos you upload on YouTube.
Under Basic Info, you’ll be able to enter a description for your YouTube channel, edit your channel URL, and do lots more. However, remember to always use the PUBLISH button to save customization.
Step4 Upload your first YouTube video
Now, it’s to upload your first YouTube video. To do so, navigate to the top-right corner of the page and click Create New. Select Upload Video.
If you have a video ready, click Select Files and upload the video you want to post.
Complete the required editing/settings after the video is uploaded.
Speaking of videos, you upload on YouTube, there are certain types of videos that can make you popular within a short time. Such YouTube video category includes;
- Singing
- Teaching
- Fashion Advice
- Cooking Tutorial
- Make-Up Tutorial
Step5 Make your YouTube channel discoverable
It’s time to start making your YouTube channel discoverable online. You need the subscribers, views, and all that a creator like you is worth having. However, to make this possible, you need to do the following;
Optimize Video Titles
Using Google-friendly titles for your videos is vital to allow them to rank well on Google search ranking. It should be catchy and compelling that users will be prompted to want to know what the video is about. Make sure it contains keywords too.
Optimize Video Description
Adding descriptions to your video is as important as the title. This will help search engines understand what your video is all about. So, make sure you add rich keywords to your video description and keep it concise.
Promote Your Channel on Other Social Media Platforms
You shouldn’t limit yourself to just creating videos and uploading them on YouTube. Make sure you always make it a priority to promote your YouTube videos on other platforms like Facebook, Twitter, or Instagram. This will help you give your existing fans a heads-up that you’re starting a YouTube channel.
Add Tags to your videos
When we say add tags to your videos, it does not mean you should add any tag to any video you upload on YouTube. Only add tags that’s relating to the theme of your video.
Tags will help YouTube understand the kind of video you’re uploading, and it’ll help you maintain the quality of not just your videos but your YouTube channel.
Use Keywords in Your Videos
Using rich keywords in your YouTube videos is a great way to increase the chances of your videos being seen online. Make sure you use the right keyword in the video title, as it’ll help guide viewers to your video when they search for similar words or phrases online.
Part 3: YouTube Must-Have Tools: What Are They?
Congratulations on creating your YouTube channel. But, before you get over-excited, there are essential tools you need as a YouTuber to help you stand out in the industry. These tools include the following;
1. Video Editor – Wondershare Filmora
As a YouTuber, regardless of your niche of expertise, you need an efficient video editing tool like Wondershare Filmora to create quality videos. Filmora is different from the regular video editor you find online, and it offers a plethora of video editing features that you can rely on to edit your videos and spice them up without requiring any kind of video editing knowledge.
See how you can use Filmora video editor on your YouTube videos;
Free Download For Win 7 or later(64-bit)
Free Download For macOS 10.14 or later
Step1 Go to the official website and install the Filmora video editing software on your computer. Then, launch the tool and import the video you want to edit using the Import button.
Drag-n-drop the video to the timeline.
Step2 Click Effects from the top of the screen. Select AI Portrait from the left-hand side and find a preferred AI Portrait effect. Then, click on it and drag-n-drop the effect to the Timeline.
Adjust the effect starting and ending point of where you want the AI Portrait effect to be displayed.
Step3 Again, adjust the AI Portrait effect settings by double-clicking on it, then, from the pop-up, apply the preferred settings.
Step4 You can also add a “Subscribe” watermark to your YouTube video. To do so, just click the >> icon next to Export at the top of the screen, then select Element.
Select the ‘Social Media Show Element 07’ Effects. Then, drag-n-drop it to the Timeline.
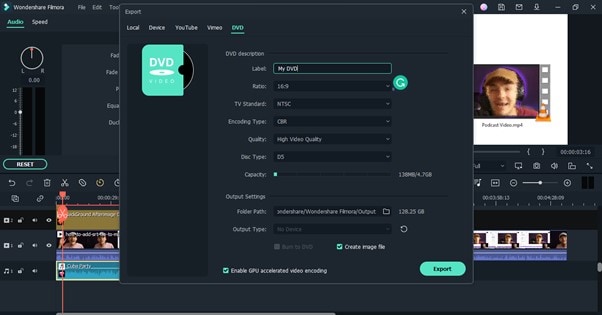
Step5 Lastly, preview the edited video, and if you’re okay with it, click Export from the top bar and select Burn DVD from the drop-down list.
From the pop-up window that appears on your PC screen, select the Folder Path and give the video file a preferred name. Then, click Export to complete the operation.
2. Google Keyword Planner
The Google keyword planner is vital to help you do keyword research and see the trends of how a particular keyword is searched in a particular month, within a given year, or more. It’ll help you understand how people are searching for a particular keyword and what time of the year it usually has more searches from folks.
By using Google Keyword planner, you’ll put yourself ahead of your competitors by using the right keyword that you need for your SEO and PPC strategies at the right time. From search volume to trends, CPC, competition scores, and more, it’s crucial you have this tool at your fingertips. Besides, it’s 100% free to use.
3. YouTube Studio
YouTube Studio is a crucial analytic tool that can come in handy to help you improve your video as you grow your YouTube channel. It is like Google Analytics in a way. It’ll allow you to track the analytics of how people view your videos, comment on your video, and more. YouTube Studio is available for free. You can use it through the Android App, on your PC or online from YouTube itself.
4. VidIQ
Are you looking for a tool to grow your YouTube channel efficiently? Then VidIQ is the ideal tool for you. Yes, with VidIQ, you’ll get access to essential tools to grow your YouTube audience faster than you can think. It’s just a scorecard that offers you in-depth analytics of how your YouTube videos are performing compared to your competitors, thus allowing you to get helpful info on how you can get ahead of them and stand out in the industry.
With VidIQ, you’ll get access to a checklist that will highlight titles, descriptions, cards, end screens, closed captions, and lots more in your videos. And of all, it’ll suggest tags that you can use in your videos to get more traffic and improve SEO.
Part 4: Tips & Tricks to Make your YouTube Grow Faster
Stay Consistent
There’s no doubt that the key to succeeding in whatever you do is to stay consistent. It can be quite hard for anyone, especially newbies to keep up with different difficulties encountered in the pursuit to create a successful YouTube channel.
So, for you to achieve your dreams of being a popular YouTuber, you must keep up with the consistency of creating quality videos, promoting your videos, and doing the right thing that’s needed for your YouTube channel to stand out online.
Collaborate With Other YouTubers
Don’t be shy to reach out to your fellow YouTubers for collaboration. Yes, by collaborating with popular YouTubers, you get to enhance your online presence, thereby increasing your subscriber base and increasing your video views.
YouTube SEO Is Crucial
You might have heard of SEO (Search Engine Optimization) being crucial for websites to rank well, but the truth is it also applies to YouTube channels. YouTube SEO is a great way to optimize your YouTube channel and video to make it rank well on online search results.
It’s important you understand how YouTube SEO works and implement it in your YouTube channel, as it’ll increase your chances of more viewers visiting your channel and watching your videos.
Final Words
That’s all you need to know about creating a successful YouTube channel. If you fancy creating videos, the above tips will teach you how to create a YouTube channel and make money. Also, if you read the article to this point, we believe you’ve understood different ways you can make your YouTube channel stand out and enhance your chances of making more money on YouTube. Don’t hesitate to start your journey now For Win 7 or later(64-bit)
Free Download For macOS 10.14 or later
Also read:
- [New] Easy Steps to Youtubing Prosperity Channel Size Not a Barrier
- Convenient Method to Design Original Shorts Thumbnails
- Master Your Niche Perfecting the Art of Gadget Unboxings
- [Updated] Direct Transition From YouTube to Instagram Reels
- 2024 Approved Crafting GIFs Like a Pro Industry Leaders' Tools
- 2024'S Streaming Surge Gamers and Money Flow
- [New] Capture Chill Vibes Top Winter Bg Ideas for YT
- Daily Dose Your Go-To Anime Video Streams Online for 2024
- Cultivating Your Persona in the World of Gamers for 2024
- In 2024, City Planning for Climate Action A Comprehensive Guide
- Channel Surge Strategy Using YouTube Outros for Rapid Expansion
- Essential Gear Picking the Very Best Among Top 9 Free Logomakers
- Craft Stellar Channels Best 10 Apps for Artistic Banner Design for 2024
- Audio Anomalies Essential Rhythm Altering Tools for 2024
- In 2024, Crafting Dynamic Collab Videos with Content Partners on YouTube
- [Updated] Confirming YouTube Pro-Rated Earnings
- 4 Ways To Set Up Your YouTube Talking-Head Shots
- Captivating Your Audience YouTube Intro Excellence with iMovie
- 10 Unique Video Reaction Strategies for Online Enthusiasts
- [Updated] Create Impactful YouTube Videos Top 20 Font Picks
- Unlocking YouTube The Full Guide to Premium Membership
- 2024 Approved Essential Microphones Tailored to Channel Genres
- Demystifying the Process of Writing YouTube Video Content
- How to Make a YouTube Thumbnail On Mac
- Perfecting the Skill for Selective YouTube Downloads
- [New] Craft Engaging Streams for Success The Ultimate Youtube Broadcast Blueprint Using WireCast
- [New] Boost Your Content Access Free Vocal SFX
- Unlocking YouTube's Potential with Targeted Keywords
- 2024 Approved Discovering New Horizons in Online Videos The Best 27 Non-YouTube Sites
- Cementing Climactic Conclusions for 2024
- [Updated] Best in Class Textify Your Vlogs
- Maximize View Count Best YT Thumbnail Sizes
- Premier Football Vids Key YouTube Infographic Data
- Precision Editing Made Simple with YouTube Studio Tools
- 2024 Approved Adding YouTube Captions/Subtitles Made Simple and Fast
- Top 5 Car Locator Apps for Lava Yuva 3 Pro | Dr.fone
- [Updated] Affordable PC Display Recorder Apps for 2024
- Updated Unleash the Power of Linux on Your Chromebook An Installation Guide for 20 for 2024
- In 2024, Premier Methods for Streamlining TV Viewership on Computers
- In 2024, How to Fix Pokemon Go Route Not Working On Vivo S17? | Dr.fone
- Seamless Transitions From Real to Reel for 2024
- [New] Smartphone Tools for Perfecting Your Pronunciation for 2024
- Best 10 Mock Location Apps Worth Trying On Lenovo ThinkPhone | Dr.fone
- Hacks to do pokemon go trainer battles For Poco C55 | Dr.fone
- Updated 2024 Approved Match Made in Heaven Syncing Colors Across Video Clips in PowerDirector
- Updated 2024 Approved Resonating Titans An Auditory Journey Through Monstrous Realms
- Ways To Find Unlocking Codes For Vivo X100 Phones
- In 2024, 5 Hassle-Free Solutions to Fake Location on Find My Friends Of OnePlus Nord CE 3 Lite 5G | Dr.fone
- Simple ways to get lost files back from U23 Pro
- Adobe Premiere Pro 2023 A Step-by-Step Guide to Video Import and Export
- Updated There Are Certain Things that You Should Consider when Youre Looking to Convert an MP3 File Into MP4 Format! Learn More in This Article
- 2024 Approved Pro-Level Strategies for Stunningly Pinning Messages in Discord
- [New] Mastering Social Media Chatter with These 20 Top TikTok Captions for 2024
- Unveiling the Elite Free SRT Translation Websites of Choice
- Your Free Tool to Record Android's Precision
- Securing Your Online Presence Off-Facebook Activities Exposed
- [New] 2024 Approved The Step-by-Step Guide to OBS Streaming Success
- How to Unlock Poco M6 5G Phone with Broken Screen
- In 2024, Remove Device Supervision From your iPhone 12 | Dr.fone
- [Updated] From One World to Another Connecting Instagram & Facebook
- 2024 Approved Simplify MacBook Screen Capture for Beginners
- In 2024, Exploring the Leading 10 Streaming & Broadcast Tools
- In 2024, Life360 Learn How Everything Works On Apple iPhone 11 | Dr.fone
- [Updated] 2024 Approved Innovative Techniques for Capturing Audio on iPad
- [New] FreeWeb Cam's Features Uncovered in Detail for 2024
- In 2024, Locked Out of Apple iPhone 11? 5 Ways to get into a Locked Apple iPhone 11 | Dr.fone
- New Discover Twitters Ideal Video Aspect Ratio for Maximum Engagement for 2024
- Updated 2024 Approved How to Draw Cartoons Step by Step with This Guide
- Title: "Capturing the Unseen 9 Must-Have CamGear for Aspiring Vloggers"
- Author: Brian
- Created at : 2024-06-18 11:31:43
- Updated at : 2024-06-19 11:31:43
- Link: https://youtube-video-recordings.techidaily.com/capturing-the-unseen-9-must-have-camgear-for-aspiring-vloggers/
- License: This work is licensed under CC BY-NC-SA 4.0.
