
:max_bytes(150000):strip_icc()/electric-car-GettyImages-508500905-58263d025f9b58d5b15ed347.jpg)
"Capturing Emotion Ensuring Authenticity in Your YouTube Videos"
Capturing Emotion: Ensuring Authenticity in Your YouTube Videos
10 Tips For Shooting Profesional YouTube Videos

Richard Bennett
Mar 27, 2024• Proven solutions
We have mentioned before about the equipment you should have to start your YouTube video shooting , however, being methodical in your approach to the video making process and knowing exactly what and where you are going to stage and record will increase the quality of the content. Focus on the technical aspects of your YouTube video before you actually start shooting and strive to be well prepared for all the challenges a day on the set may bring.
These and other useful tips may help you make better videos for your YouTube channel, so let’s explore different ways of improving your video making skills.
10 Tips for Shooting Better YouTube Videos
All videographers agree that you shouldn’t come to the set unprepared. Everything has to be in its place, no matter how insignificant it may seem, because a tiny detail can completely ruin the shot or even an entire day of work. These tips are going to help you avoid common mistakes, inexperienced video producers often make.
1. Write the Script
Everything starts with a script, at least in the cinematography world. You don’t have to write long, detailed descriptions of all scenes, just make a short note of every scene, what is being said in the shot, on-screen actions, camera positions, and so on. By doing this, you’ll save yourself a lot of valuable time, you can then dedicate to other burning issues on the set. Besides, knowing what you are going to say throughout the video so you don’t have to improvise all the time is going to help you feel more relaxed in front of a camera.
2. Build the Set (Lighting included)
Don’t leave anything to chance. You should control everything that is going to be in the shot, so avoid working at locations you can’t at least partially control. Shooting in studio-like conditions will enable you to carefully select the scenography and to design light so it matches the scene perfectly. The actors must always be clearly visible to the audience, which is why you need to pay attention to where they are located in the shot and how much light you have in that part of the shot.
3. Keep Your Batteries Charged
There is nothing more frustrating than arriving at the set anxious to start shooting just to find out that the batteries are empty. Charge the batteries at the end of each day on the set, because the chances are that you are going to need them early in the morning. Always have several spare batteries with you, so even if one battery is empty you have the replacement ready. You can also prolong the battery life by switching the camera off when you are not recording.
4. Do a Microphone Check
Capturing audio with an external microphone drastically increases the quality of the sound in your videos. That’s why making absolutely sure that all cables are connected and that the microphone is perfectly placed is paramount if you want to get the sound right. The host or the hosts of the video must be at the right distance from the microphone, usually, the length of their fist with the thumb and pinky finger extended, but this can vary a few inches to either side.
Check out the best microphone for YouTuber in 2018
5. Pay Attention to The Shot Composition
The rule of thirds is a common composition principle used by videographers to create balanced and unified images. The rule suggests that the subjects in a shot should be placed at the intersections of the lines that divide the screen. Most digital cameras have a grid that makes using the rule of thirds quite simple because you can easily see when the subjects in the shot are not positioned correctly.
This is just one of many shot composition techniques you have at your disposal, and as you gain more experience you’ll learn how to combine them and get aesthetically pleasing results.
6. Always Record Videos in Landscape Mode


Posting vertically oriented videos to your YouTube channel will make you look unprofessional because portrait mode is never used for capturing videos. YouTubers who record their videos with Smartphones are more likely to fall into this trap, but all you need to do to avoid this is remember to hold the device horizontally.
By switching to portrait mode, you’ll be cropping the frame in a way, so you might unknowingly end up removing parts of the shot you wanted to record.
In case that you want to convert your portrait video to landscape, do not miss this article about How to Convert A Portrait Video to Landscape.
7. Eliminate The Background Noises
Professional microphones can pick up even the softest sounds, that might prove difficult to remove in the post-production. You can reduce the noise levels in your videos by using shotgun microphones that only capture sounds that come directly into the microphone, or by using the omnidirectional mic to eliminate the wind if you’re shooting on an outdoor location.
Background noises can be particularly unpleasant when recording narration, because the viewers of the video may not want to watch it until the end if they can’t hear what the person in the video is saying.
If it is hard for you to record your YouTube video in quite environment, you can remove the background noise by using some video editing software. For YouTubers, we recommend you to try Wondershare Filmora to de-noise. Check the video below about how to remove background noise with one click.
8. Keep The Shot in Focus
You can always keep the shot in focus by simply enabling the autofocus feature, but if you do so you won’t be able to control where the focus is going to be. Pulling focus manually is an art that takes years to master, and you have to keep practicing it as much as you can in order to become good at it.
The best way to deal with out of focus shots is to avoid shooting scenes that include a lot of action because you won’t have to pull focus that often.
9. Put The Camera on a Tripod

The footage you produce should be smooth and free of camera shakes. All video cameras pick up vibrations easily, so even the slightest movement or impact can ruin a shot. Putting the camera on a tripod is one of the best ways to stabilize the shot and avoid camera shaking.
In addition, a tripod enables you to maintain image stability even when shooting form lower or upper angles, something that cannot be achieved by simply holding the camera.
We have chosen some of the best tripods that you can use for starting a YouTube vlogging Video shooting . If you are using a 4K camera, here are some tripods that you can use for your 4K Cameras .
10. Find The Best Angle
Every scene has its perfect angle, you just have to find it. This job is much easier if you have already built the set and adjusted the lighting before approaching the shot selection process because it will allow you to know exactly where the camera should be.
The camera position depends on a number of factors, including the video’s aesthetics or the action that takes place in the shot, and you have to go through this process for each shot in your video.
Read More to Get : How to Download YouTube Videos without Any Software Easily >>
Conclusion
Hopefully, the tips we provided in this article are going to help you create better YouTube videos. There are hundreds of tricks you’ll have to learn as your skills become more polished, but sometimes just paying attention to the basic rules of videography is more than enough to create a stunning video.
Leave a comment and let us know which tips helped you the most or tell us which useful tips we failed to mention in this article.
Richard Bennett
Richard Bennett is a writer and a lover of all things video.
Follow @Richard Bennett
Richard Bennett
Mar 27, 2024• Proven solutions
We have mentioned before about the equipment you should have to start your YouTube video shooting , however, being methodical in your approach to the video making process and knowing exactly what and where you are going to stage and record will increase the quality of the content. Focus on the technical aspects of your YouTube video before you actually start shooting and strive to be well prepared for all the challenges a day on the set may bring.
These and other useful tips may help you make better videos for your YouTube channel, so let’s explore different ways of improving your video making skills.
10 Tips for Shooting Better YouTube Videos
All videographers agree that you shouldn’t come to the set unprepared. Everything has to be in its place, no matter how insignificant it may seem, because a tiny detail can completely ruin the shot or even an entire day of work. These tips are going to help you avoid common mistakes, inexperienced video producers often make.
1. Write the Script
Everything starts with a script, at least in the cinematography world. You don’t have to write long, detailed descriptions of all scenes, just make a short note of every scene, what is being said in the shot, on-screen actions, camera positions, and so on. By doing this, you’ll save yourself a lot of valuable time, you can then dedicate to other burning issues on the set. Besides, knowing what you are going to say throughout the video so you don’t have to improvise all the time is going to help you feel more relaxed in front of a camera.
2. Build the Set (Lighting included)
Don’t leave anything to chance. You should control everything that is going to be in the shot, so avoid working at locations you can’t at least partially control. Shooting in studio-like conditions will enable you to carefully select the scenography and to design light so it matches the scene perfectly. The actors must always be clearly visible to the audience, which is why you need to pay attention to where they are located in the shot and how much light you have in that part of the shot.
3. Keep Your Batteries Charged
There is nothing more frustrating than arriving at the set anxious to start shooting just to find out that the batteries are empty. Charge the batteries at the end of each day on the set, because the chances are that you are going to need them early in the morning. Always have several spare batteries with you, so even if one battery is empty you have the replacement ready. You can also prolong the battery life by switching the camera off when you are not recording.
4. Do a Microphone Check
Capturing audio with an external microphone drastically increases the quality of the sound in your videos. That’s why making absolutely sure that all cables are connected and that the microphone is perfectly placed is paramount if you want to get the sound right. The host or the hosts of the video must be at the right distance from the microphone, usually, the length of their fist with the thumb and pinky finger extended, but this can vary a few inches to either side.
Check out the best microphone for YouTuber in 2018
5. Pay Attention to The Shot Composition
The rule of thirds is a common composition principle used by videographers to create balanced and unified images. The rule suggests that the subjects in a shot should be placed at the intersections of the lines that divide the screen. Most digital cameras have a grid that makes using the rule of thirds quite simple because you can easily see when the subjects in the shot are not positioned correctly.
This is just one of many shot composition techniques you have at your disposal, and as you gain more experience you’ll learn how to combine them and get aesthetically pleasing results.
6. Always Record Videos in Landscape Mode
Posting vertically oriented videos to your YouTube channel will make you look unprofessional because portrait mode is never used for capturing videos. YouTubers who record their videos with Smartphones are more likely to fall into this trap, but all you need to do to avoid this is remember to hold the device horizontally.
By switching to portrait mode, you’ll be cropping the frame in a way, so you might unknowingly end up removing parts of the shot you wanted to record.
In case that you want to convert your portrait video to landscape, do not miss this article about How to Convert A Portrait Video to Landscape.
7. Eliminate The Background Noises
Professional microphones can pick up even the softest sounds, that might prove difficult to remove in the post-production. You can reduce the noise levels in your videos by using shotgun microphones that only capture sounds that come directly into the microphone, or by using the omnidirectional mic to eliminate the wind if you’re shooting on an outdoor location.
Background noises can be particularly unpleasant when recording narration, because the viewers of the video may not want to watch it until the end if they can’t hear what the person in the video is saying.
If it is hard for you to record your YouTube video in quite environment, you can remove the background noise by using some video editing software. For YouTubers, we recommend you to try Wondershare Filmora to de-noise. Check the video below about how to remove background noise with one click.
8. Keep The Shot in Focus
You can always keep the shot in focus by simply enabling the autofocus feature, but if you do so you won’t be able to control where the focus is going to be. Pulling focus manually is an art that takes years to master, and you have to keep practicing it as much as you can in order to become good at it.
The best way to deal with out of focus shots is to avoid shooting scenes that include a lot of action because you won’t have to pull focus that often.
9. Put The Camera on a Tripod
The footage you produce should be smooth and free of camera shakes. All video cameras pick up vibrations easily, so even the slightest movement or impact can ruin a shot. Putting the camera on a tripod is one of the best ways to stabilize the shot and avoid camera shaking.
In addition, a tripod enables you to maintain image stability even when shooting form lower or upper angles, something that cannot be achieved by simply holding the camera.
We have chosen some of the best tripods that you can use for starting a YouTube vlogging Video shooting . If you are using a 4K camera, here are some tripods that you can use for your 4K Cameras .
10. Find The Best Angle
Every scene has its perfect angle, you just have to find it. This job is much easier if you have already built the set and adjusted the lighting before approaching the shot selection process because it will allow you to know exactly where the camera should be.
The camera position depends on a number of factors, including the video’s aesthetics or the action that takes place in the shot, and you have to go through this process for each shot in your video.
Read More to Get : How to Download YouTube Videos without Any Software Easily >>
Conclusion
Hopefully, the tips we provided in this article are going to help you create better YouTube videos. There are hundreds of tricks you’ll have to learn as your skills become more polished, but sometimes just paying attention to the basic rules of videography is more than enough to create a stunning video.
Leave a comment and let us know which tips helped you the most or tell us which useful tips we failed to mention in this article.
Richard Bennett
Richard Bennett is a writer and a lover of all things video.
Follow @Richard Bennett
Elevate Your Content: Top 8 No-Cost Video Editing Software
Free Online Video Editors for YouTube
Richard Bennett
Mar 27, 2024• Proven solutions
Most of you might be addicted to YouTube videos because those uploads are outstanding with content that contains information, entertainment stuff and many more. But some of you might be also thinking to get a solution for editing some of your favourite YouTube videos in order to create some customized results. There are so many options available online as well as with downloadable versions. Below are some of the basic details about top seven highly rated online YouTube video editors:
If you need more advanced features like PIP, Green Screen, or audio mixing, check this easy to use and powerful video editor-Wondershare Filmora , and ignite your video by clicks.
Download Mac Version ](https://tools.techidaily.com/wondershare/filmora/download/ )
8 Free YouTube Video Editor Online
Here is a comparison table. You will learn more information about 4K and price. Each of them has noticable features, so have a look.
| Price | Share to YouTube | Support 4K | Include templates | |
|---|---|---|---|---|
| video editor | Free | N | Y | Y |
| Wevideo | Free | Y | Y | Y |
| Loopster | Free | Y | N | N |
| Kizoa | Free | Y | Y | Y |
| Tubechop | Free | N | N | Y |
| Magisto | Free | Y | N | Y |
| Wideo | Free | Y | N | Y |
| Renderforest | Free | Y | N | Y |
| Powtoon | Free | Y | N | Y |
| YouTube Studio | Free | Y | Y | N |
2. Wevideo
This software tool makes online editing task much easier and fun oriented where you can easily make connections with other cloud services for exporting data. Users can access its paid as well as free version where later comes with watermarked editing feature. The editing experience with Wevideo is really outstanding and simple where interactive tools can be used for drag and drop, trimming and transitioning of files.
Pros:
Collaborative software feature where it is possible to call friends for uploading any footage to project created by you.
Cons:
Free version comes with a limitation of watermarked video type.
3.Loopster
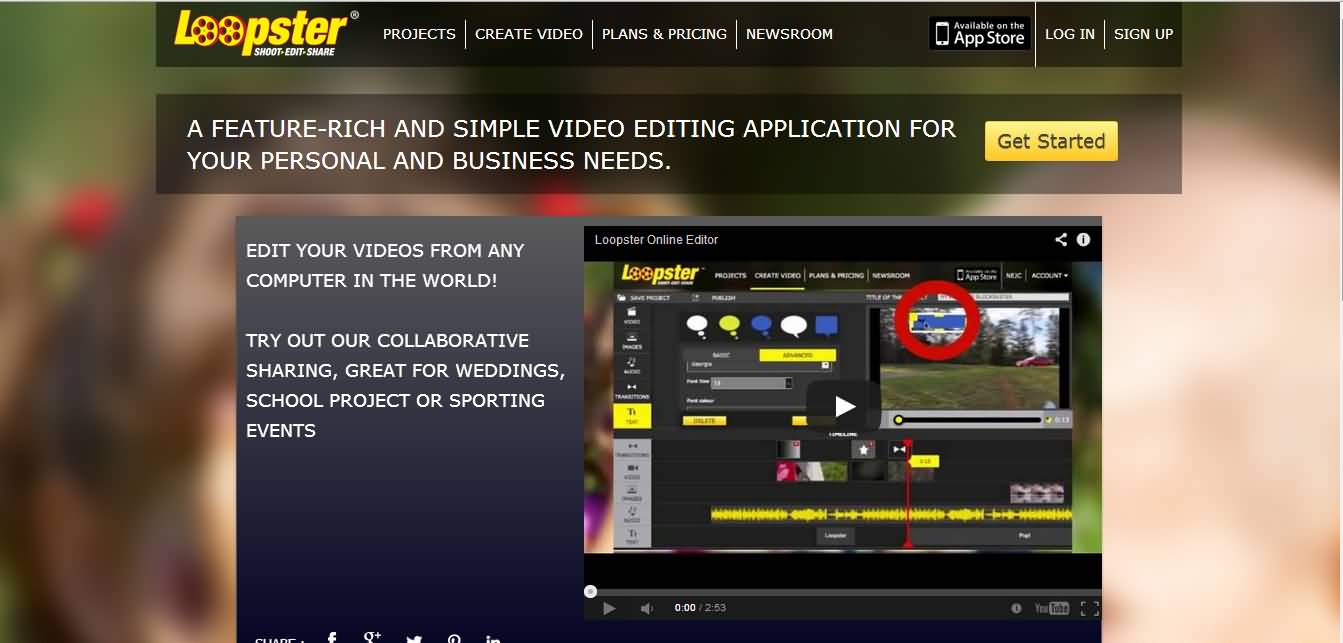
Loopster is one of the best options for educators, film makers, professionals as well as beginners due to its interactive interface. You can avail its free version along with other affordable packages as per need. The special features include splicing of features, adjustment of video angles, sound effect creations and addition of music from external sources.
Pros:
Easy to use interface with fast access to photo and video transfers; allows fast uploading to YouTube account along with other simple functions.
Cons:
Comes with very basic functions and transition feature is not that interactive; is not useful for animation needs.
4.Kizoa

Kizoa is a popular cloud based video editor that comes with user friendly interface where users can edit, share and store photos as per requirement as its storage capacity goes up to 1GB even with free account. It comes with cloud base and web base where you can also upload music from your personal computer.
Pros:
It comes with numerous templates and effects.
Cons:
Free account allows users to work only on a 10 second clip; and resolution is not much appreciable.
5.Tubechop
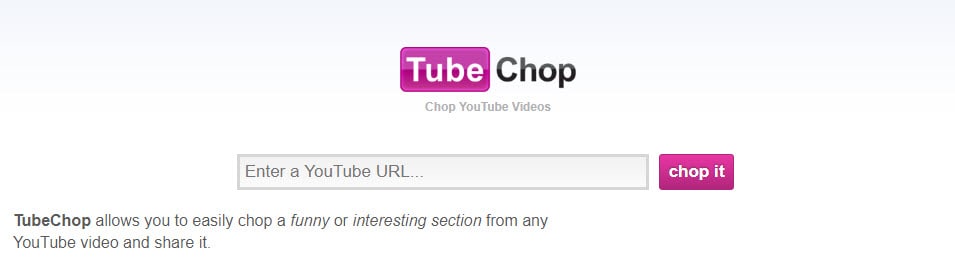
It is actually a website that allows easy chopping of YouTube videos; users need to copy and paste the URL of videos and select the desired part of video for chopping. This tool provides lots of options to for sharing chopped videos to other platforms.
Pros:
Trimming and sharing of videos is much easier as easy to use interface makes everything much easier.
Cons:
Not suitable for those who want to add background music to their video files.
6.Magisto
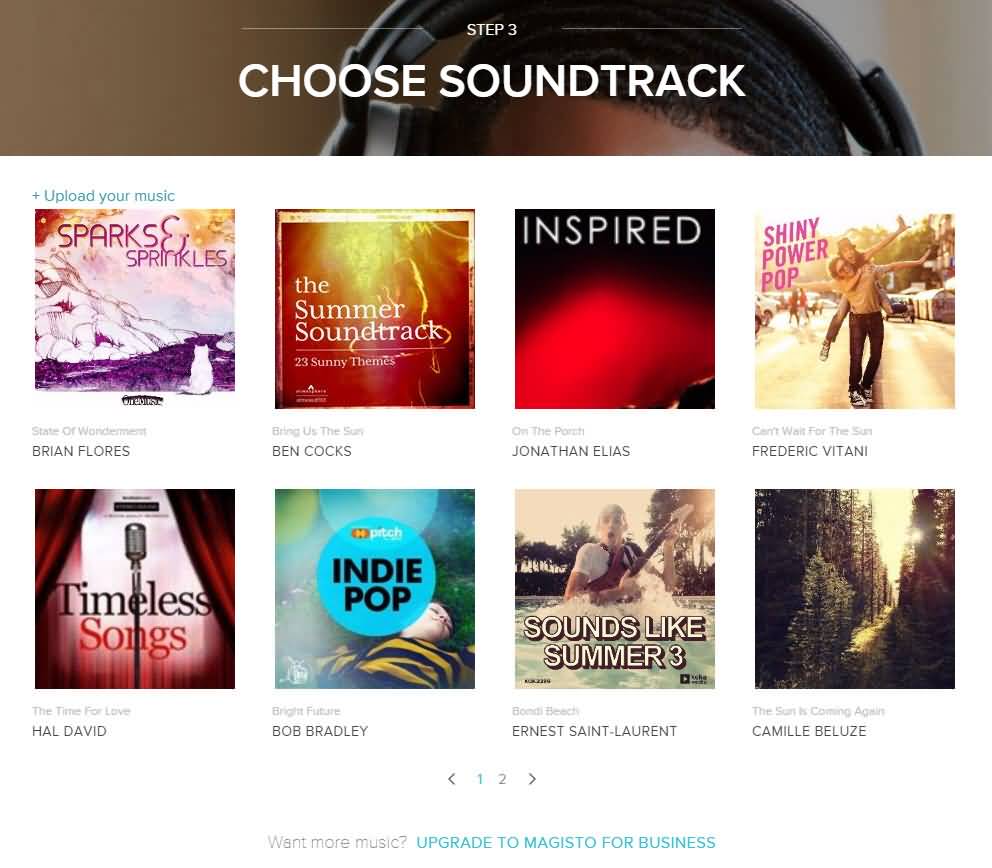
Magisto is a great app that is really popular for automatically turning what would otherwise be an everyday type video into a beautiful poignant movie. . Magisto allows users to derive a funny video from any random footage and the results are worth watching.
Pros:
This online video editing tool is well designed, engaging and offers highly automated video production feature.
Cons:
Less control over edits, restricted length of productions and pricey subscriptions.
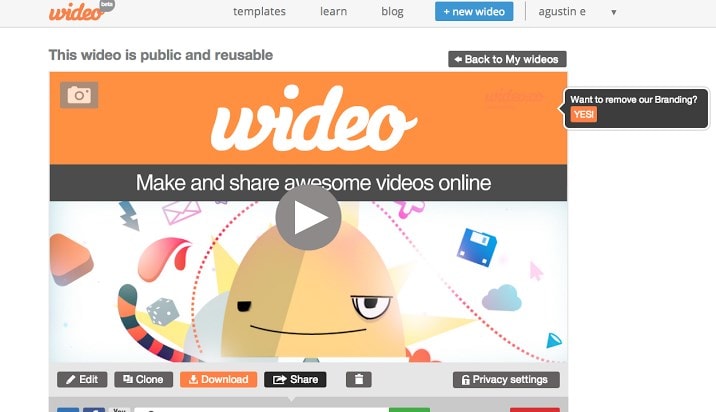
7.Wideo
It is one of the latest web based application tool that allows easy to use interface for creation of presentations and animations. This software window contains lots of stylish templates, objects, editing tools, and other interactive elements.
Pros:
Comes with free unbranded player and video hosting service, outstanding customer support, special discounts are added for educators and students.
Cons:
Possess limited editing tools for audios; users need faster internet connection for proper connectivity.
8.Renderforest
Renderforest is a cloud-based video maker platform. It offers a wide variety of branding and editing tools for YouTubers, including advanced video trimmer and voice-over options, logo animations, intros, and promotional video templates. Creators can share their videos on social media, publish them on Facebook or Youtube directly from the preview page.
Pros:
Intuitive and user-friendly interface, easy editing tools, and more than 800+ video templates available for free. The subscription plans come with other tools, including a website builder, logo maker, and mockup editor.
Cons:
With the free plan, users can create an unlimited number of 3-minute videos in 360p with watermarks.
9.Powtoon

Powtoon is an amazing online application that you don’t need to download on your system as it provides all facilities on your premium account. This tool contains so many tools for animation creation and acts like a professional studio for all users. Premium users can easily download their finished videos with high resolution here.
Pros:
Powtoon possesses numerous editing tools and supports many file types; this platform is more famous for animations and professional video editing needs.
Cons:
It is little difficult to use this software for beginners and demands very high speed internet connection.
10.YouTube Studio (Beta)
YouTube video editor was one of the most widely used free online video editing tool over the internet until 20th September, 2017, because after that time, users will no longer be able to use the complimentary editing suite. Check the best YouTube video editor alternatives from this complete guide.

However, the new YouTube Studio now allows you to trim, split video uploaded YouTube videos and add blur effects to faces or objects. Though this easy to use free online video editor doesn’t feature tools like combine several video clips, photos into one longer video, nor add Pan and Zoom effects like the previous version, you can still add audio tracks from its Audio Library to Video. Yeah, this is a video maker online with music and effects. So, it is in our best free online video editor list. Remember, if you’re looking for a free online video editor for YouTube for these simple editing features, then you can try the Editor under YouTube Studio.
Richard Bennett
Richard Bennett is a writer and a lover of all things video.
Follow @Richard Bennett
Richard Bennett
Mar 27, 2024• Proven solutions
Most of you might be addicted to YouTube videos because those uploads are outstanding with content that contains information, entertainment stuff and many more. But some of you might be also thinking to get a solution for editing some of your favourite YouTube videos in order to create some customized results. There are so many options available online as well as with downloadable versions. Below are some of the basic details about top seven highly rated online YouTube video editors:
If you need more advanced features like PIP, Green Screen, or audio mixing, check this easy to use and powerful video editor-Wondershare Filmora , and ignite your video by clicks.
Download Mac Version ](https://tools.techidaily.com/wondershare/filmora/download/ )
8 Free YouTube Video Editor Online
Here is a comparison table. You will learn more information about 4K and price. Each of them has noticable features, so have a look.
| Price | Share to YouTube | Support 4K | Include templates | |
|---|---|---|---|---|
| video editor | Free | N | Y | Y |
| Wevideo | Free | Y | Y | Y |
| Loopster | Free | Y | N | N |
| Kizoa | Free | Y | Y | Y |
| Tubechop | Free | N | N | Y |
| Magisto | Free | Y | N | Y |
| Wideo | Free | Y | N | Y |
| Renderforest | Free | Y | N | Y |
| Powtoon | Free | Y | N | Y |
| YouTube Studio | Free | Y | Y | N |
2. Wevideo
This software tool makes online editing task much easier and fun oriented where you can easily make connections with other cloud services for exporting data. Users can access its paid as well as free version where later comes with watermarked editing feature. The editing experience with Wevideo is really outstanding and simple where interactive tools can be used for drag and drop, trimming and transitioning of files.
Pros:
Collaborative software feature where it is possible to call friends for uploading any footage to project created by you.
Cons:
Free version comes with a limitation of watermarked video type.
3.Loopster
Loopster is one of the best options for educators, film makers, professionals as well as beginners due to its interactive interface. You can avail its free version along with other affordable packages as per need. The special features include splicing of features, adjustment of video angles, sound effect creations and addition of music from external sources.
Pros:
Easy to use interface with fast access to photo and video transfers; allows fast uploading to YouTube account along with other simple functions.
Cons:
Comes with very basic functions and transition feature is not that interactive; is not useful for animation needs.
4.Kizoa
Kizoa is a popular cloud based video editor that comes with user friendly interface where users can edit, share and store photos as per requirement as its storage capacity goes up to 1GB even with free account. It comes with cloud base and web base where you can also upload music from your personal computer.
Pros:
It comes with numerous templates and effects.
Cons:
Free account allows users to work only on a 10 second clip; and resolution is not much appreciable.
5.Tubechop
It is actually a website that allows easy chopping of YouTube videos; users need to copy and paste the URL of videos and select the desired part of video for chopping. This tool provides lots of options to for sharing chopped videos to other platforms.
Pros:
Trimming and sharing of videos is much easier as easy to use interface makes everything much easier.
Cons:
Not suitable for those who want to add background music to their video files.
6.Magisto
Magisto is a great app that is really popular for automatically turning what would otherwise be an everyday type video into a beautiful poignant movie. . Magisto allows users to derive a funny video from any random footage and the results are worth watching.
Pros:
This online video editing tool is well designed, engaging and offers highly automated video production feature.
Cons:
Less control over edits, restricted length of productions and pricey subscriptions.
7.Wideo
It is one of the latest web based application tool that allows easy to use interface for creation of presentations and animations. This software window contains lots of stylish templates, objects, editing tools, and other interactive elements.
Pros:
Comes with free unbranded player and video hosting service, outstanding customer support, special discounts are added for educators and students.
Cons:
Possess limited editing tools for audios; users need faster internet connection for proper connectivity.
8.Renderforest
Renderforest is a cloud-based video maker platform. It offers a wide variety of branding and editing tools for YouTubers, including advanced video trimmer and voice-over options, logo animations, intros, and promotional video templates. Creators can share their videos on social media, publish them on Facebook or Youtube directly from the preview page.
Pros:
Intuitive and user-friendly interface, easy editing tools, and more than 800+ video templates available for free. The subscription plans come with other tools, including a website builder, logo maker, and mockup editor.
Cons:
With the free plan, users can create an unlimited number of 3-minute videos in 360p with watermarks.
9.Powtoon
Powtoon is an amazing online application that you don’t need to download on your system as it provides all facilities on your premium account. This tool contains so many tools for animation creation and acts like a professional studio for all users. Premium users can easily download their finished videos with high resolution here.
Pros:
Powtoon possesses numerous editing tools and supports many file types; this platform is more famous for animations and professional video editing needs.
Cons:
It is little difficult to use this software for beginners and demands very high speed internet connection.
10.YouTube Studio (Beta)
YouTube video editor was one of the most widely used free online video editing tool over the internet until 20th September, 2017, because after that time, users will no longer be able to use the complimentary editing suite. Check the best YouTube video editor alternatives from this complete guide.
However, the new YouTube Studio now allows you to trim, split video uploaded YouTube videos and add blur effects to faces or objects. Though this easy to use free online video editor doesn’t feature tools like combine several video clips, photos into one longer video, nor add Pan and Zoom effects like the previous version, you can still add audio tracks from its Audio Library to Video. Yeah, this is a video maker online with music and effects. So, it is in our best free online video editor list. Remember, if you’re looking for a free online video editor for YouTube for these simple editing features, then you can try the Editor under YouTube Studio.
Richard Bennett
Richard Bennett is a writer and a lover of all things video.
Follow @Richard Bennett
Also read:
- Culinary Crescendo High-Impact Food Network Monikers for 2024
- [New] Balancing Frequency & Quality in YouTube Video Uploads
- In 2024, Elevate Your ASMR Sessions with These Microphones
- [New] Boosting Sales Through Effective Strategies for Channel Trailer Creation
- The Ultimate Guide to Eradicate Green Screen From Mac-Produced Videos
- Making a Mark on YouTube Proven Techniques From Creator Studio Experts
- In 2024, Effortless Fusion of YouTube Audio with iMovie Masterpieces
- Keep Watching YouTube On-the-Go with iPhone/Android
- Avoiding Common Pitfalls in YouTube Sponsorships, According to FameBit for 2024
- 2024 Approved Enhance YouTube Trademarks Tips on Logo and Watermark Addition
- Battle Royale Queens Top 10 Female YouTubers
- Live Stream to Youtube with OBS Step by Step Guide for Beginners
- Earning Potential Unveiled YouTube AdSense Earning per Thousand Video Observations for 2024
- 2024 Approved Beginner's Blueprint for YouTube Income Growth
- [Updated] A Cascade of Curiosity Concurrent Video Watching Made Easy
- 2024 Approved Channel Charisma Strategies to Skyrocket Your YouTube Visibility
- [Updated] Android-Centric Top Downloads for YouTube Videos Explored
- [Updated] Easy Guide Online Tools to Save Your YouTube Videos
- Unlocking the Secret How to Display YouTube Playlists on Websites
- In 2024, Blitz 30-Second Guide to Fast Thumbnails
- Econo Audio Amps for Youtubers with Limited Dough for 2024
- Audio Alchemy Free, Perfectly Crafted DJ Template Videos for 2024
- Pro-Tips for Effortless YouTube Content Export Through Gmail ID
- YouTube Channels for Filmmakers to Learn Filmmaking Tips and Tutorials
- Perfect Your YouTube Presence Learn to Create Engaging Ads & Thumbnails
- In 2024, Broadcast Excellence Incorrante Video Loops Into Television
- Cut the Cord with YouTube-MP3 Conversion Tools for 2024
- The Art of Optimizing Your YT Channel Description
- [New] Captivating Crafting Writing Intriguing Youtube Descriptions with Templates
- [New] Capturing the Action 5 Roblox Recordings for Mac Users
- [New] 2024 Approved Socialite's Secret Accelerate Your Fame on Insta with Our Top 15 Hacks
- [Updated] In 2024, Unveiling the Best of Facebook's Vid Scene
- In 2024, Here are Some Pro Tips for Pokemon Go PvP Battles On Lava Blaze Curve 5G | Dr.fone
- How to recover old videos from your 14
- [Updated] Becoming a Snapshot Wizard Top Positions for iPhone Photos
- How to Change your Honor Magic V2 Location on Twitter | Dr.fone
- [Updated] The Auditory Nexus Studio Mac Essentials for 2024
- In 2024, iPogo will be the new iSpoofer On Oppo A59 5G? | Dr.fone
- In 2024, Save InstaStories Infinite The Liberation App
- New Edit Videos with QuickTime Player on Mac for 2024
- Updated In 2024, Unraveling Rap Music Its Origins, Evolution, and Global Influence
- 2024 Approved Crafting Success Tips From Ginger Islet
- The Ultimate Guide to Replacing Windows 10 Photos 8 Top Picks for 2024
- How To Stream Anything From Motorola Moto G04 to Apple TV | Dr.fone
- Essential Tips Keeping Your Snapchat Images Intact Post-Snap
- Title: "Capturing Emotion Ensuring Authenticity in Your YouTube Videos"
- Author: Brian
- Created at : 2024-05-25 11:27:47
- Updated at : 2024-05-26 11:27:47
- Link: https://youtube-video-recordings.techidaily.com/capturing-emotion-ensuring-authenticity-in-your-youtube-videos/
- License: This work is licensed under CC BY-NC-SA 4.0.
