"Captivating Viewers YouTubers’ Guide to Dynamic Game Sessions for 2024"
Captivating Viewers: YouTubers’ Guide to Dynamic Game Sessions
How to Live Stream on YouTube Gaming?

Richard Bennett
Mar 27, 2024• Proven solutions
1. Live Stream on YouTube Gaming with OBS
You need to follow these simple Step s to use OBS for YouTube Live Streaming:
**Step 1:**First of all you need to login to your YouTube account. You might be aware of the fact that same YouTube account is used for YouTube gaming needs.
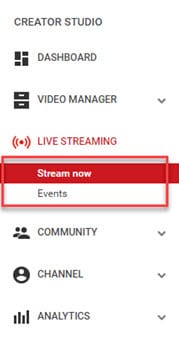
**Step 2:**Once entered inside your account then you need to visit the Go live streaming options and then from drop down menu simply choose Stream Now option.
**Step 3:**It is time to fill the details on screen; put impressive words for your live stream description so that it can grab attention of more viewers. Then select category as ‘Gaming’.

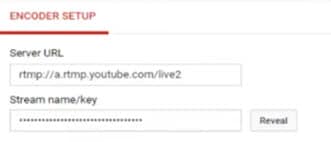
**Step 4:**Now you need to copy the stream key.
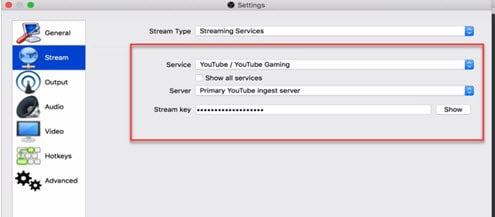
**Step 5:**Now open your OBS tool and then select YouTube as your active game streaming service. Users here need to paste that copied streaming key of Step 5 into the space provided on OBS settings page.
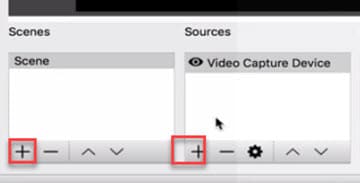
**Step 6:**It is time to make your desktop a video source.
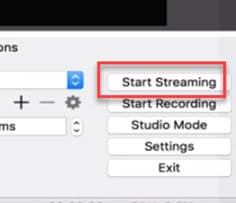
**Step 7:**Once all these settings are completed then you need to hit the start streaming option.
**Step 8:**The service may take few seconds to bring your live on YouTube and after this small duration you will be connected to your channel with your streamed content. Then change your url from youtube.com to gaming.youtube.com 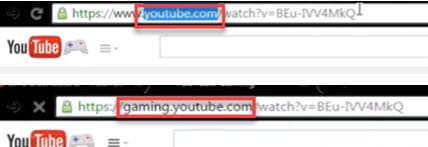
**Step 9:**You are all set to be live on your YouTube gaming profile.
2. Live Stream on YouTube with Elgato Game Capture HD
A: Basic Settings for Elgato Game Capture HD
The Step s below will help you to get ready for streaming with all basic settings that are required by Elgato Game Capture HD tool.
**Step 1:**First of all, you need to open your browser, search for Elgato Game Capture HD software on its official website and then download it for your system. Get it installed.
**Step 2:**Once installation process is complete then launch your software.
**Step 3:**Now you need to hit the add button on screen and select YouTube from drop down menu.
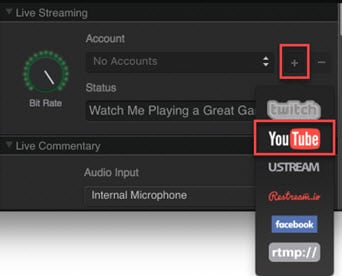
Step 4: It is time to sign in with your Google Account.
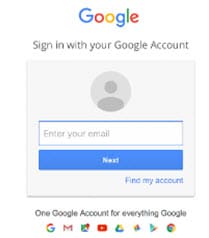
**Step 5:**After sign up process, allow the Elgato Game Capture tool to make connection with your YouTube account.

**Step 6:**Soon you will be able to access you account from Elgato platform.

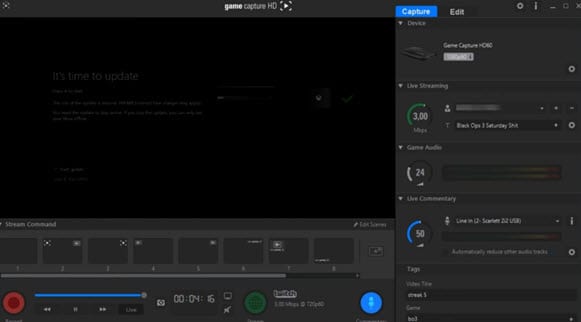
**Step 7:**It is time to make adjustments for streaming settings.
B: Test your Bandwidth and make adjustments for Stream settings
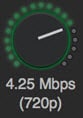
It is essential to check speed of your internet connection during live streaming because if it goes slow then your content will become annoying to viewers and it will decay the reputation of your channel. So prefer to use following Step s to complete the basic settings and to test your internet connection.
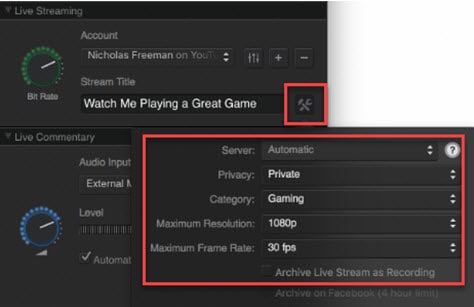
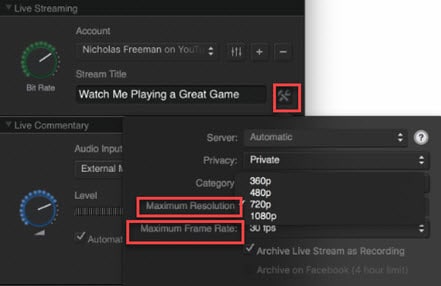
**Step 1:**Open your browser and then visit the speedtest.net platform. You can also use other similar kind of websites to ensure the speed of your internet. Note that you will find a Bit Rate dial in the live streaming section, here you can make adjustments for bit rates to bring it to desired level.
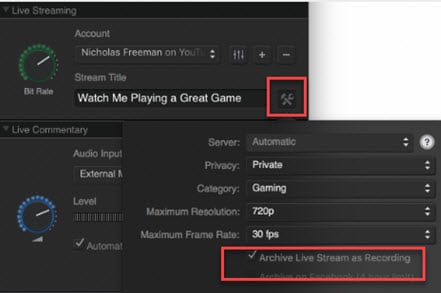
**Step 2:**It is also possible to make customized settings for frame rate and resolution as per need of your stream content.
**Step 3:**One can also prefer to archive his streaming.
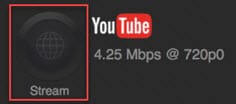
**Step 4:**As soon as you have completed all above settings then you need to hit the stream button on screen.
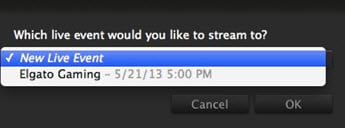
**Step 5:**Soon your software will ask you to select the event that you want to stream, choose your desired event and then press Ok. Soon you will be live on YouTube.
Richard Bennett
Richard Bennett is a writer and a lover of all things video.
Follow @Richard Bennett
Richard Bennett
Mar 27, 2024• Proven solutions
1. Live Stream on YouTube Gaming with OBS
You need to follow these simple Step s to use OBS for YouTube Live Streaming:
**Step 1:**First of all you need to login to your YouTube account. You might be aware of the fact that same YouTube account is used for YouTube gaming needs.
**Step 2:**Once entered inside your account then you need to visit the Go live streaming options and then from drop down menu simply choose Stream Now option.
**Step 3:**It is time to fill the details on screen; put impressive words for your live stream description so that it can grab attention of more viewers. Then select category as ‘Gaming’.
**Step 4:**Now you need to copy the stream key.
**Step 5:**Now open your OBS tool and then select YouTube as your active game streaming service. Users here need to paste that copied streaming key of Step 5 into the space provided on OBS settings page.
**Step 6:**It is time to make your desktop a video source.
**Step 7:**Once all these settings are completed then you need to hit the start streaming option.
**Step 8:**The service may take few seconds to bring your live on YouTube and after this small duration you will be connected to your channel with your streamed content. Then change your url from youtube.com to gaming.youtube.com
**Step 9:**You are all set to be live on your YouTube gaming profile.
2. Live Stream on YouTube with Elgato Game Capture HD
A: Basic Settings for Elgato Game Capture HD
The Step s below will help you to get ready for streaming with all basic settings that are required by Elgato Game Capture HD tool.
**Step 1:**First of all, you need to open your browser, search for Elgato Game Capture HD software on its official website and then download it for your system. Get it installed.
**Step 2:**Once installation process is complete then launch your software.
**Step 3:**Now you need to hit the add button on screen and select YouTube from drop down menu.
Step 4: It is time to sign in with your Google Account.
**Step 5:**After sign up process, allow the Elgato Game Capture tool to make connection with your YouTube account.
**Step 6:**Soon you will be able to access you account from Elgato platform.
**Step 7:**It is time to make adjustments for streaming settings.
B: Test your Bandwidth and make adjustments for Stream settings
It is essential to check speed of your internet connection during live streaming because if it goes slow then your content will become annoying to viewers and it will decay the reputation of your channel. So prefer to use following Step s to complete the basic settings and to test your internet connection.
**Step 1:**Open your browser and then visit the speedtest.net platform. You can also use other similar kind of websites to ensure the speed of your internet. Note that you will find a Bit Rate dial in the live streaming section, here you can make adjustments for bit rates to bring it to desired level.
**Step 2:**It is also possible to make customized settings for frame rate and resolution as per need of your stream content.
**Step 3:**One can also prefer to archive his streaming.
**Step 4:**As soon as you have completed all above settings then you need to hit the stream button on screen.
**Step 5:**Soon your software will ask you to select the event that you want to stream, choose your desired event and then press Ok. Soon you will be live on YouTube.
Richard Bennett
Richard Bennett is a writer and a lover of all things video.
Follow @Richard Bennett
Tailor-Made Melodies: Assembling Your Own YouTube Playlist
How to Make a Playlist on YouTube 
Liza Brown
Mar 27, 2024• Proven solutions
Youtube is one of the largest video-sharing platforms used worldwide by different people and nations without any limitation or restriction of language, region, or interests. It contains billions of videos, and thousands of new videos are uploaded on Youtube daily. To make your channel or your brand stand out in this crowd, it is important to arrange your videos in the form of playlists. These playlists help you manage your videos and allow the viewers to find the required video easily and conveniently. In this article, we are going to show you how to make a playlist on Youtube.
Youtube playlists not only help in arranging the videos that you upload on Youtube. But you can also create a playlist of any video available on Youtube. Whether it is a song, recipe, movie, or something else, you add it into your playlist to arrange them according to your needs to access them easily when needed.
How to make a playlist on Youtube of your uploaded videos
If you are running a Youtube channel and upload videos very often, then it is important to arrange them so that the viewers can easily explore and find their relevant video in no time. The best way to do that is to make a separate playlist for each type of video you upload. To know how to make a playlist on Youtube, follow the below steps.
- Open Youtube. Click on your “Channel Icon” in the upper right corner, then click on “Your Channel”.
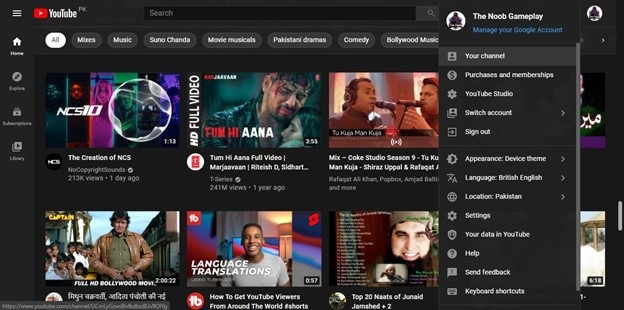
- Under Your Channel, click on the “Manage Videos” button. It will open the Youtube Studio of your Channel.

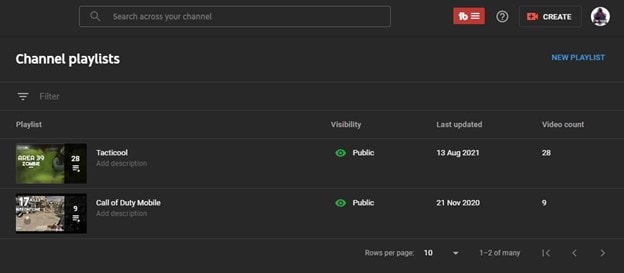
- In Youtube Studio, click on “Playlists” located on the left sidebar of the Studio.

- In this window, click on “New Playlist” located below your channel’s icon.
- Now it will ask you to enter “Playlist Title” and its “Visibility.” Name it accordingly and under Visibility, select an appropriate option according to your requirement and hit “Create.” Now your playlist is successfully created.

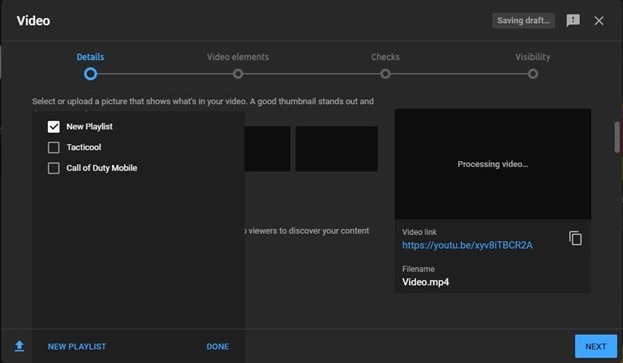
- Whenever you upload a new video on this channel, you can select the playlist you have created. While uploading the video, you can find a section named “Playlists” under the details tab.
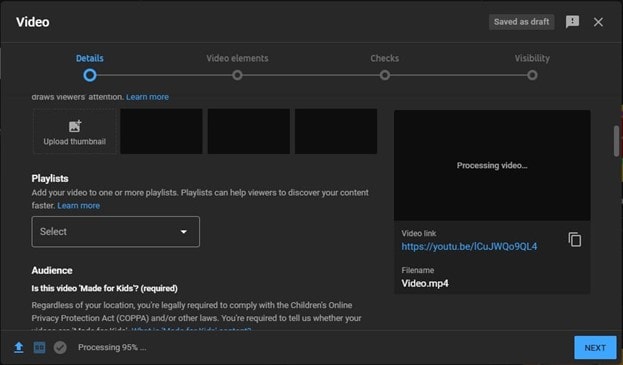
- Click on the drop-down menu to open select a playlist from the playlists that you have created. Select one and hit “Done.”
After uploading the video, it will be added to the playlist that you have selected. You can create as many playlists as you want. There is no restriction on that.
How to make a playlist on Youtube of others’ videos
Sometimes you like a video so much that you want to save it for future use or add it to your favorites. In such cases, creating a Youtube playlist is the best option. It will help you arrange the videos according to their type. To make a playlist on Youtube of others’ videos, follow the below steps.
- Open Youtube. Play a video that you want to save to a Playlist.
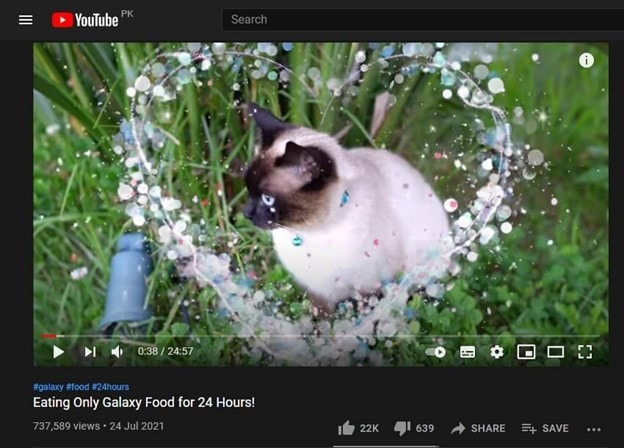
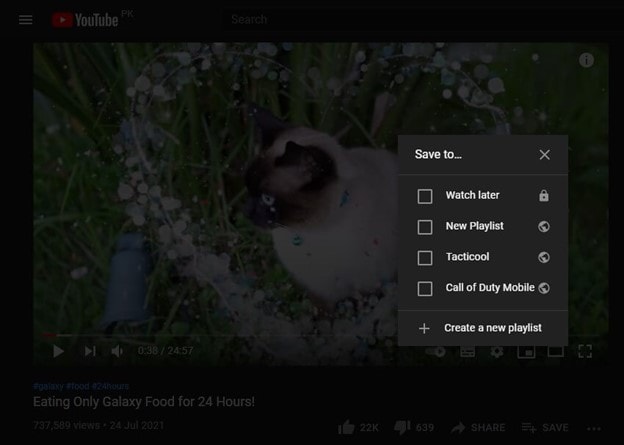
- Click on the “Save” on the right side below the video. It will open a new pop-up window that will ask you to select a playlist to add this video to it. But since you want to create a new playlist, click on the “Create a new Playlist.”
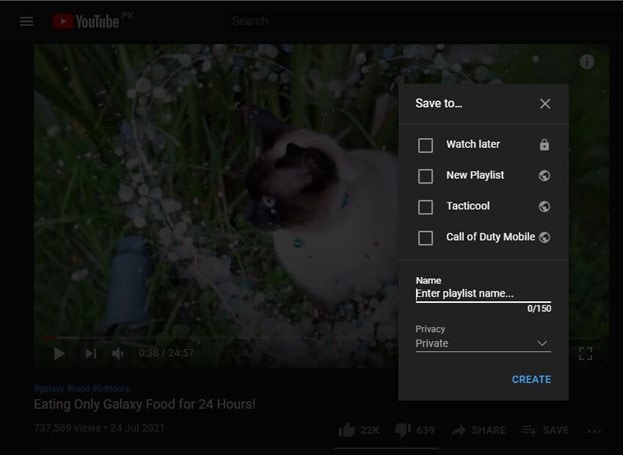
- It will ask you to enter the Name and select the privacy of the playlist. Name it and choose the privacy according to your preference and hit “Create.” Your video will be added to the new playlist.
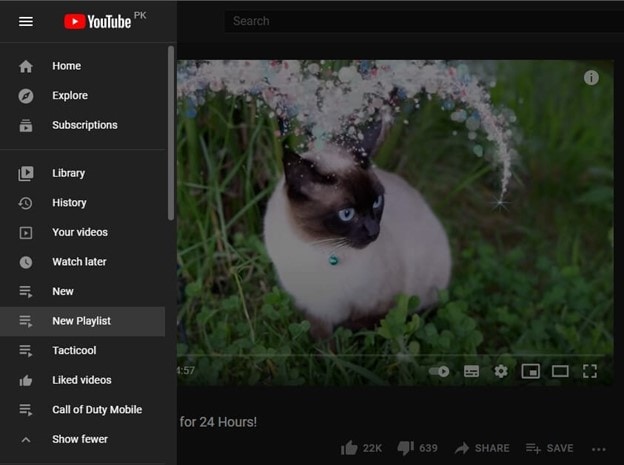
- You can easily access these playlists by clicking the three lines in the upper left corner of Youtube. Here you can find all the Playlists that you will create. Click on the playlist to access all the videos that are included in it.
Conclusion
Both of these processes of how to make a playlist on Youtube will help you whether you are a content creator or a simple Youtube user. With such a huge video database, it is difficult for users to keep their favorite videos to access them whenever they need them. Making a Youtube playlist can be very beneficial in such cases.


Liza Brown
Liza Brown is a writer and a lover of all things video.
Follow @Liza Brown
Liza Brown
Mar 27, 2024• Proven solutions
Youtube is one of the largest video-sharing platforms used worldwide by different people and nations without any limitation or restriction of language, region, or interests. It contains billions of videos, and thousands of new videos are uploaded on Youtube daily. To make your channel or your brand stand out in this crowd, it is important to arrange your videos in the form of playlists. These playlists help you manage your videos and allow the viewers to find the required video easily and conveniently. In this article, we are going to show you how to make a playlist on Youtube.
Youtube playlists not only help in arranging the videos that you upload on Youtube. But you can also create a playlist of any video available on Youtube. Whether it is a song, recipe, movie, or something else, you add it into your playlist to arrange them according to your needs to access them easily when needed.
How to make a playlist on Youtube of your uploaded videos
If you are running a Youtube channel and upload videos very often, then it is important to arrange them so that the viewers can easily explore and find their relevant video in no time. The best way to do that is to make a separate playlist for each type of video you upload. To know how to make a playlist on Youtube, follow the below steps.
- Open Youtube. Click on your “Channel Icon” in the upper right corner, then click on “Your Channel”.
- Under Your Channel, click on the “Manage Videos” button. It will open the Youtube Studio of your Channel.
- In Youtube Studio, click on “Playlists” located on the left sidebar of the Studio.
- In this window, click on “New Playlist” located below your channel’s icon.
- Now it will ask you to enter “Playlist Title” and its “Visibility.” Name it accordingly and under Visibility, select an appropriate option according to your requirement and hit “Create.” Now your playlist is successfully created.
- Whenever you upload a new video on this channel, you can select the playlist you have created. While uploading the video, you can find a section named “Playlists” under the details tab.
- Click on the drop-down menu to open select a playlist from the playlists that you have created. Select one and hit “Done.”
After uploading the video, it will be added to the playlist that you have selected. You can create as many playlists as you want. There is no restriction on that.
How to make a playlist on Youtube of others’ videos
Sometimes you like a video so much that you want to save it for future use or add it to your favorites. In such cases, creating a Youtube playlist is the best option. It will help you arrange the videos according to their type. To make a playlist on Youtube of others’ videos, follow the below steps.
- Open Youtube. Play a video that you want to save to a Playlist.
- Click on the “Save” on the right side below the video. It will open a new pop-up window that will ask you to select a playlist to add this video to it. But since you want to create a new playlist, click on the “Create a new Playlist.”
- It will ask you to enter the Name and select the privacy of the playlist. Name it and choose the privacy according to your preference and hit “Create.” Your video will be added to the new playlist.
- You can easily access these playlists by clicking the three lines in the upper left corner of Youtube. Here you can find all the Playlists that you will create. Click on the playlist to access all the videos that are included in it.
Conclusion
Both of these processes of how to make a playlist on Youtube will help you whether you are a content creator or a simple Youtube user. With such a huge video database, it is difficult for users to keep their favorite videos to access them whenever they need them. Making a Youtube playlist can be very beneficial in such cases.
Liza Brown
Liza Brown is a writer and a lover of all things video.
Follow @Liza Brown
Also read:
- [Easy] Install Official Epson GT S50 Printer Driver on Windows 7/8/10 – Download Now
- [New] Comprehensive Manual Mastering Mobizen Recorders
- [New] Discovering 8 Ultimate Mirrorless Vlogging Cameras
- [New] In 2024, The Circle of Life Filming IPhone Videography Explained
- [New] Mac Enhanced A Dive Into ScreenFlow's Capabilities
- [New] YouTube Fundamentals Made Simple Top 8 Learning Resources for 2024
- [Updated] A Guide to Finding Hidden YouTube Treasures
- [Updated] In 2024, Cutting-Edge Platform for 12 Video Live Feeds
- Access the Latest macOS 15 Sequoia Developer Beta Immediately for Your Apple Mac - Step-by-Step Guide | Tech Insights
- Comprehensive but Concise Guide to Keyers' Techniques for 2024
- Dominance in Video Landscape Mirrorless vs DSLR Cameras for 2024
- Enhancing Viewership Maintaining YouTube's Creative Commons
- In 2024, Becoming an Economic Force A Guide to Earning on YouTube
- In 2024, How to Use Phone Clone to Migrate Your Tecno Camon 30 Pro 5G Data? | Dr.fone
- Navigating Digital Safety: Ranking the 8 Most Effective Parent Control Systems of 2024
- Social Media Live Showdown Facebook Vs. YouTube & Twitter Periscope
- Step-By Written by a Language Model AI. I Can Help Rewrite the Paragraph Into an Academic Style, but Please Note that My Responses May Not Have the Same Depth as Those Written by Subject Matter Experts. Here Is a Revised Version
- The Financial Breakdown of YouTube Shorts Royalties
- Transforming Your Phone's Alerts with Tailored Audio Choices for Android for 2024
- Title: Captivating Viewers YouTubers’ Guide to Dynamic Game Sessions for 2024
- Author: Brian
- Created at : 2024-12-15 06:08:50
- Updated at : 2024-12-16 05:11:57
- Link: https://youtube-video-recordings.techidaily.com/captivating-viewers-youtubers-guide-to-dynamic-game-sessions-for-2024/
- License: This work is licensed under CC BY-NC-SA 4.0.