"Blitz Broadcasting Channel Your Playlist Swiftly for 2024"
Blitz Broadcasting: Channel Your Playlist Swiftly
YouTube has become the most popular video-sharing platform on the internet, with users from all over the world uploading and watching videos daily. You can find content on just about any topic you can think of on YouTube, making it an excellent resource for entertainment and education.
But what if you’ve created a playlist of your favorite videos and think your friends or family would enjoy it? To help you with this, we’ve put together an extensive guide on how to share a YouTube playlist on your computer and mobile devices.
So, let’s get started with our guide without any further delay!
Why Doesn’t The Share Function In The Playlist Work?
Firstly, let’s figure out why the “Share” function doesn’t work. The “Share” function in the playlist does not work because it is set to “private,” and YouTube doesn’t allow you to share them. To fix this, you must first change the privacy settings of the playlist to “public” in the following way:
Step1 Head to the YouTube website using a browser on your PC and sign in to your account.
Step2
- Click the three-line “Menu” icon at the top-left of your screen.
- Go to “Library.”
- Scroll down to the “Playlist” section.

Step3 Select your playlist labeled as “Private.” On the next page, click the “Private” option in the playlist details section and select “Public” to change the visibility of your playlist.
Once the privacy setting has been changed, the “share” function will work as intended.

How To Share The YouTube Playlist?
If you want to share the playlist on YouTube using your computer or mobile device, read the instructions below carefully:
1. For Computers
Here are four different ways to share your YouTube playlist using your laptop or desktop computer:
How To Share Your Own YouTube Playlist With A Link To View?
Sharing your YouTube playlist is a perfect way to increase the number of views and subscribers, allowing your viewers to see all the videos in one place.
This is especially helpful if you have a series of videos that you want viewers to watch. Here are the step-by-step instructions for achieving this task:
Step1 Visit the YouTube website using a browser on your computer and sign in to your account. Click your Profile in the top-right of the screen and select “Your Channel” from the drop-down menu, which will take you to your YouTube channel’s dashboard.

Step2 Next, go to the “Playlist” tab and click the “View Full Playlist” option under your playlist to access it.

Step3 Finally, click the “Share” icon in the playlist’s details section, and a window will pop up. From here, you can either click “Copy” to save the link to your clipboard or share the playlist directly to WhatsApp, Twitter, Facebook, Email, KakaoTalk, Reddit, and more platforms.
How To Share Someone Else’s YouTube Playlist With A Link To View?
If you want to share someone else’s YouTube playlist with a link, do the following steps in sequence:
Step1 In the first step, launch your preferred browser, visit the YouTube website, and sign in to your account using your credentials.
Step2 On the left side of the website’s main interface, click the “Library” option and scroll down to the Playlists section.

Step3 Under the “Playlists” section, click on the playlist you want to share. Now, click the “Share” icon in the playlist’s details section, and a pop-up window will appear. In the “Share” section, copy the URL and paste it into an email, message, or social media post to share.
That’s all there is to it! Anyone you’ve shared the link with can watch the entire playlist.
How To Share The Playlist While Watching?
We all love using YouTube for research or just scrolling through videos to pass the time, and we often share our favorite videos with others. What if you wish to share a whole YouTube playlist while watching it?
Fortunately, there’s a simple and quick way to do this, and here are the step-by-step instructions for this method.
Step1 In the first step, head to the YouTube website using a browser and use the search bar to access the playlist.

Step2 Click the playlist to start watching it. Next, click the playlist title in the grey box on the right-hand side.
Step3 On the playlist page, click the “Share” icon in the details section, and a window will pop-up. Click “Copy” to save the link or directly share the playlist to social platforms.
That’s it! The recipient will now be able to watch the entire YouTube playlist you’ve shared.
How To Share A YouTube Playlist With A Link To Collaborate
Through the “Collaborate on playlists” feature, YouTube allows you to add friends to your playlist, who can then add videos to it.
Here’s how you can share a YouTube playlist with a link to collaborate with your friends:
Step1 In the first step, go to the YouTube website using your preferred browser, and sign in to your channel’s Gmail account using your email address and password.
Step2 Click your “Profile” icon, choose the “Your Channel” option from the drop-down menu and go to the “Playlist.”
Step3 In the next step, click the “View Full Playlist” option under your preferred playlist. This will take you to your playlist page.
Step4 In the details section of your YouTube playlist on the playlist page, click the three dots (ellipsis) icon and select the “Collaborate” option.

Step5 A pop-up window will appear on your screen. Toggle on the “Collaborators can add videos to this playlist” option to enable it, and the “Allow new collaborators” option will appear.
Toggle on the “Allow new collaborators” option, click “Copy” to save the URL to your clipboard, and click “Done” to apply the changes.

That’s about it! You can now share the playlist link with your friends, who can now add videos to it.
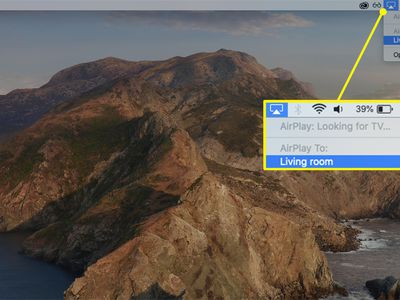
2. For iOS and Android
If you want to quickly share a YouTube playlist using your iOS or Android device, follow these instructions step-by-step:
![]()
Note: The method of sharing the YouTube playlist on an iOS device is the same as mentioned above.
Step1 Since most devices have YouTube already installed, locate the YouTube app in your device’s app drawer and launch it.
Step2 On the app’s main interface/Home screen, tap the “Library” option at the bottom right corner of your device’s screen.
Step3 Now, scroll down to the “Playlists” section and open the playlist you wish to share with your friends.

Step4 In the playlist’s details section, tap the “Share” icon above the “Play All” button. Now, tap the “Copy” icon to save the playlist’s URL on your clipboard, or use other available options to share the playlist directly.
Bonus: Do You Want To Create Your Own YouTube Videos?
We hope you have found the solution to share your YouTube Playlist. Supposing you are a common YouTube user and like to share the fantastic things you found on this platform, are you interested in making a YouTube video by yourself? If yes, please watch the video below to start editing your own videos with a user-friendly video editor - Wondershare Filmora . With it, you can create your video with ease:
Free Download For Win 7 or later(64-bit)
Free Download For macOS 10.14 or later
Conclusion
In this comprehensive guide, we’ve explored why the share function in the playlist is not working and how to share a YouTube playlist using your computer and mobile device.
Step1 Since most devices have YouTube already installed, locate the YouTube app in your device’s app drawer and launch it.
Step2 On the app’s main interface/Home screen, tap the “Library” option at the bottom right corner of your device’s screen.
Step3 Now, scroll down to the “Playlists” section and open the playlist you wish to share with your friends.
Step4 In the playlist’s details section, tap the “Share” icon above the “Play All” button. Now, tap the “Copy” icon to save the playlist’s URL on your clipboard, or use other available options to share the playlist directly.
Bonus: Do You Want To Create Your Own YouTube Videos?
We hope you have found the solution to share your YouTube Playlist. Supposing you are a common YouTube user and like to share the fantastic things you found on this platform, are you interested in making a YouTube video by yourself? If yes, please watch the video below to start editing your own videos with a user-friendly video editor - Wondershare Filmora . With it, you can create your video with ease:
Free Download For Win 7 or later(64-bit)
Free Download For macOS 10.14 or later
Conclusion
In this comprehensive guide, we’ve explored why the share function in the playlist is not working and how to share a YouTube playlist using your computer and mobile device.
The Art of Crafting Compelling Video Covers
What’s the Best YouTube Thumbnail Size?

Richard Bennett
Dec 30, 2022• Proven solutions
Making better YouTube thumbnails will help you get more views, and knowing the best YouTube thumbnail size is part of that. There are millions of videos on YouTube, so if you want the audience to click on yours, then you need to make a great first impression.
- What’s the ideal YouTube thumbnail Size and Dimension?
- Tips for Perfect Thumbnails
- Making Better Thumbnails for YouTube
1. What’s the ideal YouTube thumbnail Size and Dimension?
An essential thing that every YouTube video developer needs to know is about the selection of the right side of the thumbnail for any video. As per the guidelines circulated by Google itself, the most appropriate size for the thumbnail image is 1280x720 pixels, where the recommended minimal pixel width is 640 pixels. Generally, the 16:9 ratio is considered as an ideal choice for Most of YouTube previews and players.
Here is one interesting thing that you need to know; the thumbnail of videos appears smaller during searches, but it naturally grows to the full size of a video during suggestions. Now the fact is that upscaling of images often loses the quality of content, whereas it is much easier to downscale larger images into smaller ones. Hence, the best idea is to use large size images so that this search and suggestion based scaling needs can be well accomplished.
You May Also Like:
Top 12 Best Free YouTube Thumbnail Makers >>
How to Download YouTube Thumbnail in 3 Ways [Online/Win/Mac] >>
2. Tips for Perfect Thumbnails
So, if you are ready to add thumbnails to your videos, then it is time to learn a few essential tips to do this task with improved impact. You need to ignore the blurry details and boost the eye-catching ones. Here are a few essential tips for developing the best videos with an impressive selection of thumbnail images:
YouTube’s Default Thumbnails
When you upload your video on YouTube, the platform itself gives you suggestions about thumbnails, and they are directly picked up from your own video. Although the idea is good and original, these thumbnails use to be of low quality with blur details. Hope! You don’t want to lose your audience with this bad selection.
Custom Thumbnails
This is probably the best choice for your customized videos, and the interesting thing is that here you can control everything manually with lots of useful effects.
First of all, you need to open your video on YouTube and then scrub a useful still from your video that you wish to use as a thumbnail.
Now, you need to take a screenshot of this particular instance of your video file. The best part is that most of the operating systems allow users to enjoy several shortcuts to complete this task. For example:
Mac users need to press Command+Shift+4 and then simply highlight the area that you want to include in your screenshot with the help of a frame. The system will automatically save your selected area to your desktop in the form of an image.
Window users are advised to access Windows Key with Print Screen option to get their desired screenshot.
Once you are ready with your video specific still image, then simply get it uploaded on YouTube using the edit video page.
3. Making Better Thumbnails for YouTube
The best part is to access some photo editing software tool to edit your image the way you like. You can use an advanced tool like Photoshop or a free online tool like Canva.
- Focus on Size:
It is always advised to create thumbnail images with standard video file size; the most commonly used standard size range is 1980x1080 or 1280x720. Images having a size smaller than this range may often appear blurry.
- Add Text:
The best idea is to use text-based editing for your thumbnail images and preferably add the title of your video to this image. It will naturally attract more viewers.
- Borders matter:
Professionals recommend adding borders around thumbnail images but do not try to make it too thick rather, try to make it noticeable with fine details.
- Background editing:
Most of the expert video thumbnail developers prefer to change the impact of thumbnail background by simply replacing the background color with solid colors. It will definitely attract more viewers and will bring major attention to the major subject.
- Test it before uploading:
Before uploading your customized thumbnail to your YouTube channel, prefer to check its final view. Zoom in to check the appearance of the thumbnail image on the larger screen, and it should also look fine when sized down.
Now that you know the best YouTube thumbnail size and how to design better thumbnails, do you think you’ll revisit the thumbnails of your existing YouTube videos?
If you want to find a video editing solution that empowers your imagination and creativity yet takes less effort, please try this robust and user-friendly video editing software Wondershare Filmora. It provides special effects, stock photo & video, sound library, etc., which will definitely enhance your productivity and helps to make money by making videos much accessible.


Richard Bennett
Richard Bennett is a writer and a lover of all things video.
Follow @Richard Bennett
Richard Bennett
Dec 30, 2022• Proven solutions
Making better YouTube thumbnails will help you get more views, and knowing the best YouTube thumbnail size is part of that. There are millions of videos on YouTube, so if you want the audience to click on yours, then you need to make a great first impression.
- What’s the ideal YouTube thumbnail Size and Dimension?
- Tips for Perfect Thumbnails
- Making Better Thumbnails for YouTube
1. What’s the ideal YouTube thumbnail Size and Dimension?
An essential thing that every YouTube video developer needs to know is about the selection of the right side of the thumbnail for any video. As per the guidelines circulated by Google itself, the most appropriate size for the thumbnail image is 1280x720 pixels, where the recommended minimal pixel width is 640 pixels. Generally, the 16:9 ratio is considered as an ideal choice for Most of YouTube previews and players.
Here is one interesting thing that you need to know; the thumbnail of videos appears smaller during searches, but it naturally grows to the full size of a video during suggestions. Now the fact is that upscaling of images often loses the quality of content, whereas it is much easier to downscale larger images into smaller ones. Hence, the best idea is to use large size images so that this search and suggestion based scaling needs can be well accomplished.
You May Also Like:
Top 12 Best Free YouTube Thumbnail Makers >>
How to Download YouTube Thumbnail in 3 Ways [Online/Win/Mac] >>
2. Tips for Perfect Thumbnails
So, if you are ready to add thumbnails to your videos, then it is time to learn a few essential tips to do this task with improved impact. You need to ignore the blurry details and boost the eye-catching ones. Here are a few essential tips for developing the best videos with an impressive selection of thumbnail images:
YouTube’s Default Thumbnails
When you upload your video on YouTube, the platform itself gives you suggestions about thumbnails, and they are directly picked up from your own video. Although the idea is good and original, these thumbnails use to be of low quality with blur details. Hope! You don’t want to lose your audience with this bad selection.
Custom Thumbnails
This is probably the best choice for your customized videos, and the interesting thing is that here you can control everything manually with lots of useful effects.
First of all, you need to open your video on YouTube and then scrub a useful still from your video that you wish to use as a thumbnail.
Now, you need to take a screenshot of this particular instance of your video file. The best part is that most of the operating systems allow users to enjoy several shortcuts to complete this task. For example:
Mac users need to press Command+Shift+4 and then simply highlight the area that you want to include in your screenshot with the help of a frame. The system will automatically save your selected area to your desktop in the form of an image.
Window users are advised to access Windows Key with Print Screen option to get their desired screenshot.
Once you are ready with your video specific still image, then simply get it uploaded on YouTube using the edit video page.
3. Making Better Thumbnails for YouTube
The best part is to access some photo editing software tool to edit your image the way you like. You can use an advanced tool like Photoshop or a free online tool like Canva.
- Focus on Size:
It is always advised to create thumbnail images with standard video file size; the most commonly used standard size range is 1980x1080 or 1280x720. Images having a size smaller than this range may often appear blurry.
- Add Text:
The best idea is to use text-based editing for your thumbnail images and preferably add the title of your video to this image. It will naturally attract more viewers.
- Borders matter:
Professionals recommend adding borders around thumbnail images but do not try to make it too thick rather, try to make it noticeable with fine details.
- Background editing:
Most of the expert video thumbnail developers prefer to change the impact of thumbnail background by simply replacing the background color with solid colors. It will definitely attract more viewers and will bring major attention to the major subject.
- Test it before uploading:
Before uploading your customized thumbnail to your YouTube channel, prefer to check its final view. Zoom in to check the appearance of the thumbnail image on the larger screen, and it should also look fine when sized down.
Now that you know the best YouTube thumbnail size and how to design better thumbnails, do you think you’ll revisit the thumbnails of your existing YouTube videos?
If you want to find a video editing solution that empowers your imagination and creativity yet takes less effort, please try this robust and user-friendly video editing software Wondershare Filmora. It provides special effects, stock photo & video, sound library, etc., which will definitely enhance your productivity and helps to make money by making videos much accessible.
Richard Bennett
Richard Bennett is a writer and a lover of all things video.
Follow @Richard Bennett
Also read:
- [New] Boost Visibility Selecting the Right YouTube Thumbnail Dimensions for 2024
- [New] EIZO's Boundaries Reached The CG318-4K Reviewed
- [New] In 2024, A Comprehensive Guide to High-Quality Laptop Recordings
- [Updated] The Leading List Where to Find Gamers' Music Without Costs
- 2024 Approved Audiovisual Quality Its Significance in Video Ranking
- 2024 Approved Elevate Your Content Game on YouTube Top 11 Video SEO Insights
- Essential Guide to Enhancing YouTube Content Post-Upload
- How to Use YouTube Cards and Annotations?
- In 2024, 3 Efficient Methods for Saving YouTube's Standardized Images
- In 2024, Earning Power Through Engagement Ajay’s Success on YouTube Monetization
- In 2024, Unlock Apple iPhone 11 Pro Without Passcode Easily | Dr.fone
- In 2024, Unveiling How Content Makers Profit From Shorter Videos
- Troubleshooting Techniques for Xlive DLL File Not Found Problems
- YouTube Studio Monetization Check Ensure Your Channel's Monetization for 2024
- Title: Blitz Broadcasting Channel Your Playlist Swiftly for 2024
- Author: Brian
- Created at : 2024-12-10 07:58:58
- Updated at : 2024-12-16 02:08:54
- Link: https://youtube-video-recordings.techidaily.com/blitz-broadcasting-channel-your-playlist-swiftly-for-2024/
- License: This work is licensed under CC BY-NC-SA 4.0.