
:max_bytes(150000):strip_icc():format(webp)/SetaLiveWallpaperinWindows11-b8ca3913592d4a5790808131bf8f34e1.jpg)
Beginner's Guide to Crafting Trendy Mac Video Content
Beginner’s Guide to Crafting Trendy Mac Video Content
How do Beginners Make a Cool Video for YouTube on Mac

Shanoon Cox
Dec 14, 2023• Proven solutions
To get the right video editors to cut a video for YouTube on your Mac can be a bit of a problem for beginners. It is understandable that there will be a learning curve if you just want to get tons of subscribers on your channel – who doesn’t? Ultimately, in getting a standard video that will attract and sustain the interest of the viewers, you will need to employ certain strategies that will enhance your credibility.
Let’s tell each other the truth, no one wants to watch a video that is not aesthetically appealing even if it is a close friend. So, if you have got the relevant content and the video to pull traffic to your channel, what you will need is editing software that will help you make the correct adjustments to your video
Nobody wants a random viewer to comment “This video is a little bit tacky, touch-up properly”, that will definitely leave a sting. As such, understand the best technique that works for you as well as the software that meets your needs based on the current level of expertise. It is okay for you to grow.

Five Video Cutting Skills Youtubers Must Have
As much as the enthusiasm is brewing to get on your mac and upload the video you just shot, there are certain elements you need to implement to make a cool video for YouTube. Beginners sometimes feel their content is the best, the excitement of posting their very first series can be overwhelming. Sometimes, it blocks off other ideas for making the video better.
However, having amazing content dies not to exclude the need for the right editing technique. Here are five methods for editing your YouTube videos:
1.Control the video duration
The length of a particular scene can have different meanings depending on how long or short it is in a video. This means the duration can impact the message you are trying to pass across to your viewers, hence it is important to know what places to accelerate and cut in the video.
You can have a system where each part of the content is labeled in their order of importance such as A, B, C. This means from the most important to the least important. Consequently, you will be able to sieve through the content and make the appropriate changes while editing the video.
![]()
2.Customize the intro and end of the video
It is possible to grab the attention of the viewer in the intro and even more likely to lose someone once the opening montage comes in. Creating an intro that is captivating and appealing to drag the audience to your video is an important technique for editing your videos. Also, the end of the video, from the signing out to the closing montage has to appeal to the audience. You will be surprised by the number of people that love seeing end credits if the closing montage is good. Customize the intro and the end of the video so the audience is tuned all through.
You May Like: Best YouTube Banner Size and Channel Art Dimension (The Ultimate Guide)
You May Like: How to Add Logo or Watermark to YouTube Video
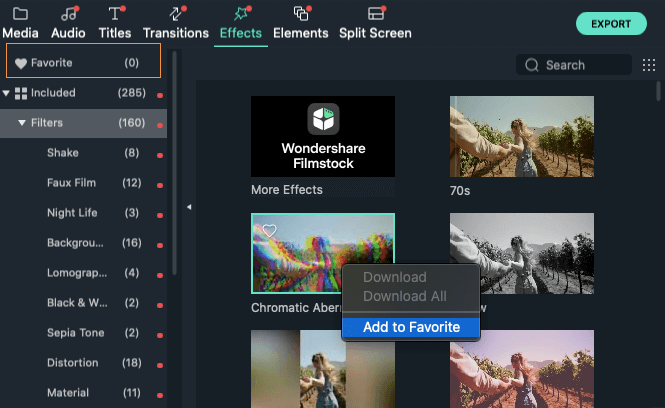
3.Use Cool transitions or filters
If there is anything the audience love to see, it is the way you move from different points in the vudeo. The ability to use transition that does not affect their attention but leaves them wanting more is very key. Use fanciful transitions that do noy hurt the eyes and allows for easy comprehension.
4.Match the cuts
Whatever you cut has to match the next phase of the video. You do not want to leave the audience behind as they will wonder how the last scene correlates with a new one. You need to ensure that all cuts match the next scenes.
5.Cutaway shots
This is very good in providing the audience context. You can take shots of the room or item that you are trying to discuss in your video. If people keep staring at a particular thing for long, they get bored, cutaway shots keep the excitement alive for the audience.
What Editing Software can Meet Your Needs?
As a beginner, it is important to use software that is easily adaptable to your needs. If you want to make a cool video for you be on your mac, getting software that allows you to be creative without confusion is key. Here are two software for making cool YouTube videos for your Mac;
Filmora X
This is one of the simplest yet powerful tools that is lightweight and apt for your Mac. One of the perks of using the Filmora X is the feature that allows you to upload the video directly to YouTube, saving you any extended hassles.


There are also 400+ transition effects as well as a stylish text editor that is fun to use. There is also a built-in music and sound effect feature that enables you to select sounds to match the video you are editing. This is if you do not have the music you want for the video already.
Other pros of Filmora are:
• It has fast rendering sped for your video
• The lifetime price is affordable.
However, there are some disadvantages to the usage of Filmora X, which are:
• The free version contains the Filmora X watermark
• The color grading tool is limited.
Blender
If you are looking for software for the model, game creating, and animation then opting for Blender will be a good fit. You can trim videos, insert filters, and add as many videos as you want.
Pros
- The 3D graphics make it suitable for editing YouTube videos.
- Composting system and node-based material
- It supports your Mac.
Cons:
- It could be slow when running
- Some think it might be a bit complicated.
Although there is other editing software for your Mac, Filmora X simplifies the whole process. If you are looking for quality wrapped in affordability and convenience, then Filmora X will be right for you. Start editing and enjoy the ride!
Learn More: YouTuber Skillshare: Essential Video Cutting Skills For YouTubers
Shanoon Cox
Shanoon Cox is a writer and a lover of all things video.
Follow @Shanoon Cox
Shanoon Cox
Dec 14, 2023• Proven solutions
To get the right video editors to cut a video for YouTube on your Mac can be a bit of a problem for beginners. It is understandable that there will be a learning curve if you just want to get tons of subscribers on your channel – who doesn’t? Ultimately, in getting a standard video that will attract and sustain the interest of the viewers, you will need to employ certain strategies that will enhance your credibility.
Let’s tell each other the truth, no one wants to watch a video that is not aesthetically appealing even if it is a close friend. So, if you have got the relevant content and the video to pull traffic to your channel, what you will need is editing software that will help you make the correct adjustments to your video
Nobody wants a random viewer to comment “This video is a little bit tacky, touch-up properly”, that will definitely leave a sting. As such, understand the best technique that works for you as well as the software that meets your needs based on the current level of expertise. It is okay for you to grow.
Five Video Cutting Skills Youtubers Must Have
As much as the enthusiasm is brewing to get on your mac and upload the video you just shot, there are certain elements you need to implement to make a cool video for YouTube. Beginners sometimes feel their content is the best, the excitement of posting their very first series can be overwhelming. Sometimes, it blocks off other ideas for making the video better.
However, having amazing content dies not to exclude the need for the right editing technique. Here are five methods for editing your YouTube videos:
1.Control the video duration
The length of a particular scene can have different meanings depending on how long or short it is in a video. This means the duration can impact the message you are trying to pass across to your viewers, hence it is important to know what places to accelerate and cut in the video.
You can have a system where each part of the content is labeled in their order of importance such as A, B, C. This means from the most important to the least important. Consequently, you will be able to sieve through the content and make the appropriate changes while editing the video.
![]()
2.Customize the intro and end of the video
It is possible to grab the attention of the viewer in the intro and even more likely to lose someone once the opening montage comes in. Creating an intro that is captivating and appealing to drag the audience to your video is an important technique for editing your videos. Also, the end of the video, from the signing out to the closing montage has to appeal to the audience. You will be surprised by the number of people that love seeing end credits if the closing montage is good. Customize the intro and the end of the video so the audience is tuned all through.
You May Like: Best YouTube Banner Size and Channel Art Dimension (The Ultimate Guide)
You May Like: How to Add Logo or Watermark to YouTube Video
3.Use Cool transitions or filters
If there is anything the audience love to see, it is the way you move from different points in the vudeo. The ability to use transition that does not affect their attention but leaves them wanting more is very key. Use fanciful transitions that do noy hurt the eyes and allows for easy comprehension.
4.Match the cuts
Whatever you cut has to match the next phase of the video. You do not want to leave the audience behind as they will wonder how the last scene correlates with a new one. You need to ensure that all cuts match the next scenes.
5.Cutaway shots
This is very good in providing the audience context. You can take shots of the room or item that you are trying to discuss in your video. If people keep staring at a particular thing for long, they get bored, cutaway shots keep the excitement alive for the audience.
What Editing Software can Meet Your Needs?
As a beginner, it is important to use software that is easily adaptable to your needs. If you want to make a cool video for you be on your mac, getting software that allows you to be creative without confusion is key. Here are two software for making cool YouTube videos for your Mac;
Filmora X
This is one of the simplest yet powerful tools that is lightweight and apt for your Mac. One of the perks of using the Filmora X is the feature that allows you to upload the video directly to YouTube, saving you any extended hassles.
There are also 400+ transition effects as well as a stylish text editor that is fun to use. There is also a built-in music and sound effect feature that enables you to select sounds to match the video you are editing. This is if you do not have the music you want for the video already.
Other pros of Filmora are:
• It has fast rendering sped for your video
• The lifetime price is affordable.
However, there are some disadvantages to the usage of Filmora X, which are:
• The free version contains the Filmora X watermark
• The color grading tool is limited.
Blender
If you are looking for software for the model, game creating, and animation then opting for Blender will be a good fit. You can trim videos, insert filters, and add as many videos as you want.
Pros
- The 3D graphics make it suitable for editing YouTube videos.
- Composting system and node-based material
- It supports your Mac.
Cons:
- It could be slow when running
- Some think it might be a bit complicated.
Although there is other editing software for your Mac, Filmora X simplifies the whole process. If you are looking for quality wrapped in affordability and convenience, then Filmora X will be right for you. Start editing and enjoy the ride!
Learn More: YouTuber Skillshare: Essential Video Cutting Skills For YouTubers
Shanoon Cox
Shanoon Cox is a writer and a lover of all things video.
Follow @Shanoon Cox
Framing Perfection: A Filmmaker’s Guide to Cinematic YouTube Videos
10 Tips For Shooting Profesional YouTube Videos

Richard Bennett
Mar 27, 2024• Proven solutions
We have mentioned before about the equipment you should have to start your YouTube video shooting , however, being methodical in your approach to the video making process and knowing exactly what and where you are going to stage and record will increase the quality of the content. Focus on the technical aspects of your YouTube video before you actually start shooting and strive to be well prepared for all the challenges a day on the set may bring.
These and other useful tips may help you make better videos for your YouTube channel, so let’s explore different ways of improving your video making skills.
10 Tips for Shooting Better YouTube Videos
All videographers agree that you shouldn’t come to the set unprepared. Everything has to be in its place, no matter how insignificant it may seem, because a tiny detail can completely ruin the shot or even an entire day of work. These tips are going to help you avoid common mistakes, inexperienced video producers often make.
1. Write the Script
Everything starts with a script, at least in the cinematography world. You don’t have to write long, detailed descriptions of all scenes, just make a short note of every scene, what is being said in the shot, on-screen actions, camera positions, and so on. By doing this, you’ll save yourself a lot of valuable time, you can then dedicate to other burning issues on the set. Besides, knowing what you are going to say throughout the video so you don’t have to improvise all the time is going to help you feel more relaxed in front of a camera.
2. Build the Set (Lighting included)
Don’t leave anything to chance. You should control everything that is going to be in the shot, so avoid working at locations you can’t at least partially control. Shooting in studio-like conditions will enable you to carefully select the scenography and to design light so it matches the scene perfectly. The actors must always be clearly visible to the audience, which is why you need to pay attention to where they are located in the shot and how much light you have in that part of the shot.
3. Keep Your Batteries Charged
There is nothing more frustrating than arriving at the set anxious to start shooting just to find out that the batteries are empty. Charge the batteries at the end of each day on the set, because the chances are that you are going to need them early in the morning. Always have several spare batteries with you, so even if one battery is empty you have the replacement ready. You can also prolong the battery life by switching the camera off when you are not recording.
4. Do a Microphone Check
Capturing audio with an external microphone drastically increases the quality of the sound in your videos. That’s why making absolutely sure that all cables are connected and that the microphone is perfectly placed is paramount if you want to get the sound right. The host or the hosts of the video must be at the right distance from the microphone, usually, the length of their fist with the thumb and pinky finger extended, but this can vary a few inches to either side.
Check out the best microphone for YouTuber in 2018
5. Pay Attention to The Shot Composition
The rule of thirds is a common composition principle used by videographers to create balanced and unified images. The rule suggests that the subjects in a shot should be placed at the intersections of the lines that divide the screen. Most digital cameras have a grid that makes using the rule of thirds quite simple because you can easily see when the subjects in the shot are not positioned correctly.
This is just one of many shot composition techniques you have at your disposal, and as you gain more experience you’ll learn how to combine them and get aesthetically pleasing results.
6. Always Record Videos in Landscape Mode
Posting vertically oriented videos to your YouTube channel will make you look unprofessional because portrait mode is never used for capturing videos. YouTubers who record their videos with Smartphones are more likely to fall into this trap, but all you need to do to avoid this is remember to hold the device horizontally.
By switching to portrait mode, you’ll be cropping the frame in a way, so you might unknowingly end up removing parts of the shot you wanted to record.
In case that you want to convert your portrait video to landscape, do not miss this article about How to Convert A Portrait Video to Landscape.
7. Eliminate The Background Noises
Professional microphones can pick up even the softest sounds, that might prove difficult to remove in the post-production. You can reduce the noise levels in your videos by using shotgun microphones that only capture sounds that come directly into the microphone, or by using the omnidirectional mic to eliminate the wind if you’re shooting on an outdoor location.
Background noises can be particularly unpleasant when recording narration, because the viewers of the video may not want to watch it until the end if they can’t hear what the person in the video is saying.
If it is hard for you to record your YouTube video in quite environment, you can remove the background noise by using some video editing software. For YouTubers, we recommend you to try Wondershare Filmora to de-noise. Check the video below about how to remove background noise with one click.
8. Keep The Shot in Focus
You can always keep the shot in focus by simply enabling the autofocus feature, but if you do so you won’t be able to control where the focus is going to be. Pulling focus manually is an art that takes years to master, and you have to keep practicing it as much as you can in order to become good at it.
The best way to deal with out of focus shots is to avoid shooting scenes that include a lot of action because you won’t have to pull focus that often.
9. Put The Camera on a Tripod

The footage you produce should be smooth and free of camera shakes. All video cameras pick up vibrations easily, so even the slightest movement or impact can ruin a shot. Putting the camera on a tripod is one of the best ways to stabilize the shot and avoid camera shaking.
In addition, a tripod enables you to maintain image stability even when shooting form lower or upper angles, something that cannot be achieved by simply holding the camera.
We have chosen some of the best tripods that you can use for starting a YouTube vlogging Video shooting . If you are using a 4K camera, here are some tripods that you can use for your 4K Cameras .
10. Find The Best Angle
Every scene has its perfect angle, you just have to find it. This job is much easier if you have already built the set and adjusted the lighting before approaching the shot selection process because it will allow you to know exactly where the camera should be.
The camera position depends on a number of factors, including the video’s aesthetics or the action that takes place in the shot, and you have to go through this process for each shot in your video.
Read More to Get : How to Download YouTube Videos without Any Software Easily >>
Conclusion
Hopefully, the tips we provided in this article are going to help you create better YouTube videos. There are hundreds of tricks you’ll have to learn as your skills become more polished, but sometimes just paying attention to the basic rules of videography is more than enough to create a stunning video.
Leave a comment and let us know which tips helped you the most or tell us which useful tips we failed to mention in this article.
Richard Bennett
Richard Bennett is a writer and a lover of all things video.
Follow @Richard Bennett
Richard Bennett
Mar 27, 2024• Proven solutions
We have mentioned before about the equipment you should have to start your YouTube video shooting , however, being methodical in your approach to the video making process and knowing exactly what and where you are going to stage and record will increase the quality of the content. Focus on the technical aspects of your YouTube video before you actually start shooting and strive to be well prepared for all the challenges a day on the set may bring.
These and other useful tips may help you make better videos for your YouTube channel, so let’s explore different ways of improving your video making skills.
10 Tips for Shooting Better YouTube Videos
All videographers agree that you shouldn’t come to the set unprepared. Everything has to be in its place, no matter how insignificant it may seem, because a tiny detail can completely ruin the shot or even an entire day of work. These tips are going to help you avoid common mistakes, inexperienced video producers often make.
1. Write the Script
Everything starts with a script, at least in the cinematography world. You don’t have to write long, detailed descriptions of all scenes, just make a short note of every scene, what is being said in the shot, on-screen actions, camera positions, and so on. By doing this, you’ll save yourself a lot of valuable time, you can then dedicate to other burning issues on the set. Besides, knowing what you are going to say throughout the video so you don’t have to improvise all the time is going to help you feel more relaxed in front of a camera.
2. Build the Set (Lighting included)
Don’t leave anything to chance. You should control everything that is going to be in the shot, so avoid working at locations you can’t at least partially control. Shooting in studio-like conditions will enable you to carefully select the scenography and to design light so it matches the scene perfectly. The actors must always be clearly visible to the audience, which is why you need to pay attention to where they are located in the shot and how much light you have in that part of the shot.
3. Keep Your Batteries Charged
There is nothing more frustrating than arriving at the set anxious to start shooting just to find out that the batteries are empty. Charge the batteries at the end of each day on the set, because the chances are that you are going to need them early in the morning. Always have several spare batteries with you, so even if one battery is empty you have the replacement ready. You can also prolong the battery life by switching the camera off when you are not recording.
4. Do a Microphone Check
Capturing audio with an external microphone drastically increases the quality of the sound in your videos. That’s why making absolutely sure that all cables are connected and that the microphone is perfectly placed is paramount if you want to get the sound right. The host or the hosts of the video must be at the right distance from the microphone, usually, the length of their fist with the thumb and pinky finger extended, but this can vary a few inches to either side.
Check out the best microphone for YouTuber in 2018
5. Pay Attention to The Shot Composition
The rule of thirds is a common composition principle used by videographers to create balanced and unified images. The rule suggests that the subjects in a shot should be placed at the intersections of the lines that divide the screen. Most digital cameras have a grid that makes using the rule of thirds quite simple because you can easily see when the subjects in the shot are not positioned correctly.
This is just one of many shot composition techniques you have at your disposal, and as you gain more experience you’ll learn how to combine them and get aesthetically pleasing results.
6. Always Record Videos in Landscape Mode
Posting vertically oriented videos to your YouTube channel will make you look unprofessional because portrait mode is never used for capturing videos. YouTubers who record their videos with Smartphones are more likely to fall into this trap, but all you need to do to avoid this is remember to hold the device horizontally.
By switching to portrait mode, you’ll be cropping the frame in a way, so you might unknowingly end up removing parts of the shot you wanted to record.
In case that you want to convert your portrait video to landscape, do not miss this article about How to Convert A Portrait Video to Landscape.
7. Eliminate The Background Noises
Professional microphones can pick up even the softest sounds, that might prove difficult to remove in the post-production. You can reduce the noise levels in your videos by using shotgun microphones that only capture sounds that come directly into the microphone, or by using the omnidirectional mic to eliminate the wind if you’re shooting on an outdoor location.
Background noises can be particularly unpleasant when recording narration, because the viewers of the video may not want to watch it until the end if they can’t hear what the person in the video is saying.
If it is hard for you to record your YouTube video in quite environment, you can remove the background noise by using some video editing software. For YouTubers, we recommend you to try Wondershare Filmora to de-noise. Check the video below about how to remove background noise with one click.
8. Keep The Shot in Focus
You can always keep the shot in focus by simply enabling the autofocus feature, but if you do so you won’t be able to control where the focus is going to be. Pulling focus manually is an art that takes years to master, and you have to keep practicing it as much as you can in order to become good at it.
The best way to deal with out of focus shots is to avoid shooting scenes that include a lot of action because you won’t have to pull focus that often.
9. Put The Camera on a Tripod
The footage you produce should be smooth and free of camera shakes. All video cameras pick up vibrations easily, so even the slightest movement or impact can ruin a shot. Putting the camera on a tripod is one of the best ways to stabilize the shot and avoid camera shaking.
In addition, a tripod enables you to maintain image stability even when shooting form lower or upper angles, something that cannot be achieved by simply holding the camera.
We have chosen some of the best tripods that you can use for starting a YouTube vlogging Video shooting . If you are using a 4K camera, here are some tripods that you can use for your 4K Cameras .
10. Find The Best Angle
Every scene has its perfect angle, you just have to find it. This job is much easier if you have already built the set and adjusted the lighting before approaching the shot selection process because it will allow you to know exactly where the camera should be.
The camera position depends on a number of factors, including the video’s aesthetics or the action that takes place in the shot, and you have to go through this process for each shot in your video.
Read More to Get : How to Download YouTube Videos without Any Software Easily >>
Conclusion
Hopefully, the tips we provided in this article are going to help you create better YouTube videos. There are hundreds of tricks you’ll have to learn as your skills become more polished, but sometimes just paying attention to the basic rules of videography is more than enough to create a stunning video.
Leave a comment and let us know which tips helped you the most or tell us which useful tips we failed to mention in this article.
Richard Bennett
Richard Bennett is a writer and a lover of all things video.
Follow @Richard Bennett
Also read:
- Best YouTube Names Generators [+ How to Brainstorm]
- 2024 Approved Delving Into How T-Series Earnings Work on Youtube
- How to Create GIFs From YouTube Videos
- Discover Why AV1 Is a Game Changer for YouTube Viewers for 2024
- Elevate Your Edits with These Top 5 Tools (No Youtube) for 2024
- [Updated] Decoding YouTube's Economics How to Quantify Watches and Earnings
- [Updated] Breaking the Screens Top 10 Most Popular Female YouTubers
- In 2024, Countdown in Forward The Counterintuitive Playlist Method
- Selecting the Right Gear A Filmmaker's Checklist
- Amplify Online Impact Through Savvy Templates Design
- Navigating YouTube Strikes Understanding and Resolving Copyright Issues
- Mastering the Melody Incorporating Music Seamlessly in YouTube
- Banner Brilliance Elevating Your Game Channel Image for 2024
- How to Make a Cooking Video in Steps - an Ultimate Guide
- Easy Sound Transformation IOS Tools to Convert YouTube Songs to MP3 Files
- How to Embed a YouTube Video in PowerPoint [4 Methods]
- [Updated] Boost Your Videos' Impact with Top-Ranking Software Solutions
- Advanced Techniques for YouTube Shorts and Mp4 Exportation for 2024
- Elevate Small Screen Experience with These Leading & Affordable Tools to Download YouTubes' Tiny Videos for 2024
- How to Restore iPhone 11 Pro from Backup when iTunes Backup is Corrupt or not compatible | Stellar
- 2024 Approved The Premier Guide to Cutting-Edge Audio Masking Tech, Apps & Online Sites
- In 2024, Budget-Friendly Edits Made Easy with Vimeo's Free Tools
- How to Intercept Text Messages on OnePlus Ace 2 Pro | Dr.fone
- [New] Focus Frequencies Zoning Out Ambient Noise on Audacity
- New In 2024, Glitch Video Editing on a Budget Top Free and Affordable Options for Windows and Mac
- Play Store Stuck on Downloading Of Meizu 21? 7 Ways to Resolve | Dr.fone
- Essential Audio Setups for Personalized Mobile Soundscapes for 2024
- [New] In 2024, Engaging Oratory Insights Part 8
- Discover the Best Free Online Video Editor Jaycut Tutorial and Review for 2024
- [Updated] Premier Programs to Transform Webcam Footage for 2024
- Pursuit for Perfection Exploring 4K with HP's Z32X
- Title: Beginner's Guide to Crafting Trendy Mac Video Content
- Author: Brian
- Created at : 2024-05-25 11:22:05
- Updated at : 2024-05-26 11:22:05
- Link: https://youtube-video-recordings.techidaily.com/beginners-guide-to-crafting-trendy-mac-video-content/
- License: This work is licensed under CC BY-NC-SA 4.0.
