
:max_bytes(150000):strip_icc()/rotate-video-getty-5ae80a9ca18d9e0037b96028.jpg)
"Audio Perfection Achieved Expert Tips Without a Microphone for 2024"
Audio Perfection Achieved: Expert Tips Without a Microphone
How to Record Good Audio Without a Microphone?

Richard Bennett
Oct 26, 2023• Proven solutions
Audio quality is more important than video quality on YouTube. You’ve probably heard that before – viewers might forgive sub-par video quality if they’re interested in what you’re saying, but if it’s hard to understand what you’re saying they’ll click away.
Getting an external mic (even a $10 one-off Amazon ) is one of the best ways to improve your videos. That said, maybe your budget is $0. Or, maybe you just don’t happen to have a mic now and don’t want to wait to make videos. It could even be that you just don’t want to bother with an external mic.
Luckily, there are a lot of easy, free, things you can do to protect the quality of your audio recording even if you’re not using an external mic. Here are a few tips:
- 1. Keep Your Camera Close
- 2. Shoot Somewhere Quiet
- 3. Pick a Good Room
- 4. Protect your Built-In Mic from Wind
- 5. Use a Free Audio App
- 6. Do a Sound Check
1. Keep Your Camera Close (like, really close)
The biggest problem with the mic built into any camera or phone is just that, since it’s with the camera, it’s usually too far away from you. Built-in mics can record decent audio up close, but usually, your camera will be set up farther away from you than an external mic would be.
For example, your camera’s mic might be just as good as a clip-on LAV, but that LAV is right by your mouth and the camera is a couple of big steps away.
Moving your camera/smartphone physically closer to you will make it hard to include anything besides your head and shoulders in your shot, but it will get you significantly better audio.
2.Shoot Somewhere Quiet
The best way to limit the amount of background noise you pick up in your sound recording is to shoot somewhere where there’s no background noise. That probably seems really basic, but it’s something a lot of people just don’t do. It’s easy to default to recording in your home office, even though it’s right next to the kitchen where your family is bustling around, or in your bedroom even though there’s a busy street right outside your window.
Sometimes the best thing you can do for your audio is simply to scout out a quiet room in your house where the sound recording conditions are better. Speaking of recording conditions…
3. Pick a Good Room
There’s more that goes into picking a good room than how quiet it is. If you try to record in a room that’s too big your voice might sound to distant, and if you try to record in a room that’s too small your audio will be too echo-y. You need a room that’s just right.
You should also pay attention to what’s in the room you’re recording in. Avoid hard, reflective, surfaces like appliances and mirrors which your voice will bounce off of. The same conditions that make you sound great when you sing in the shower will – like recording in a small space -make your voiceover unpleasantly echo-y.
Look for a room that has a lot of soft things in it, like beds and sofas.
4. Protect your Built-In Mic from Wind
If you shoot outside, then the wind passing over your built-in mic will do terrible things to your audio. You can do a lot to counter-act this problem by physically blocking the wind.
There are a few ways to do this. If you’re doing hand-held shots you can partially cover your camera or phone’s mic with your finger. You don’t want to completely cover it/press down or your audio will be muffled. What you’re trying to do is create a barrier blocking out the wind.
On movie sets, they block out wind by covering the microphones with big fuzzy things called ‘dead cats’. You can also block out wind noise by attaching something fuzzy to your microphone. If your camera’s built-in mic is on front of it then you just need something big and fluffy you can loop around the lens. You can use a piece of a boa, a fuzzy novelty scrunchie – you can even murder a fuzzy stuffed animal! Do you have an old coat with a fuzz around the hood? That fuzz would do nicely.
The pompom used in this video cost $2, but you might already have something that would work!
If your built-in mic is on top of your camera you can get something called a ‘micromuff’. A micromuff is essentially a circular or rectangular piece of velcro with long strands of fluff on top. It’s open in the middle so it doesn’t actually cover your mic, but the surrounding fuzz blocks out the wind.

You use the adhesive backing to attach the base velcro to your camera. The other side of the velcro has your fluff attached to the back.
The only thing about a micromuff is that it costs about $30, and if you’re going to spend $30 on audio equipment then you could just buy yourself an inexpensive LAV mic. I only bring up the micromuff because it’s a very simple design you can probably DIY – you just need velcro with adhesive backing and any of the fluff-sources we just discussed.
5. Use a Free Audio App
If you’re recording on a smartphone, you can download a free app that will let you make adjustments to your audio as you record it. With the right app, you can adjust your gain (volume is how you control ‘output’ audio, and gain is for ‘input’ audio. By turning up your gain, you can make your mic more sensitive), tempo, and more. A lot of the time, your audio recording app will also let you edit your audio afterward.
Even if you’re not recording video from your smartphone, it might be a good idea to use your phone as your mic and record a separate audio file. You’ll be able to use an app to fine-tune your recording, and you can set your phone up closer to you the way you would an external mic while keeping your camera back a bit farther.
Free audio apps: Hi-Q MP3 Voice Recorder (Android), RecForge II (Android), Smart Voice Recorder (Android), Audio Memos (iOS), and Recorder Plus (iOS).
6. Do a Sound Check
Once you think you’ve got good audio set up – test it! You don’t want to do a whole video and find out when you play it back that your audio doesn’t sound good.
Do you have any of your own audio tips to pass on? Leave them in the comments!
This topic was suggested by RS Beauty over in the forums. Thanks for the idea!
Polish Your YouTube Videos with Filmora
As one of the most widely used video editing software in YouTube video editing, Filmora allows you to record voiceover and edit the recorded audio with mixer, equalizer and provides lots of templates and effects with an intuitive interface, which saves much time. Download the free trial version and get started now.


Richard Bennett
Richard Bennett is a writer and a lover of all things video.
Follow @Richard Bennett
Richard Bennett
Oct 26, 2023• Proven solutions
Audio quality is more important than video quality on YouTube. You’ve probably heard that before – viewers might forgive sub-par video quality if they’re interested in what you’re saying, but if it’s hard to understand what you’re saying they’ll click away.
Getting an external mic (even a $10 one-off Amazon ) is one of the best ways to improve your videos. That said, maybe your budget is $0. Or, maybe you just don’t happen to have a mic now and don’t want to wait to make videos. It could even be that you just don’t want to bother with an external mic.
Luckily, there are a lot of easy, free, things you can do to protect the quality of your audio recording even if you’re not using an external mic. Here are a few tips:
- 1. Keep Your Camera Close
- 2. Shoot Somewhere Quiet
- 3. Pick a Good Room
- 4. Protect your Built-In Mic from Wind
- 5. Use a Free Audio App
- 6. Do a Sound Check
1. Keep Your Camera Close (like, really close)
The biggest problem with the mic built into any camera or phone is just that, since it’s with the camera, it’s usually too far away from you. Built-in mics can record decent audio up close, but usually, your camera will be set up farther away from you than an external mic would be.
For example, your camera’s mic might be just as good as a clip-on LAV, but that LAV is right by your mouth and the camera is a couple of big steps away.
Moving your camera/smartphone physically closer to you will make it hard to include anything besides your head and shoulders in your shot, but it will get you significantly better audio.
2.Shoot Somewhere Quiet
The best way to limit the amount of background noise you pick up in your sound recording is to shoot somewhere where there’s no background noise. That probably seems really basic, but it’s something a lot of people just don’t do. It’s easy to default to recording in your home office, even though it’s right next to the kitchen where your family is bustling around, or in your bedroom even though there’s a busy street right outside your window.
Sometimes the best thing you can do for your audio is simply to scout out a quiet room in your house where the sound recording conditions are better. Speaking of recording conditions…
3. Pick a Good Room
There’s more that goes into picking a good room than how quiet it is. If you try to record in a room that’s too big your voice might sound to distant, and if you try to record in a room that’s too small your audio will be too echo-y. You need a room that’s just right.
You should also pay attention to what’s in the room you’re recording in. Avoid hard, reflective, surfaces like appliances and mirrors which your voice will bounce off of. The same conditions that make you sound great when you sing in the shower will – like recording in a small space -make your voiceover unpleasantly echo-y.
Look for a room that has a lot of soft things in it, like beds and sofas.
4. Protect your Built-In Mic from Wind
If you shoot outside, then the wind passing over your built-in mic will do terrible things to your audio. You can do a lot to counter-act this problem by physically blocking the wind.
There are a few ways to do this. If you’re doing hand-held shots you can partially cover your camera or phone’s mic with your finger. You don’t want to completely cover it/press down or your audio will be muffled. What you’re trying to do is create a barrier blocking out the wind.
On movie sets, they block out wind by covering the microphones with big fuzzy things called ‘dead cats’. You can also block out wind noise by attaching something fuzzy to your microphone. If your camera’s built-in mic is on front of it then you just need something big and fluffy you can loop around the lens. You can use a piece of a boa, a fuzzy novelty scrunchie – you can even murder a fuzzy stuffed animal! Do you have an old coat with a fuzz around the hood? That fuzz would do nicely.
The pompom used in this video cost $2, but you might already have something that would work!
If your built-in mic is on top of your camera you can get something called a ‘micromuff’. A micromuff is essentially a circular or rectangular piece of velcro with long strands of fluff on top. It’s open in the middle so it doesn’t actually cover your mic, but the surrounding fuzz blocks out the wind.
You use the adhesive backing to attach the base velcro to your camera. The other side of the velcro has your fluff attached to the back.
The only thing about a micromuff is that it costs about $30, and if you’re going to spend $30 on audio equipment then you could just buy yourself an inexpensive LAV mic. I only bring up the micromuff because it’s a very simple design you can probably DIY – you just need velcro with adhesive backing and any of the fluff-sources we just discussed.
5. Use a Free Audio App
If you’re recording on a smartphone, you can download a free app that will let you make adjustments to your audio as you record it. With the right app, you can adjust your gain (volume is how you control ‘output’ audio, and gain is for ‘input’ audio. By turning up your gain, you can make your mic more sensitive), tempo, and more. A lot of the time, your audio recording app will also let you edit your audio afterward.
Even if you’re not recording video from your smartphone, it might be a good idea to use your phone as your mic and record a separate audio file. You’ll be able to use an app to fine-tune your recording, and you can set your phone up closer to you the way you would an external mic while keeping your camera back a bit farther.
Free audio apps: Hi-Q MP3 Voice Recorder (Android), RecForge II (Android), Smart Voice Recorder (Android), Audio Memos (iOS), and Recorder Plus (iOS).
6. Do a Sound Check
Once you think you’ve got good audio set up – test it! You don’t want to do a whole video and find out when you play it back that your audio doesn’t sound good.
Do you have any of your own audio tips to pass on? Leave them in the comments!
This topic was suggested by RS Beauty over in the forums. Thanks for the idea!
Polish Your YouTube Videos with Filmora
As one of the most widely used video editing software in YouTube video editing, Filmora allows you to record voiceover and edit the recorded audio with mixer, equalizer and provides lots of templates and effects with an intuitive interface, which saves much time. Download the free trial version and get started now.
Richard Bennett
Richard Bennett is a writer and a lover of all things video.
Follow @Richard Bennett
Celebrating Clickers: Channel & Buttons Incentives
YouTube Subscriber Awards! The Play Button Awards for Creators
Richard Bennett
Dec 30, 2022• Proven solutions
YouTube rewards creators for channel growth using “Play Buttons,” YouTube Subscriber Awards that they mail to creators who have reached certain milestones such as 100,000 subscribers. Due to user demand for more recognition of smaller channels, YouTube also introduced reward levels for channels that are still growing. These lower levels don’t come with trophies, but creators who reach them should feel proud.
Here are all of YouTube’s levels, from small to big:
Benefit levels
Awards Level
[4. The Silver Creator Award](#The Silver Creator Award)
[5. The Gold Creator Award](#The Gold Creator Award)
[6. The Diamond Creator Award](#The Diamond Creator Award)
Super High Level
[7. The Custom Creator Award](#The Custom Creator Award)
[8. The Red Diamond Creator Award](#The Red Diamond Creator Award)
Want to learn how to get more subscribers and increase your level?
Benefit levels
YouTube won’t award the YouTubers of these levels with physical plaque but will offer them alternative benefits.
#1: Graphite Level (0-1000 subscribers)
Graphite is the starter level. As soon as you start a YouTube channel, you will already be on this level until you get up to 1K subscribers. During this time, you should focus on learning how YouTube works and perfecting your video production and editing skills. If your YouTube Channel subscriber is over 100, then you will be allowed to custom the URL of your channel. For more information about Custom Channel URL, please read: How to Find and Change Your YouTube Channel URL – Super Easy! >>
#2: Opal Level (1000-10K subscribers)
After you get your first thousand subscribers on your YouTube channel, you will be on the Opal Level. This is one of the three requirements for getting access to the Partner Program for monetization . By this point, you’ll have started to develop your own style and build a personal brand. This is the time to start networking with other YouTubers and trying to find collaboration partners.
#3: Bronze Level (10K-100K subscribers)
Getting ten thousand subscribers is a big deal. By this point, you have enough of a following that they could be called a fanbase, and you can start leveraging your platform to make money through AdSense. Once you pass 10K subscribers, it starts to become easier to find brand deals and sponsorships too. YouTube will offer an additional option of Teespring for the monetized channel at this level.
Awards Level
When a verified YouTube channel reaches a specific milestone and is deemed eligible for a creator award, they are awarded a relatively flat trophy in a metal casing with a YouTube play button symbol.
#4: The Silver Creator Award (100K-1 million subscribers)
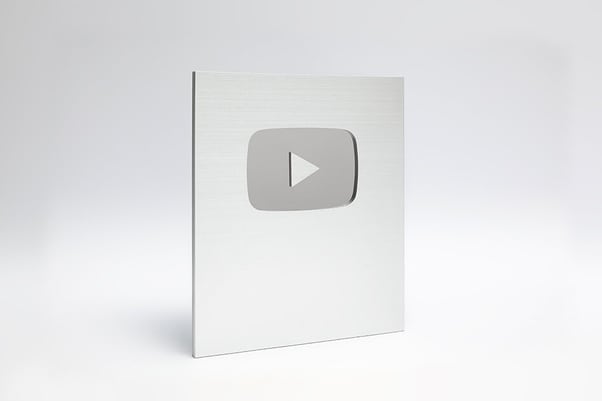
This is the first level that comes with a trophy. YouTubers with a Silver Play Button probably won’t be earning enough money from YouTube to support themselves, but they’re in a good position to start going after more lucrative brand deals. Creators at this level may be earning enough to invest in some better camera gear. Channels at this level are also eligible to apply for a digital verification badge.
#5: The Gold Creator Award (1 million-10 million subscribers)
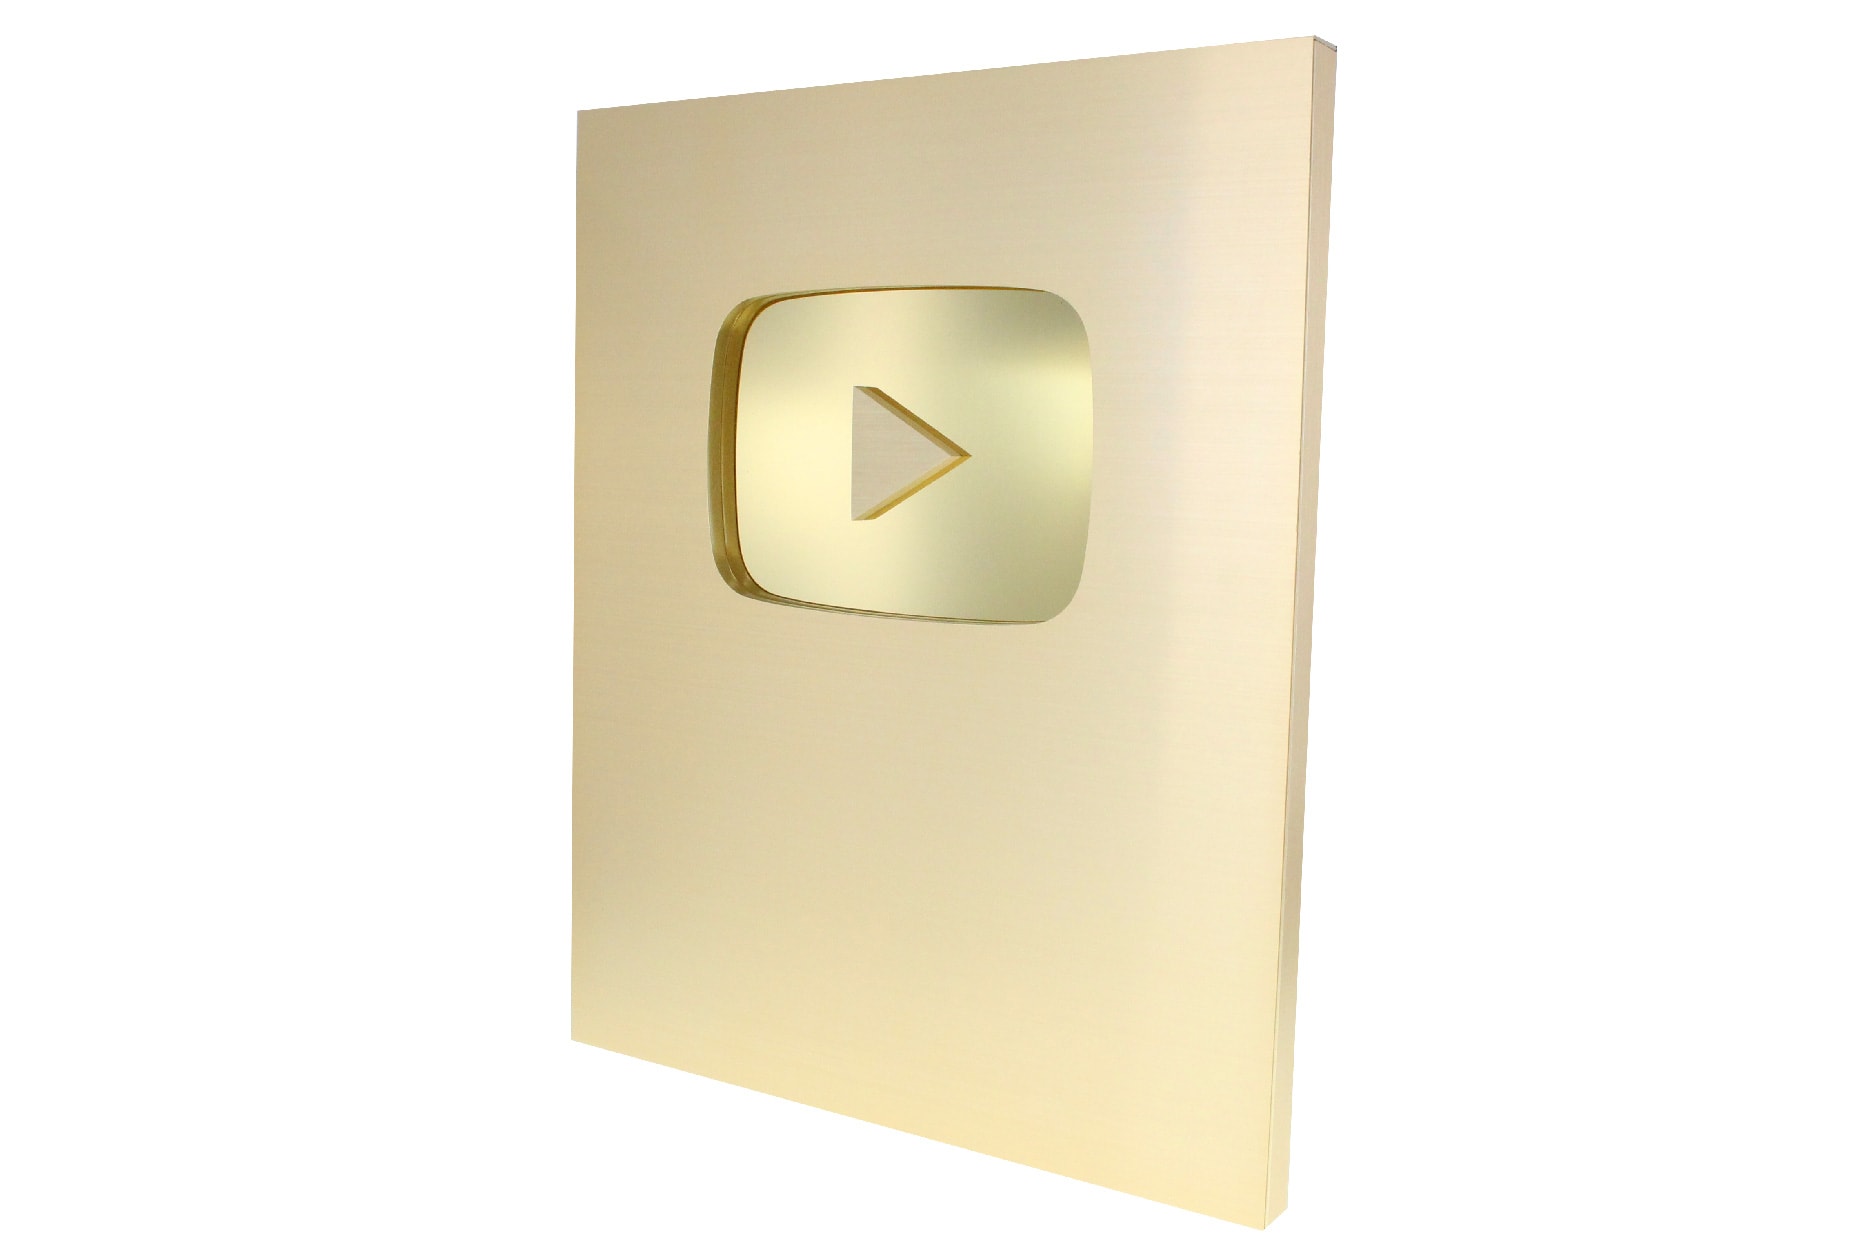
If people mean graphite when they say ‘lead,’ and alchemists turn lead into gold, then is YouTube really about alchemy?
At this level, you’re making money. When you first reach 1 million, it may still not be enough to live off of, but you’re getting close to being able to make YouTube your job (which you will probably be able to do before leaving the Gold Level). Things like your own makeup line or a book deal are not out of the question at this point.
#6: The Diamond Creator Award (10 million-50 million subscribers)
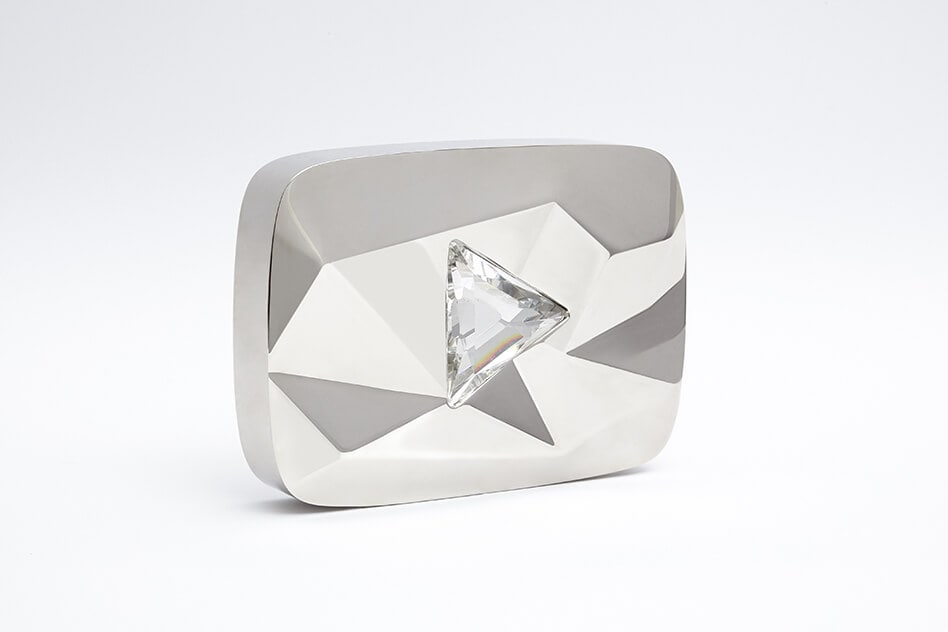
You’re a YouTube star. You’ve made it. You’re making enough money that YouTube/projects spawned from your YouTube channel support you completely, and you’ve probably got a team of helpers. Expect to be going on tours to meet and perform for your fans’ live. Also, if you didn’t have a book deal before, you almost definitely have one now.
Super High Level
The awards in these levels are absent from the Creator Awards page. Only a handful of channels achieved these levels.
#7: The Custom Creator Award (50 million subscribers)
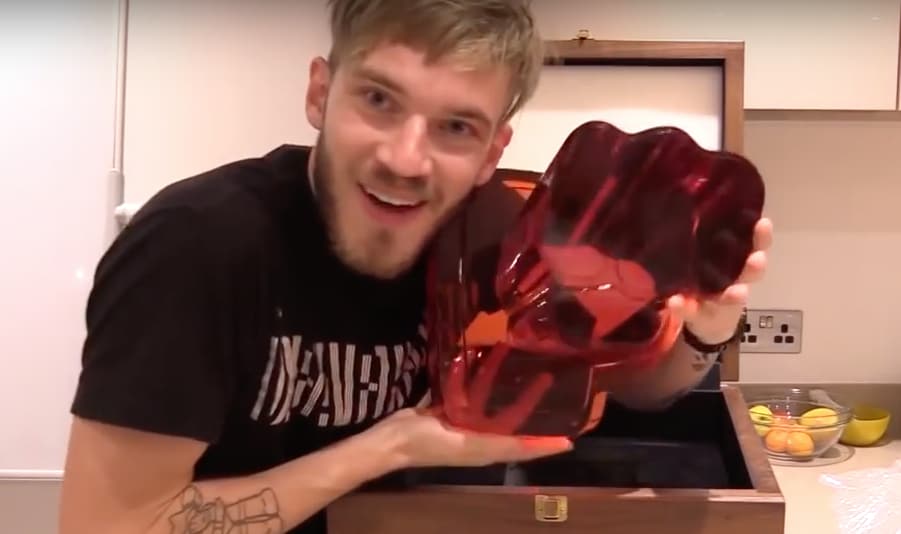
For channels whose subscribers are over 50 million, PewDiePie is the first person to ever receive this reward. It was made by the shape of his channel logo, a fist bump. He nicknamed this custom play button the Ruby Play Button. If you manage to reach this level, you are beyond being a star on YouTube and are now a bonafide pop culture phenomenon.
#8: The Red Diamond Creator Award (100 million subscribers)
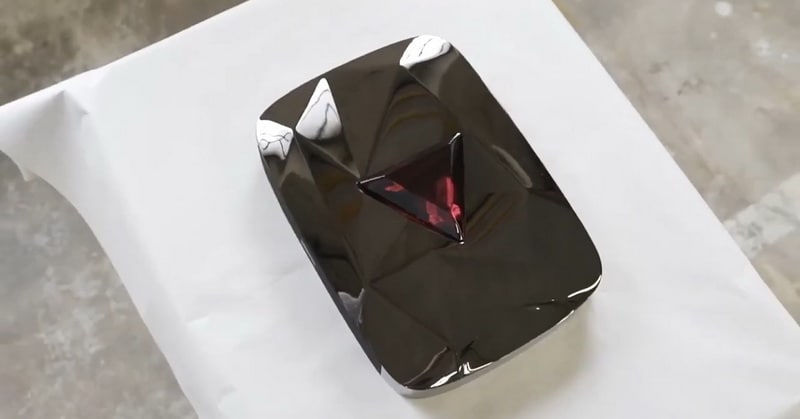
The play button at this level features a play button triangle with a large dark red crystal. If you are able to obtain the award at this level, monetization should never be for you to worry about. One hundred million subscribers mean that 1.3% of the people on this planet are watching you. You’d be a legend if you made it. As of August 2020, only PewDiePie and T-series have obtained this award.
Click here to check out the 5 most subscribed YouTubers.
Welp. Those are the YouTube subscriber awards. What level are you on?
If you want to find a video editing solution that empowers your imagination and creativity yet takes less effort, please try this robust and user-friendly video editing software Wondershare Filmora. It provides special effects, stock photo & video, sound library, etc., which will definitely enhance your productivity and helps to make monetization on YouTube much accessible.
Richard Bennett
Richard Bennett is a writer and a lover of all things video.
Follow @Richard Bennett
Richard Bennett
Dec 30, 2022• Proven solutions
YouTube rewards creators for channel growth using “Play Buttons,” YouTube Subscriber Awards that they mail to creators who have reached certain milestones such as 100,000 subscribers. Due to user demand for more recognition of smaller channels, YouTube also introduced reward levels for channels that are still growing. These lower levels don’t come with trophies, but creators who reach them should feel proud.
Here are all of YouTube’s levels, from small to big:
Benefit levels
Awards Level
[4. The Silver Creator Award](#The Silver Creator Award)
[5. The Gold Creator Award](#The Gold Creator Award)
[6. The Diamond Creator Award](#The Diamond Creator Award)
Super High Level
[7. The Custom Creator Award](#The Custom Creator Award)
[8. The Red Diamond Creator Award](#The Red Diamond Creator Award)
Want to learn how to get more subscribers and increase your level?
Benefit levels
YouTube won’t award the YouTubers of these levels with physical plaque but will offer them alternative benefits.
#1: Graphite Level (0-1000 subscribers)
Graphite is the starter level. As soon as you start a YouTube channel, you will already be on this level until you get up to 1K subscribers. During this time, you should focus on learning how YouTube works and perfecting your video production and editing skills. If your YouTube Channel subscriber is over 100, then you will be allowed to custom the URL of your channel. For more information about Custom Channel URL, please read: How to Find and Change Your YouTube Channel URL – Super Easy! >>
#2: Opal Level (1000-10K subscribers)
After you get your first thousand subscribers on your YouTube channel, you will be on the Opal Level. This is one of the three requirements for getting access to the Partner Program for monetization . By this point, you’ll have started to develop your own style and build a personal brand. This is the time to start networking with other YouTubers and trying to find collaboration partners.
#3: Bronze Level (10K-100K subscribers)
Getting ten thousand subscribers is a big deal. By this point, you have enough of a following that they could be called a fanbase, and you can start leveraging your platform to make money through AdSense. Once you pass 10K subscribers, it starts to become easier to find brand deals and sponsorships too. YouTube will offer an additional option of Teespring for the monetized channel at this level.
Awards Level
When a verified YouTube channel reaches a specific milestone and is deemed eligible for a creator award, they are awarded a relatively flat trophy in a metal casing with a YouTube play button symbol.
#4: The Silver Creator Award (100K-1 million subscribers)
This is the first level that comes with a trophy. YouTubers with a Silver Play Button probably won’t be earning enough money from YouTube to support themselves, but they’re in a good position to start going after more lucrative brand deals. Creators at this level may be earning enough to invest in some better camera gear. Channels at this level are also eligible to apply for a digital verification badge.
#5: The Gold Creator Award (1 million-10 million subscribers)
If people mean graphite when they say ‘lead,’ and alchemists turn lead into gold, then is YouTube really about alchemy?
At this level, you’re making money. When you first reach 1 million, it may still not be enough to live off of, but you’re getting close to being able to make YouTube your job (which you will probably be able to do before leaving the Gold Level). Things like your own makeup line or a book deal are not out of the question at this point.
#6: The Diamond Creator Award (10 million-50 million subscribers)
You’re a YouTube star. You’ve made it. You’re making enough money that YouTube/projects spawned from your YouTube channel support you completely, and you’ve probably got a team of helpers. Expect to be going on tours to meet and perform for your fans’ live. Also, if you didn’t have a book deal before, you almost definitely have one now.
Super High Level
The awards in these levels are absent from the Creator Awards page. Only a handful of channels achieved these levels.
#7: The Custom Creator Award (50 million subscribers)
For channels whose subscribers are over 50 million, PewDiePie is the first person to ever receive this reward. It was made by the shape of his channel logo, a fist bump. He nicknamed this custom play button the Ruby Play Button. If you manage to reach this level, you are beyond being a star on YouTube and are now a bonafide pop culture phenomenon.
#8: The Red Diamond Creator Award (100 million subscribers)
The play button at this level features a play button triangle with a large dark red crystal. If you are able to obtain the award at this level, monetization should never be for you to worry about. One hundred million subscribers mean that 1.3% of the people on this planet are watching you. You’d be a legend if you made it. As of August 2020, only PewDiePie and T-series have obtained this award.
Click here to check out the 5 most subscribed YouTubers.
Welp. Those are the YouTube subscriber awards. What level are you on?
If you want to find a video editing solution that empowers your imagination and creativity yet takes less effort, please try this robust and user-friendly video editing software Wondershare Filmora. It provides special effects, stock photo & video, sound library, etc., which will definitely enhance your productivity and helps to make monetization on YouTube much accessible.
Richard Bennett
Richard Bennett is a writer and a lover of all things video.
Follow @Richard Bennett
Also read:
- Essential Gear Picking the Very Best Among Top 9 Free Logomakers
- In 2024, Choosing a Champion DSLR or Mirrorless Camera?
- Essential YouTube-to-WebM Video Transformers for 2024
- Demystifying the World of YouTube Shorts
- YouTube Video Magic Best Tools for Effortless WebM Conversion
- 2024 Approved Beginner's Tutorial Composing YouTube Video Content
- Pro Tips for Utilizing Green Screen Effects Professionally
- [Updated] 6-Figure Success Starts with Smart #Hashtagging
- Cutting-Edge 8 Content Creators Skyrocketing Growth
- [Updated] Eco-Friendly Cities Redefining Urban Spaces for Nature
- Becoming a Wise Trader Top Video Tutorials
- 2024 Approved 10+ Best Free Video Editing Programs of 2023
- MP3 Conversion Hack YouTube to Mac's MP3 Tutorial
- Decipher YouTube's Mysteries with Advanced Insights From Social Blade
- How To Deal with YouTube Trolls and Negative Comments
- Becoming a Skin-Deep Sage Setting Up Your Beauty Channel for 2024
- In 2024, Effortless Fusion of YouTube Videos with FlV Format
- 2024 Approved Eclectic Lineup The Best Anime Channels on Youtube
- Classic Cinema Revisited Step-by-Step Video Guide for 2024
- In 2024, Bridging the Gap Incorrancing YouTube Links Within Presentation Software
- A Guide to Top Alternatives Ranking 27 Video Streamers
- In 2024, Boost Your Channel's Popularity - Optimal Post Dates
- YouTube Ad Revenue How Much Do YouTubers Make Per Ad?
- 12 Unparalleled YouTube Gamers' Intros Revealed Free or Fee for 2024
- Learn to Leverage KineMaster's Features for Maximum Gaming Fun, Then Compare
- [New] Get Organized Timely Social Media Engagement on FB (No Cost)
- Updated Enhancing PC Sound Quality with Audacity Modern Techniques and Setup for 2024
- In 2024, How to Change GPS Location on Nubia Red Magic 9 Pro+ Easily & Safely | Dr.fone
- Is GSM Flasher ADB Legit? Full Review To Bypass Your Itel P55FRP Lock
- Hassle-Free Ways to Remove FRP Lock on Samsung Galaxy F04 Phones with/without a PC
- In 2024, Different Methods To Unlock Your Apple iPhone 14
- In 2024, Unlock Cross-Platform Video Editing A Chromebook Guide
- [New] In 2024, Elevate Your Instagram Shots With Strategic Borders
- 6 Proven Ways to Unlock Vivo Y100A Phone When You Forget the Password
- Tips for Removing Fisheye From GoPro Footage
- Title: "Audio Perfection Achieved Expert Tips Without a Microphone for 2024"
- Author: Brian
- Created at : 2024-05-25 11:20:42
- Updated at : 2024-05-26 11:20:42
- Link: https://youtube-video-recordings.techidaily.com/audio-perfection-achieved-expert-tips-without-a-microphone-for-2024/
- License: This work is licensed under CC BY-NC-SA 4.0.
