
:max_bytes(150000):strip_icc():format(webp)/Flora_and_Son-f6517d3de531487e89f5e0e99192d13f.jpg)
A Beginner's Guide to Elevating Auditory Experiences on YouTube for 2024
A Beginner’s Guide to Elevating Auditory Experiences on YouTube
How to Edit Audio on YouTube

Richard Bennett
Mar 27, 2024• Proven solutions
In this article, we are going to show you how to edit audio with YouTube Video Editor, and the tips on adding your own audio file to YouTube.
- Part 1: Add your Own Audio File to YouTube Video
- Part 2: How to Edit Audio with YouTube Video Editor
Part 1: Add your Own Audio File to YouTube Video
Tools You Are Going to Need
YouTube video editor is far from meeting the needs of people who want to have more control on their audio. On the bright side, if you are interested in learning how to edit audio on YouTube, there is a solution. There are many video editors in the market that allow you to add your own music or audio files to a video. Windows Movie Maker, iMovie, Adobe Premiere, and Magisto are some of the video editors available for you to choose from. In this guide, we recommend the Wondershare Filmora video editor. Below is a quick tutorial about how to edit audio in Filmora.
 Download Mac Version ](https://tools.techidaily.com/wondershare/filmora/download/ )
Why Should You Choose Wondershare Filmora?
There are many advantages associated with the use of Wondershare Filmora. You will see that it allows you to fully edit any audio file and gain 100% control over your files. It is an integrated solution that lacks nothing in terms of efficiency and quality standards. To be more specific, Filmora offers the following unique features:
- Built-in audio editing tools that allow you to gain full control of your audio in an easy way
- Exclusive audio track that enables you to mute, detach or even de-noise the audio from video
- All audio effects can easily be adjusted with one click only
- The built-in Equalizer is capable enough to create amazing audio effects
- Directly upload your video to YouTube, Facebook or Vimeo from Wondershare Filmora
How to add audio files to YouTube video with Wondershare Filmora
Do you want to know more about audio editing? Please read this article: How to add audio to video.
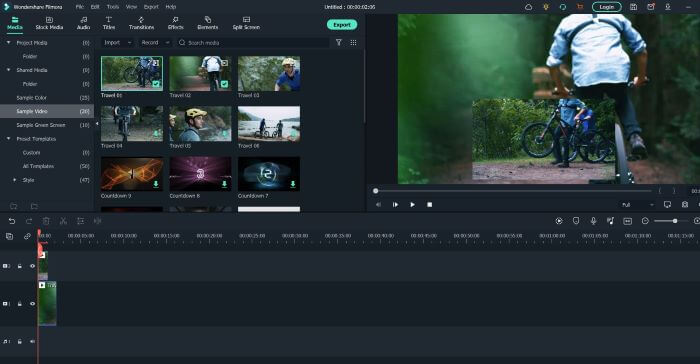
Step 1 Import Video Clips into Filmora
Filmora supports a wide range of video formats, such as MKV, MOV, AVI, WebM and MP4, you can import the video clip shot with Camera, smartphone or camcorder easily to it.
Step 2 Detach Audio
If you want to edit the original audio of the video, you can choose to split the audio file from the video by using the Audio Detach option on Wondershare Filmora. Then, the audio file will be shown in the audio track, and you can cut or trim it.

Note: If you do not want to keep the original audio file in the video, you can delete it from the audio track directly.
Step 3Add Audio Files
Wondershare Filmora offers you multiple royalty free audio effects and music in its rich audio library. What is more, you can also import your own music or audio file from your computer or iTunes. Of course, you should know that the audio should be royalty free for you to make use of. In a different situation, you cannot upload it and benefit from its quality and nature.
Step 4Edit Audio
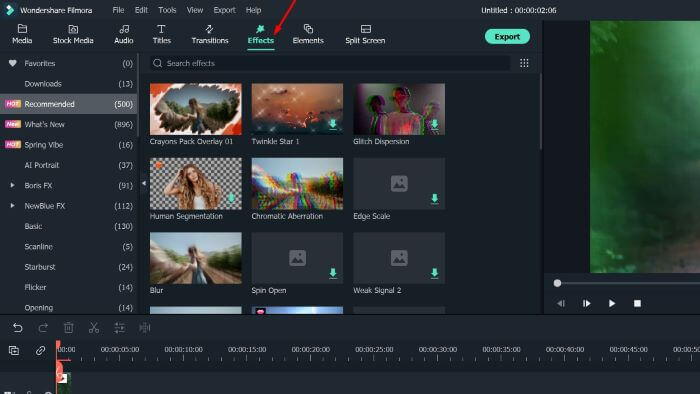
In this step, you can adjust the audio volume and pitch, etc. There are multiple options for you to benefit from, including the Audio Equalizer, Music, Mix Audio. In this way, you can make sure that the audio is exactly like you have wanted it to be. For further information as to how you can improve the sound quality of your recorded videos, you can check out: How to improve sound quality of recorded videos.
Step 5Save Your Work and Upload on YouTube
If you are satisfied with your work on the audio file and you wish to publish it, the process is quite simple. You just hit Export and select to upload the video to YouTube. After signing in to your YouTube account, you will be ready to start uploading the audio file.

In case you wish to edit the audio from an already published video, you have to download the video first. Then, you can follow the steps above to edit the audio file in Filmora. As one of the widely used video editing software for YouTubers, Filmora is here to empower your imagination. Just download the free trial version and try it now.

Part 2: How to Edit Audio with YouTube Video Editor
Unfortunately, YouTube does not allow users to upload audio files such as MP3, WAV, etc. Instead, you can only upload audio files which are offered by YouTube in the first place. Since YouTube has got a plentiful audio library, you can find a lot of audio there. In this part, we will show you how to add and edit audio with YouTube Video Editor.
You may also like: How to Add Music to YouTube Videos >>
Note: From 20th September 2017 users will no longer be able to use the complimentary editing suite. Check the best YouTube video editor alternatives from this complete guide. In the following part, I will show you how to add audio track , replace the original audio and adjust the audio position and length as well.
- Step 1: Sign in to your YouTube account
- **Step 2:**Click your profile avatar and select Creator Studio option.
- Step 3: In the left pane, go to Video Manager and then click Videos. In the Videos list, choose the video that you want to add new audio track, and then select Audio from the Edit button.

- Step 4: Now you can add or replace the audio in your video. Here you will find that there are various songs and audio files you can choose from. Click ADD TO VIDEO and the audio track will be added to the video directly.

- Step 5: Now you will see the audio track appears at the bottom of the player. Here you can trim and drag the audio bar to adjust the audio positon and length. To Trim the audio, click the beginning or the end of the audio bar and then drag it to the left or right. After trimming, drag it to meet the target position.

Conclusion
Normally, it would be better to add and edit audio to video before updating to YouTube. In this case, Filmora is highly recommended as one of the best video editor for YouTubers , which provides some royalty free music sound in the Music Library to choose from and also the audio editing tools like remove background noise from the video, add fade in and fade out effects with ease or play the video backward or fast forward.
Richard Bennett
Richard Bennett is a writer and a lover of all things video.
Follow @Richard Bennett
Richard Bennett
Mar 27, 2024• Proven solutions
In this article, we are going to show you how to edit audio with YouTube Video Editor, and the tips on adding your own audio file to YouTube.
- Part 1: Add your Own Audio File to YouTube Video
- Part 2: How to Edit Audio with YouTube Video Editor
Part 1: Add your Own Audio File to YouTube Video
Tools You Are Going to Need
YouTube video editor is far from meeting the needs of people who want to have more control on their audio. On the bright side, if you are interested in learning how to edit audio on YouTube, there is a solution. There are many video editors in the market that allow you to add your own music or audio files to a video. Windows Movie Maker, iMovie, Adobe Premiere, and Magisto are some of the video editors available for you to choose from. In this guide, we recommend the Wondershare Filmora video editor. Below is a quick tutorial about how to edit audio in Filmora.
Download Mac Version ](https://tools.techidaily.com/wondershare/filmora/download/ )
Why Should You Choose Wondershare Filmora?
There are many advantages associated with the use of Wondershare Filmora. You will see that it allows you to fully edit any audio file and gain 100% control over your files. It is an integrated solution that lacks nothing in terms of efficiency and quality standards. To be more specific, Filmora offers the following unique features:
- Built-in audio editing tools that allow you to gain full control of your audio in an easy way
- Exclusive audio track that enables you to mute, detach or even de-noise the audio from video
- All audio effects can easily be adjusted with one click only
- The built-in Equalizer is capable enough to create amazing audio effects
- Directly upload your video to YouTube, Facebook or Vimeo from Wondershare Filmora
How to add audio files to YouTube video with Wondershare Filmora
Do you want to know more about audio editing? Please read this article: How to add audio to video.
Step 1 Import Video Clips into Filmora
Filmora supports a wide range of video formats, such as MKV, MOV, AVI, WebM and MP4, you can import the video clip shot with Camera, smartphone or camcorder easily to it.
Step 2 Detach Audio
If you want to edit the original audio of the video, you can choose to split the audio file from the video by using the Audio Detach option on Wondershare Filmora. Then, the audio file will be shown in the audio track, and you can cut or trim it.
Note: If you do not want to keep the original audio file in the video, you can delete it from the audio track directly.
Step 3Add Audio Files
Wondershare Filmora offers you multiple royalty free audio effects and music in its rich audio library. What is more, you can also import your own music or audio file from your computer or iTunes. Of course, you should know that the audio should be royalty free for you to make use of. In a different situation, you cannot upload it and benefit from its quality and nature.
Step 4Edit Audio
In this step, you can adjust the audio volume and pitch, etc. There are multiple options for you to benefit from, including the Audio Equalizer, Music, Mix Audio. In this way, you can make sure that the audio is exactly like you have wanted it to be. For further information as to how you can improve the sound quality of your recorded videos, you can check out: How to improve sound quality of recorded videos.
Step 5Save Your Work and Upload on YouTube
If you are satisfied with your work on the audio file and you wish to publish it, the process is quite simple. You just hit Export and select to upload the video to YouTube. After signing in to your YouTube account, you will be ready to start uploading the audio file.
In case you wish to edit the audio from an already published video, you have to download the video first. Then, you can follow the steps above to edit the audio file in Filmora. As one of the widely used video editing software for YouTubers, Filmora is here to empower your imagination. Just download the free trial version and try it now.
Part 2: How to Edit Audio with YouTube Video Editor
Unfortunately, YouTube does not allow users to upload audio files such as MP3, WAV, etc. Instead, you can only upload audio files which are offered by YouTube in the first place. Since YouTube has got a plentiful audio library, you can find a lot of audio there. In this part, we will show you how to add and edit audio with YouTube Video Editor.
You may also like: How to Add Music to YouTube Videos >>
Note: From 20th September 2017 users will no longer be able to use the complimentary editing suite. Check the best YouTube video editor alternatives from this complete guide. In the following part, I will show you how to add audio track , replace the original audio and adjust the audio position and length as well.
- Step 1: Sign in to your YouTube account
- **Step 2:**Click your profile avatar and select Creator Studio option.
- Step 3: In the left pane, go to Video Manager and then click Videos. In the Videos list, choose the video that you want to add new audio track, and then select Audio from the Edit button.
- Step 4: Now you can add or replace the audio in your video. Here you will find that there are various songs and audio files you can choose from. Click ADD TO VIDEO and the audio track will be added to the video directly.
- Step 5: Now you will see the audio track appears at the bottom of the player. Here you can trim and drag the audio bar to adjust the audio positon and length. To Trim the audio, click the beginning or the end of the audio bar and then drag it to the left or right. After trimming, drag it to meet the target position.
Conclusion
Normally, it would be better to add and edit audio to video before updating to YouTube. In this case, Filmora is highly recommended as one of the best video editor for YouTubers , which provides some royalty free music sound in the Music Library to choose from and also the audio editing tools like remove background noise from the video, add fade in and fade out effects with ease or play the video backward or fast forward.
Richard Bennett
Richard Bennett is a writer and a lover of all things video.
Follow @Richard Bennett
YouTube Gems: Celebrating the Best Music Playback, 2023
Create High-Quality Video - Wondershare Filmora
An easy and powerful YouTube video editor
Numerous video and audio effects to choose from
Detailed tutorials are provided by the official channel
Reaction videos are slowly taking over YouTube as the most popular type of channel. Everyone loves when someone reacts to something, and it can be anything from music, games, trending topics, or even random things like orange juice. They are so popular that people tag their friends to react to the series.
Music reaction videos are becoming increasingly more popular. Instead of a standard lyric video, music reaction videos show a fan listening and singing to their favorite album or single from start to finish. There are tons of fan-made music reaction videos on YouTube, but some get hundreds of thousands or even millions of views!
In this article
01 What is a music reaction video?
02 10 Best YouTube Music Reaction Video
03 How to make a Youtube music reaction video with Filmora
What is a music reaction video?
When you are on YouTube, you will see many music reaction videos. The music reaction video is the video that is based on the song. According to the situation, the person who uploads the video reacts to the song and does something funny or crazy. Many people enjoy watching these kinds of videos because they are funny and entertaining in many ways.
The best thing about these videos is that you can learn from them. You can learn how to react in certain situations, but these situations might arise only once in your life. So, it is good to react to these funny videos and make yourself aware of what should be done in such a situation.
You can even make your music reaction video and share it with your friends on social media platforms like Facebook, Twitter, and Instagram. People will love it and appreciate it, and you can also learn how to make these kinds of videos by watching other people’s reactions.
10 Best YouTube Music Reaction Video
#1. [BANGTAN BOMB] ‘Dynamite’ MV Reaction
In this video, a famous Korean Band named BTS reacts to many different music videos from the past. People love to see their reactions, and the video has over 25M views on Youtube.
#2. Rappers React to Rich Brian ft. Ghostface Killah, Desiigner, Tory Lanez & More
In this video, many street rappers react to many famous rappers and give their views about them. The video became quite popular on Youtube and got 23M+ views.
#3. Dixie D’Amelio’s Family and Friends React to her Be Happy Music Video
In this video, many people who are relatives of Dixie D’Amelio react to her music video. She recorded the reach of each one of them and shared it with the youtube community. The video got over 20M views on youtube.
#4. Elders React To Lil Dicky - Earth
In this video, many elders react to the Lil Dick’s Music video. Their reactions are quite amusing to the audience, and the video got over 19M views on Youtube.
#5. Kids React To Eminem
In this video, some kids react to the Eminem rap music videos and give their views about rap. Some of them are amused by the rap, and some of them find it difficult to understand. Overall their reaction is worth watching. The video got over 13M views on Youtube.
#6. Do Teens Know 90s Hip Hop?
In this video, many teens listen to ‘90s hip-hop music videos, and their reactions are recorded. They are familiar with some of the songs, and some are totally new and amusing to them. The video got over 11M Views on Youtube.
#7. Big Shaq - Mans Not Hot (Music Video)- Reaction
In this video, a couple of friends react to the Mans Not Hot Music video and record their reactions. They have reacted to the video quite funny, and their reactions are very amusing. People enjoy watching their reactions. The video has over 11M views on Youtube.
#8 BTS React To Fans Watching “Boy With Luv” Music Video For The First Time
In this video, The famous Koran Band BTS reacts to their fan’s videos, watching Boy With Luv Music video for the first time. So, in this video, you will see the reaction of BTS to the reaction of their fans. The video was a hit on Youtube, and it got over 9M views.
#9 “Don’t Forget” Minecraft FNAF Animation Music Video
This is a reaction mashup video in which a lot of creators are reacting to the Don’t forget music video. You rarely get to see soo many reactions in a single video. The video is a hit and has over 9M views on Youtube.
#10 Youtubers React To Top 10 Most Disliked Music Videos Of All Time
In this video, many YouTubers react to the top 10 most disliked music videos in Youtube’s history. Their reactions are priceless, and this video is definitely worth watching. The video has over 6M views on Youtube.
How to make a Youtube music reaction video with Filmora
Reaction videos are the latest trend in the world of YouTube. So many people want to create their own reaction videos but either doesn’t have the skills to do so or don’t know how to get started. This guide should give you everything you need to get started on creating your very next reaction video.
Step 1: First of all, make sure that you have downloaded and installed the latest version of Filmora on your computer. If you haven’t already downloaded it, then you can install it from their official website.
Step 2: Run the Filmora software and when a window appears on your screen, click on the new project and select the 16:9 aspect ratio of your project.
Step 3: Now first, you need to record your reaction to a music video . You can use Filmora’s Built-In screen recorder to record your reaction along with your cam. You can also record your reactions separately and then merge them with the original music video using Filmora.
Step 4: Now import the music video on which you want to react to the Filmora library along with your reaction video. You can do this by clicking on the file, import, and import media.
Step 5: Now drag the music video from the Library and drop it into the Filmora timeline.
Step 6: Now drag your reaction video and drop it above the original music video in the track.
Step 7: Decrease the size of your reaction video by using the canvas controls in the preview window and adjusting it to any side of the window.
Step 8: If you want to keep your reaction video in a big frame and your music video in a small one, you can do the opposite.
Step 9: If you want to add any effects or call-outs to your video, you can use the rich elements library of Filmora, where you can find hundreds of interactive elements.
Step 10: Once you have finalized the video, click on the import button and save the video to your computer in your desired format. Once the video is imported, you can share it on Youtube with your audience.
For Win 7 or later (64-bit)
For macOS 10.12 or later
Conclusion
● By following the steps above and using Filmora, you will be able to produce a high-quality music reaction video that can be shared with family, friends, or even your favorite artists. All of the steps above may look complicated when separated into different actions, but they became much easier and quicker when completed together and practiced in order.
Also read:
- [New] Essential Free Services for Designing Impactful YouTube Intros
- Elevate Your Views Degrees of Rotation on YouTube - A 2023 Guide for 2024
- [Updated] Discover the Power of Proportions in YouTube Content Creation
- [New] Coordinating Multiple Channels on One Screen
- [New] Customizing Your Watch The Art of Altering YouTube Video Pace
- 2024 Approved Elevate, Create & Earn A Startup Guide for YouTube Channels
- [New] Bridging Platforms Uploading From Twitch to YouTube
- [New] Break Down Long-Form Videos The Insider's Guide to YouTube Chapter Inclusion
- [Updated] Efficient Video Marketing Incorporating Timestamps Effectively
- Elevating Gameplay Streaming Mastery for YouTubers for 2024
- 2024 Approved Efficient Fortnite Imagery Design Quickly
- [New] Cognitive Conclaves Educational YT Powerhouses
- 2024 Approved Discovering Video Producers' Digital Command Center
- [Updated] Channel Finale 101 Insider Tricks for Successful Outros
- Go Backwards A Step-by-Step for Reversing YouTube Videos
- [New] Crafting Distinctive Video Stream Names Tips for Filmora Users
- Navigating YouTube Shorts Investments
- Unveiling YouTube’s Monthly Monetization Rules
- Ultimate Livestream Guidebook Recommended Tools and Devices Compilation
- Decoding YouTube Income How Much Does Each 1,000 Viewer Earn, In 2024
- [New] Common Issues with YouTube Shorts Thumbnails
- Two Simple Tweaks for Skyrocketing YouTube Traffic
- Elevate Your Video's Discoverability - Mastering Tags for 2024
- Your Next Travel Companion Best Youtubers' List
- Global Gross Earnings of YouTube Luminaries
- Harness the Power of Your Mobile Content on YouTube, Starting Now
- [New] Curtail Unexpected YouTube Recommendations
- [Updated] Streamline Operations Ranking the Top 8 Facebook Task Managers for 2024
- 8 Ultimate Fixes for Google Play Your Realme C67 5G Isnt Compatible | Dr.fone
- [Updated] Navigating the Maze of Communication Features on Snapchat
- Updated Get Filmora for Free No Cost, No Virus, No Hassle for 2024
- All Must-Knows to Use Fake GPS GO Location Spoofer On Samsung Galaxy M54 5G | Dr.fone
- Breakthrough Tactics for Capturing Virtual Conferences
- Premier 5 Online Communities Ascending Beyond Twitter for 2024
- This is how you can recover deleted pictures from Tecno Spark 10 5G.
- New 2024 Approved This Article Will Show You How to Make a Tattoo Disappear on Your Body Magically
- Updated In 2024, Windows 10S Best Zero-Cost Video Trimming Solutions
- [New] In 2024, The Ultimate Guide to the Most Reliable Mac Recorders
- [New] 2024 Approved Epic Anime Quotes & Phrases for Viral TikTok Challenges
- [New] In 2024, 10 Premier Vimeo Extraction Programs Reviewed
- In 2024, Mastering Lock Screen Settings How to Enable and Disable on Infinix GT 10 Pro
- In 2024, Top 7 Skype Hacker to Hack Any Skype Account On your Asus ROG Phone 8 Pro | Dr.fone
- Does Samsung Galaxy Z Flip 5 has native HEVC support?
- Master List of Speech Processing Software with Top 8 Selection, Catering to Desktop PCs, Macintosh and Web Interface Usage for 2024
- Title: A Beginner's Guide to Elevating Auditory Experiences on YouTube for 2024
- Author: Brian
- Created at : 2024-05-25 11:16:04
- Updated at : 2024-05-26 11:16:04
- Link: https://youtube-video-recordings.techidaily.com/a-beginners-guide-to-elevating-auditory-experiences-on-youtube-for-2024/
- License: This work is licensed under CC BY-NC-SA 4.0.
