
:max_bytes(150000):strip_icc()/GettyImages-155159821-8881bead1d894a0b95bca3c3e288ff54.jpg)
"8 Unbeatable Zero-Price Software Choices For Online Media Makers"
8 Unbeatable Zero-Price Software Choices For Online Media Makers
The Best Free Video Editing Software for YouTube (Top 8 Reviews)

Richard Bennett
Dec 02, 2022• Proven solutions
What makes a YouTube video good? The most important element is obviously you, the creator. Your personality, ideas, and unique viewpoint are what will make your content special and turn viewers into subscribers.
The next most important thing – even more important than the camera you use – is editing.
Editing a YouTube video doesn’t have to be difficult. In fact, it should be simple. Your focus when you’re perfecting your video should be on that ‘most important thing’ we mentioned earlier – your creativity. Editing for a YouTube video should be art, not mechanical engineering.
Below is a list of the top free video editing software ranked according to how appropriate it is for YouTube videos.
| Rank | Editor | Make Cuts | Audio Features | Multiple Video Tracks | Video Effects | Intuitive Score (1-5) | Compatibility |
|---|---|---|---|---|---|---|---|
| 1. | OpenShot Video Editor | Yes | Fade In/Out, set volume levels | Yes | Transitions, text, ability to animate. Blur/Saturation/Brightness controls. | 5 | Windows, Mac, Linux |
| 2. | Shotcut | Yes | Detailed audio editing | Yes | You can customize color presets and other effects. No animations. | 4 | Windows, Mac, Linux |
| 3. | Hitfilm Express | Yes | Audio effects and transitioning. | Yes | Every imaginable picture customization. Some FX (more if you pay). Text tool. | 4 | Windows, Mac |
| 4. | VideoPad Video Editor | Yes | Noise removal, equalizer, audio effects. | Yes | Moving text, transitions, filters. | 5 | Windows |
| 5. | Lightworks | Yes | Detailed audio editing | Yes | No premade effects, but you can add text/color edit. | 3 | Windows, Mac, Linux |
| 6. | VSDC Video Editor | Yes | Some audio features blocked in free version | Yes | Filters, transitions, text, and more. | 1 | Windows |
| 7. | Machete Video Editor Lite | Yes | None | No | None | 3 | Windows |
| 8. | Avidemux | Yes | Some audio features | No | Some picture adjustments | 2 | Windows, Mac, Linux, BSD |
Ready to upgrade to a simple, powerful, paid software that’s perfect for YouTube? Check out the free trial of Wondershare Filmora . It is an advanced tool that is focused more on newbie editors who are new to the videography world but want to compete with professionals!
1. OpenShot Video Editor – Open Source (Windows, Mac, Linux)
Pros
- Easy to use
- Includes transitions
- Keyframing
- Alpha Channel
- Unlimited video tracks
OpenShot Video Editor Review
OpenShot completely lives up to the claim that it was designed to be ‘easy to use, quick to learn, and surprisingly powerful’.
The first time you use OpenShot there will be helpful tutorial notes to guide you through the program. The interface is intuitive enough that you may not always need them, but having them should erase any confusion.
All of the basic editing features, like cutting clips up, are easy to access in the timeline. You have unlimited tracks, and it’s easy to drag your clips between them. There’s a helpful magnet feature that fits clips together if you slide them together, but which still allows for blank space if you choose to leave it.
Most other functions – setting volume levels, adjusting the speed, adding movement/zoom effect – are accessible simply by right-clicking on your clip in the timeline and choosing what you want from the menu that pops up.
Is OpenShot Video Editor good for YouTube?
OpenShot is a great, free, choice for YouTubers at any editing skill level.
Beyond simply ordering your clips, OpenShot includes text and transition options within the program. You can even animate the text, and access Animated Titles if you use OpenShot in tandem with a free animation program called Blender. Titles and transitions are vital to a lot of popular YouTube styles.
OpenShot does not provide the same level of detail as the runner up, Shotcut, when it comes to color correction or audio editing. However, the features it does have (volume levels, control of saturation) will satisfy most YouTubers.
2. Shotcut – Open Source (Windows, Mac, Linux)
Pros
- Detailed audio editing
- Color grading, ability to save presets
- Fairly intuitive timeline
Shotcut Review
Shotcut delivers a smooth, detailed, editing experience for free. It is not as easy to jump into as some of the other programs on this list, but it still only takes a half-hour or so of playing around to understand it well enough to make a video. There are also tutorials up on Shotcut’s site that can help you.
You can edit using multiple video tracks in Shotcut, making it easy to combine multiple clips, and basic functions like splitting or copying clips are as easy as clicking the right icon on the toolbar.
All of the video and audio effects, including things like chroma key, you might want to apply to your video are found under the Filters menu. It will look empty when you first open it, and you have to click the plus sign to see what your options are. If you want to create a color tint (like what you might think of as an Instagram filter) then you can do that through the Color Grading option. If you want to do something like invert your colors or add an ‘old film’ look, you’ll find that here as well along with all of the audio editing features (balance, bass and treble, and gain to name just a few).
Is Shotcut good for YouTube?
Shotcut is a great choice for YouTubers. It allows you to do some advanced editing, and it’s easy to learn compared to a program targeted at professional editors.
The only complication with Shotcut for entry-level editors who will primarily use the program for YouTube might be that animations – like moving text – are not available through the program (you can add and customize text, but it just sits there). You can get them from elsewhere and use them in the program (Shotcut has an alpha channel), but it’s a bit more involved a process than simply customizing something that’s already provided.
3. Hitfilm Express – Windows, Mac
Pros
- Compositing mode (2D and 3D)
- The Most effect customization
- Helpful User Guide & tutorials
Cons
- Can be overwhelming
- Its main strength is FX, but you only get a couple for free. Most have to be bought separately.
Hitfilm Express Review
Hitfilm Express is the best free editor if you want to add special effects to your projects. OpenShot’s alpha channel will be enough for most people, but if you think of yourself as an aspiring filmmaker then it’s hard to beat Hitfilm’s range of functions.
This is an editor designed for people who want to make movies, and it’s a lot more intuitive than most professional-grade software. Film-quality FX (lasers, explosions, etc.) are available through Hitfilm Express for a reasonable price ($10-$50, depending on what you want), and even without paying extra for the packs, there’s a lot you can do to give your video a ‘film look’ using compositing layers and the multitude of customizable effects provided through the program.
Another highlight of Hitfilm Express is the extensive selection of tutorials and helpful information they have available both through YouTube videos and their User Guide. You will need those because this program can be overwhelming. It has so many functions and areas you can customize that it is easy to get lost.
That said, basic editing in Hitfilm Express is not difficult to jump into. It’s only when you start getting fancy that things get dicey.
Is Hitfilm Express good for YouTube?
Yes. It will not be the best option for everyone, but it’s not a bad option for anyone either.
If what you want to make is a vlog where you have a series of clips, and intro, and maybe a couple of title effects, then Hitfilm express might be overkill. You don’t want to have to master compositing just to add some text.
If what you want to make is a vlog that’s interrupted by an alien invasion and turns into an action sequence with lasers and falling debris, it’d be hard to do better than Hitfilm Express.
4. VideoPad Video Editor – Windows
Pros
- Easy to jump into
- Moving text
- Huge audio waveforms
- Audio and visual effects
- Lossless exports
Cons
- No longer updated
VideoPad Video Editor Review
VideoPad Video Editor is an extremely easy to use program. It may be the easiest program on this list to jump into, which you could also realistically create your entire video inside (there are easier programs, but you can only do some of your work in them). Part of its simplicity comes from not being as feature-rich as the programs ranking higher than it on this list, however.
You do not get the same range of functions with VideoPad as you do from the top 3 free editors, but it has enough to satisfy people who are just starting out. Creating moving text effects is easy, you have huge audio waves to work with while you’re syncing, and effects like transitions and filters are easy to find.
VideoPad does suffer a bit from being dated. This program is no longer being worked on, and the interface doesn’t look particularly modern. This is a bit more than a cosmetic issue because some features, while not difficult to find, are placed a bit oddly compared to other editors.
One slightly annoying feature of VideoPad is that it will prompt you to buy the commercial version sometimes (the free version is only for non-commercial use). There have been reports of exports being blocked in the free version, but I exported several times for the sake of this review and the issue never came up.
Is VideoPad Video Editor good for YouTube?
VideoPad makes a decent YouTube editor. You can jump right in and start making cuts, adding filters, and ordering your clips. If you have the kind of channel where voiceovers are important (like in gaming or makeup), then you’ll be happy with the size of the audio waves you have to work with for syncing.
The thing about VideoPad is that you’re probably going to outgrow it quickly as you become a more capable editor.
5. Lightworks – Windows, Mac, Linux
Pros
- Detailed color and audio editing
- Multicam editing
Cons
- Exports limited to 720p for the free version
- Difficult to learn compared to other free software
Lightworks Review
On their website, Lightworks claims to have an ‘intuitive interface’ and ‘easy timeline editing’. This is true if you compare it to other professional-level editing suites. Compared to the other programs on this list, Lightworks is complicated.
The first thing I attempt when I review this program is to simply split a clip, and it took me a ridiculous amount of time to figure this feature out in Lightworks (a more advanced editor could have found it faster, but these reviews are meant to help people with less experience). Lightworks does have a whole tutorial series on using the software, so if you are interested in learning to use it there is ample material out there to help you.
Lightworks has a wide range of functions (i.e. detailed audio editing and color correction), and it has been used for big movies like ‘The Wolf of Wall Street’. It is the most professional program on this list, and it’s a great free alternative to something like Adobe Premiere Pro.
Note: there is no time limit on the free version of Lightworks, but it will ask you to renew your free license every 7 days. When it says your license is ‘expired’ it isn’t kicking you off the free version, you just need to renew.
Is Lightworks good for YouTube?
Whether or not Lightworks is right for your YouTube channel depends on your goals as a video editor.
If what you want is to jump in and start making YouTube videos quickly, Lightworks might not be a great choice. It’s not an easy program to just jump into, you’ll have to either take time to learn it or accept that it’ll take some trial and error to get the hang of.
If what you want is to become a professional-level video editor, then Lightworks is a great program to start on (although, Hitfilm Express may still be better). Taking the time to learn it could certainly pay off in the long run.
However, if one of your priorities is for your YouTube channel to come across as professional, then the free version of Lightworks does have some disappointing limitations. You can only export videos in 720p, which is lower quality than viewers on YouTube expect (you probably want at least 1080p). Your output format is limited too. The royalty-free audio and video content Lightworks offers are also not free; you can just buy them through the program.
6. VSDC Video Editor – Windows
Pros
- Diagrams and charts
- How To Get Started Guide
- Lots of features
Cons
- Very confusing
- Paid features show up in the free version, but they’re blocked
Review of VSDC Video Editor
There’s a lot to like about VSDC Video Editor, but you have to do a lot of work to uncover any of it. Accessing even the most basic features is confusing.
One of the first things I tried to do as I tested the program was make a jump cut (where you cut out part of a video so the playback ‘jumps over’ the deleted segment) and, while I was able to do it, it was not an intuitive process. There is a multitude of toolbars and icons surrounding your preview window in VSDC, and none of those icons was for making cuts to your clips. To make any cuts you have to find the ‘cutting and splitting’ option under the Editor tab at the top of the page, which will open a second window in which you still cannot make any cuts. Instead what you can do is place markers, and when you click ‘apply changes’ to exit the window cuts will be made where you placed markers. There is nothing in the window to explain what the markers are for.
Other basic functions, like adding text, are just as complicated.
Is VSDC Video Editor good for YouTube?
I would not recommend VSDC for YouTube. It ranks higher than two other items on this list because they are, do to functional limitations, unable to create full YouTube videos without the support of other programs (at least realistically). You certainly could create your full YouTube video in VSDC, but it’d be a headache.
7. Machete Video Editor Lite – Windows
Pros
- Great for harvesting clips from longer footage
- Lossless exports
Cons
- Cannot swap or add audio
- Only supports two formats (AVI and WMV)
- Slightly awkward timeline
Machete Video Editor Lite Review
Machete Lite claims that you’ll be able to edit your videos “within a few minutes after downloading the program, even if you’ve never edited a video before”, and that is true. It might even be better if you haven’t edited a video before because the interface is slightly awkward if you’ve come from a program with a more traditional timeline setup. Machete Lite is easy to use for the most part, but it doesn’t work like most other editors and that can be awkward to navigate around.
Instead of seeing a timeline with all of your individual clips, Machete treats your entire video as one clip. You will only be able to see where you have inserted a separate video clip or cut out a portion of the video by watching the video back or jumping through it (Machete Lite does allow frame-by-frame scrolling). You won’t be able to see this information at a glance, and you won’t be able to adjust the lengths of clips you’ve added separately.
To take out any portion of your overall video you’ll need to find a keyframe at the beginning, set that as the beginning of your selection, then find a key frame at the end and set that as the end of your selection. You will then be able to delete that selection. This will not work if the frames you have set as the beginning and end are not considered keyframes by the program, so it can be difficult to be precise, but since the program allows you to jump through keyframes it’s not difficult to find a point that works.
Is Machete Video Editor Lite good for YouTube?
Machete Lite is not a good choice for YouTubers unless it is used in combination with another program.
It doesn’t work as a YouTube editor because you cannot edit or swap audio, the transition between clips, or create layers of videos and images.
However, the thing Machete Lite is really good at is cutting out clips from longer videos. You can create a selection of a part of your longer clip and then export it (with no quality loss) as its own video file.
This is what the Machete Lite toolbar looks like when you’ve created a selection. Tools like cut and copy which were greyed out before are now available, as is the save icon on the far right. If you click the save icon, you’ll be able to save that selection as its own video.
You can’t create a complete YouTube video in Machete Lite, but you can harvest clips to use in a different program.
8. Avidemux – Windows, Mac, Linux, BSD
Pros
- Can add subtitle files
Cons
- Not intuitive
- Doesn’t support MOV or WMV
- The website is not informative, no tutorials
Avidemux Review
Avidemux is not an easy program to jump into. I almost wrote that it couldn’t do anything besides make cuts to a clip before I saw a YouTube tutorial about how to find the contrast and brightness tools. If you decide to try it out, remember that you have to choose your output format before Avidemux will let you access tools like Hue/Saturation and Contrast (click Filters under Video Output to find them).
There are no official tutorials for Avidemux you can access from their site, so you’ll have to rely on the forums and tutorials from users if you want to learn it.
You can import multiple clips into Avidemux, but you have to import them in the order you want because you can’t drag them around the timeline after. Everything becomes one big clip.
Is Avidemux good for YouTube?
No. It has more functionality than Machete, which is ranked higher on this list, but the difference is that Machete is excellent at one thing. They both suffer from the same main weakness – you could not complete your full YouTube video either (at least not without a lot of trouble). Machete could still be useful to a YouTuber, though, because it allows for the lossless exporting of segments of clips. You can use it to harvest clips for your larger project in another program.
In theory, you could do some picture editing and snipping in Avidemux and then put your project together/add titles in another program, but your other program can probably do all that just as well if not better. Avidemux isn’t a bad program, but it doesn’t excel at anything. There are a lot of better options which are also free.
What has your experience with free video editors been like?
Richard Bennett
Richard Bennett is a writer and a lover of all things video.
Follow @Richard Bennett
Richard Bennett
Dec 02, 2022• Proven solutions
What makes a YouTube video good? The most important element is obviously you, the creator. Your personality, ideas, and unique viewpoint are what will make your content special and turn viewers into subscribers.
The next most important thing – even more important than the camera you use – is editing.
Editing a YouTube video doesn’t have to be difficult. In fact, it should be simple. Your focus when you’re perfecting your video should be on that ‘most important thing’ we mentioned earlier – your creativity. Editing for a YouTube video should be art, not mechanical engineering.
Below is a list of the top free video editing software ranked according to how appropriate it is for YouTube videos.
| Rank | Editor | Make Cuts | Audio Features | Multiple Video Tracks | Video Effects | Intuitive Score (1-5) | Compatibility |
|---|---|---|---|---|---|---|---|
| 1. | OpenShot Video Editor | Yes | Fade In/Out, set volume levels | Yes | Transitions, text, ability to animate. Blur/Saturation/Brightness controls. | 5 | Windows, Mac, Linux |
| 2. | Shotcut | Yes | Detailed audio editing | Yes | You can customize color presets and other effects. No animations. | 4 | Windows, Mac, Linux |
| 3. | Hitfilm Express | Yes | Audio effects and transitioning. | Yes | Every imaginable picture customization. Some FX (more if you pay). Text tool. | 4 | Windows, Mac |
| 4. | VideoPad Video Editor | Yes | Noise removal, equalizer, audio effects. | Yes | Moving text, transitions, filters. | 5 | Windows |
| 5. | Lightworks | Yes | Detailed audio editing | Yes | No premade effects, but you can add text/color edit. | 3 | Windows, Mac, Linux |
| 6. | VSDC Video Editor | Yes | Some audio features blocked in free version | Yes | Filters, transitions, text, and more. | 1 | Windows |
| 7. | Machete Video Editor Lite | Yes | None | No | None | 3 | Windows |
| 8. | Avidemux | Yes | Some audio features | No | Some picture adjustments | 2 | Windows, Mac, Linux, BSD |
Ready to upgrade to a simple, powerful, paid software that’s perfect for YouTube? Check out the free trial of Wondershare Filmora . It is an advanced tool that is focused more on newbie editors who are new to the videography world but want to compete with professionals!
1. OpenShot Video Editor – Open Source (Windows, Mac, Linux)
Pros
- Easy to use
- Includes transitions
- Keyframing
- Alpha Channel
- Unlimited video tracks
OpenShot Video Editor Review
OpenShot completely lives up to the claim that it was designed to be ‘easy to use, quick to learn, and surprisingly powerful’.
The first time you use OpenShot there will be helpful tutorial notes to guide you through the program. The interface is intuitive enough that you may not always need them, but having them should erase any confusion.
All of the basic editing features, like cutting clips up, are easy to access in the timeline. You have unlimited tracks, and it’s easy to drag your clips between them. There’s a helpful magnet feature that fits clips together if you slide them together, but which still allows for blank space if you choose to leave it.
Most other functions – setting volume levels, adjusting the speed, adding movement/zoom effect – are accessible simply by right-clicking on your clip in the timeline and choosing what you want from the menu that pops up.
Is OpenShot Video Editor good for YouTube?
OpenShot is a great, free, choice for YouTubers at any editing skill level.
Beyond simply ordering your clips, OpenShot includes text and transition options within the program. You can even animate the text, and access Animated Titles if you use OpenShot in tandem with a free animation program called Blender. Titles and transitions are vital to a lot of popular YouTube styles.
OpenShot does not provide the same level of detail as the runner up, Shotcut, when it comes to color correction or audio editing. However, the features it does have (volume levels, control of saturation) will satisfy most YouTubers.
2. Shotcut – Open Source (Windows, Mac, Linux)
Pros
- Detailed audio editing
- Color grading, ability to save presets
- Fairly intuitive timeline
Shotcut Review
Shotcut delivers a smooth, detailed, editing experience for free. It is not as easy to jump into as some of the other programs on this list, but it still only takes a half-hour or so of playing around to understand it well enough to make a video. There are also tutorials up on Shotcut’s site that can help you.
You can edit using multiple video tracks in Shotcut, making it easy to combine multiple clips, and basic functions like splitting or copying clips are as easy as clicking the right icon on the toolbar.
All of the video and audio effects, including things like chroma key, you might want to apply to your video are found under the Filters menu. It will look empty when you first open it, and you have to click the plus sign to see what your options are. If you want to create a color tint (like what you might think of as an Instagram filter) then you can do that through the Color Grading option. If you want to do something like invert your colors or add an ‘old film’ look, you’ll find that here as well along with all of the audio editing features (balance, bass and treble, and gain to name just a few).
Is Shotcut good for YouTube?
Shotcut is a great choice for YouTubers. It allows you to do some advanced editing, and it’s easy to learn compared to a program targeted at professional editors.
The only complication with Shotcut for entry-level editors who will primarily use the program for YouTube might be that animations – like moving text – are not available through the program (you can add and customize text, but it just sits there). You can get them from elsewhere and use them in the program (Shotcut has an alpha channel), but it’s a bit more involved a process than simply customizing something that’s already provided.
3. Hitfilm Express – Windows, Mac
Pros
- Compositing mode (2D and 3D)
- The Most effect customization
- Helpful User Guide & tutorials
Cons
- Can be overwhelming
- Its main strength is FX, but you only get a couple for free. Most have to be bought separately.
Hitfilm Express Review
Hitfilm Express is the best free editor if you want to add special effects to your projects. OpenShot’s alpha channel will be enough for most people, but if you think of yourself as an aspiring filmmaker then it’s hard to beat Hitfilm’s range of functions.
This is an editor designed for people who want to make movies, and it’s a lot more intuitive than most professional-grade software. Film-quality FX (lasers, explosions, etc.) are available through Hitfilm Express for a reasonable price ($10-$50, depending on what you want), and even without paying extra for the packs, there’s a lot you can do to give your video a ‘film look’ using compositing layers and the multitude of customizable effects provided through the program.
Another highlight of Hitfilm Express is the extensive selection of tutorials and helpful information they have available both through YouTube videos and their User Guide. You will need those because this program can be overwhelming. It has so many functions and areas you can customize that it is easy to get lost.
That said, basic editing in Hitfilm Express is not difficult to jump into. It’s only when you start getting fancy that things get dicey.
Is Hitfilm Express good for YouTube?
Yes. It will not be the best option for everyone, but it’s not a bad option for anyone either.
If what you want to make is a vlog where you have a series of clips, and intro, and maybe a couple of title effects, then Hitfilm express might be overkill. You don’t want to have to master compositing just to add some text.
If what you want to make is a vlog that’s interrupted by an alien invasion and turns into an action sequence with lasers and falling debris, it’d be hard to do better than Hitfilm Express.
4. VideoPad Video Editor – Windows
Pros
- Easy to jump into
- Moving text
- Huge audio waveforms
- Audio and visual effects
- Lossless exports
Cons
- No longer updated
VideoPad Video Editor Review
VideoPad Video Editor is an extremely easy to use program. It may be the easiest program on this list to jump into, which you could also realistically create your entire video inside (there are easier programs, but you can only do some of your work in them). Part of its simplicity comes from not being as feature-rich as the programs ranking higher than it on this list, however.
You do not get the same range of functions with VideoPad as you do from the top 3 free editors, but it has enough to satisfy people who are just starting out. Creating moving text effects is easy, you have huge audio waves to work with while you’re syncing, and effects like transitions and filters are easy to find.
VideoPad does suffer a bit from being dated. This program is no longer being worked on, and the interface doesn’t look particularly modern. This is a bit more than a cosmetic issue because some features, while not difficult to find, are placed a bit oddly compared to other editors.
One slightly annoying feature of VideoPad is that it will prompt you to buy the commercial version sometimes (the free version is only for non-commercial use). There have been reports of exports being blocked in the free version, but I exported several times for the sake of this review and the issue never came up.
Is VideoPad Video Editor good for YouTube?
VideoPad makes a decent YouTube editor. You can jump right in and start making cuts, adding filters, and ordering your clips. If you have the kind of channel where voiceovers are important (like in gaming or makeup), then you’ll be happy with the size of the audio waves you have to work with for syncing.
The thing about VideoPad is that you’re probably going to outgrow it quickly as you become a more capable editor.
5. Lightworks – Windows, Mac, Linux
Pros
- Detailed color and audio editing
- Multicam editing
Cons
- Exports limited to 720p for the free version
- Difficult to learn compared to other free software
Lightworks Review
On their website, Lightworks claims to have an ‘intuitive interface’ and ‘easy timeline editing’. This is true if you compare it to other professional-level editing suites. Compared to the other programs on this list, Lightworks is complicated.
The first thing I attempt when I review this program is to simply split a clip, and it took me a ridiculous amount of time to figure this feature out in Lightworks (a more advanced editor could have found it faster, but these reviews are meant to help people with less experience). Lightworks does have a whole tutorial series on using the software, so if you are interested in learning to use it there is ample material out there to help you.
Lightworks has a wide range of functions (i.e. detailed audio editing and color correction), and it has been used for big movies like ‘The Wolf of Wall Street’. It is the most professional program on this list, and it’s a great free alternative to something like Adobe Premiere Pro.
Note: there is no time limit on the free version of Lightworks, but it will ask you to renew your free license every 7 days. When it says your license is ‘expired’ it isn’t kicking you off the free version, you just need to renew.
Is Lightworks good for YouTube?
Whether or not Lightworks is right for your YouTube channel depends on your goals as a video editor.
If what you want is to jump in and start making YouTube videos quickly, Lightworks might not be a great choice. It’s not an easy program to just jump into, you’ll have to either take time to learn it or accept that it’ll take some trial and error to get the hang of.
If what you want is to become a professional-level video editor, then Lightworks is a great program to start on (although, Hitfilm Express may still be better). Taking the time to learn it could certainly pay off in the long run.
However, if one of your priorities is for your YouTube channel to come across as professional, then the free version of Lightworks does have some disappointing limitations. You can only export videos in 720p, which is lower quality than viewers on YouTube expect (you probably want at least 1080p). Your output format is limited too. The royalty-free audio and video content Lightworks offers are also not free; you can just buy them through the program.
6. VSDC Video Editor – Windows
Pros
- Diagrams and charts
- How To Get Started Guide
- Lots of features
Cons
- Very confusing
- Paid features show up in the free version, but they’re blocked
Review of VSDC Video Editor
There’s a lot to like about VSDC Video Editor, but you have to do a lot of work to uncover any of it. Accessing even the most basic features is confusing.
One of the first things I tried to do as I tested the program was make a jump cut (where you cut out part of a video so the playback ‘jumps over’ the deleted segment) and, while I was able to do it, it was not an intuitive process. There is a multitude of toolbars and icons surrounding your preview window in VSDC, and none of those icons was for making cuts to your clips. To make any cuts you have to find the ‘cutting and splitting’ option under the Editor tab at the top of the page, which will open a second window in which you still cannot make any cuts. Instead what you can do is place markers, and when you click ‘apply changes’ to exit the window cuts will be made where you placed markers. There is nothing in the window to explain what the markers are for.
Other basic functions, like adding text, are just as complicated.
Is VSDC Video Editor good for YouTube?
I would not recommend VSDC for YouTube. It ranks higher than two other items on this list because they are, do to functional limitations, unable to create full YouTube videos without the support of other programs (at least realistically). You certainly could create your full YouTube video in VSDC, but it’d be a headache.
7. Machete Video Editor Lite – Windows
Pros
- Great for harvesting clips from longer footage
- Lossless exports
Cons
- Cannot swap or add audio
- Only supports two formats (AVI and WMV)
- Slightly awkward timeline
Machete Video Editor Lite Review
Machete Lite claims that you’ll be able to edit your videos “within a few minutes after downloading the program, even if you’ve never edited a video before”, and that is true. It might even be better if you haven’t edited a video before because the interface is slightly awkward if you’ve come from a program with a more traditional timeline setup. Machete Lite is easy to use for the most part, but it doesn’t work like most other editors and that can be awkward to navigate around.
Instead of seeing a timeline with all of your individual clips, Machete treats your entire video as one clip. You will only be able to see where you have inserted a separate video clip or cut out a portion of the video by watching the video back or jumping through it (Machete Lite does allow frame-by-frame scrolling). You won’t be able to see this information at a glance, and you won’t be able to adjust the lengths of clips you’ve added separately.
To take out any portion of your overall video you’ll need to find a keyframe at the beginning, set that as the beginning of your selection, then find a key frame at the end and set that as the end of your selection. You will then be able to delete that selection. This will not work if the frames you have set as the beginning and end are not considered keyframes by the program, so it can be difficult to be precise, but since the program allows you to jump through keyframes it’s not difficult to find a point that works.
Is Machete Video Editor Lite good for YouTube?
Machete Lite is not a good choice for YouTubers unless it is used in combination with another program.
It doesn’t work as a YouTube editor because you cannot edit or swap audio, the transition between clips, or create layers of videos and images.
However, the thing Machete Lite is really good at is cutting out clips from longer videos. You can create a selection of a part of your longer clip and then export it (with no quality loss) as its own video file.
This is what the Machete Lite toolbar looks like when you’ve created a selection. Tools like cut and copy which were greyed out before are now available, as is the save icon on the far right. If you click the save icon, you’ll be able to save that selection as its own video.
You can’t create a complete YouTube video in Machete Lite, but you can harvest clips to use in a different program.
8. Avidemux – Windows, Mac, Linux, BSD
Pros
- Can add subtitle files
Cons
- Not intuitive
- Doesn’t support MOV or WMV
- The website is not informative, no tutorials
Avidemux Review
Avidemux is not an easy program to jump into. I almost wrote that it couldn’t do anything besides make cuts to a clip before I saw a YouTube tutorial about how to find the contrast and brightness tools. If you decide to try it out, remember that you have to choose your output format before Avidemux will let you access tools like Hue/Saturation and Contrast (click Filters under Video Output to find them).
There are no official tutorials for Avidemux you can access from their site, so you’ll have to rely on the forums and tutorials from users if you want to learn it.
You can import multiple clips into Avidemux, but you have to import them in the order you want because you can’t drag them around the timeline after. Everything becomes one big clip.
Is Avidemux good for YouTube?
No. It has more functionality than Machete, which is ranked higher on this list, but the difference is that Machete is excellent at one thing. They both suffer from the same main weakness – you could not complete your full YouTube video either (at least not without a lot of trouble). Machete could still be useful to a YouTuber, though, because it allows for the lossless exporting of segments of clips. You can use it to harvest clips for your larger project in another program.
In theory, you could do some picture editing and snipping in Avidemux and then put your project together/add titles in another program, but your other program can probably do all that just as well if not better. Avidemux isn’t a bad program, but it doesn’t excel at anything. There are a lot of better options which are also free.
What has your experience with free video editors been like?
Richard Bennett
Richard Bennett is a writer and a lover of all things video.
Follow @Richard Bennett
Vloggers’ Ultimate Gear List #17-100
17 Best Lights and Lighting Equipment for YouTube Videos
Richard Bennett
Mar 27, 2024• Proven solutions
Great lighting is important if you want people to watch your YouTube videos from start to finish. Viewers want to be able to see you clearly and will click away if they cannot. Natural light works great, and it’s cheap, so if it is possible you might want to consider vlogging outside. Of course, not every type of vlog is suited to the outdoors.
Unfortunately, it is unlikely you will be able to get good quality light from the lamps and ceiling lights in your home. Floor lamps can be useful for filling shadows or backlighting but are not usually powerful enough to use as your main light. Natural light is, so one way you can get around needing a lot of lighting equipment is to use a window as your main light. This is not always possible, though. If you are going to vlog from inside your house then there is a good chance you will need to invest in some lighting equipment.
- Part 1: Best Types of Lightning Equipment for YouTube Videos
- Part 2: What Should Good Lighting Equipment Feature?
- Part 3: Best Lights and Lighting Equipment for YouTube Video Shooting
Part 1: Best Types of Lightning Equipment for YouTube Videos
Every video no matter how long or short depends on light, more than anything else. The natural light sources are often not powerful enough to light a scene you’re trying to capture, so to avoid having to deal with underexposed footage, the best solution is to use artificial lighting. Even if you want the light in your video to be completely natural, you still have to figure out a way to get rid of shadows, which brings us back to different types of lighting equipment that can be used to increase the quality of the footage you’re producing.
1. Softbox Lights
Shooting videos with only natural light will put a lot of challenges in front of you, and the best way to overcome them is to use softbox lights. These natural light emulators mimic the natural light by using diffusion panels to make the light look softer and less artificial.
Softbox lights enable you to direct light to the exact spot in the shot, and they make lighting subjects and particular parts of a scene much easier. Softboxes are available in all shapes and sizes at very reasonable prices, and they are a standard part of the equipment used for the production of YouTube videos.
2. Umbrella Lights
The newcomers to the world of YouTube video production are going to love using these lights. The umbrella lights provide a much broader source of light than the softbox lights and they are frequently used to light the entire scene. You can also add extra light on the video’s subject if you’re looking to get a more balanced shot.
They are portable and quite handy if you often shoot in different locations since you can easily pack and carry them to wherever you plan on shooting your next YouTube video.
3. Ring Lights
Although they are most frequently used for fashion and beauty videos, ring lights are a great option whenever you need to make sure that the subjects of the video are perfectly lit. These circular lights have an amount in the center, so the camera’s point of view is identical to the direction from which the light is coming.
Ring lights are powerful enough to provide light for an entire scene, and they also work nicely as a catch or fill light. Some of the most popular YouTubers like Casy Neistat or PewDiePie use ring lights in their videos.
Part 2: What Should Good Lighting Equipment Feature?
Now that you know which types of lights are commonly used on YouTube video sets, you can start looking at models that best fit your demands. There are thousands of different studio lights on the market, but only the best offer features that make the light setup process easier and faster. So before buying your lighting equipment, you should make sure that it has the following features.
1. Adjustable Beam Spread
The equipment you use should allow you to control how wide the light is spreading. This is particularly useful when you want to light just one subject in the shot while keeping the rest in the dark. Lights with an adjustable beam spread to give you versatility and enable you to adapt to a wider range of scenes.
2. The Height of the Light Stand
Most lighting kits include stands, but not all stands allow you to change the height at which the light is positioned. This can largely limit your options on the set, which is why you need to check if the stand is adjustable. You’ll also want to do a background check on the stand’s durability, because low-quality stands may cause damage to the lights and other equipment.
3. Portability
How portable your lighting equipment should be is directly related to the genre of YouTube videos you want to produce. If you are planning on shooting in studio conditions, then portability is not such an important factor, but if you want to shoot at a different location every day then portability becomes something you simply must consider.
4. Accessories
Most lightning kits include a number of handy accessories that help you achieve better results. Reflectors, barn doors, diffusers, scrims, and mounting accessories are all commonly featured in high-quality lighting kits, and you shouldn’t buy a kit that doesn’t offer at least some of the accessories we mentioned here.
5. All About Reflectors/Diffusers
White reflectors are used to simply bounce light. Silver reflectors make light a bit colder-looking, and gold reflectors give things a slightly warmer, more glamourous, look. Black and translucent ‘reflectors’ are not really for bouncing light. The black reflector blocks light, which is useful if you are trying to focus your main light so it is only lighting you and not everything behind you. The translucent reflector is actually a diffuser. Diffusers are usually set up between you and your main light to soften it and make it easier on your eyes.
Reflectors are used to bounce light towards your subject. They are great for filling shadows created by your main light. This reflector is five reflectors in one: silver, gold, black, white, and translucent.
Part 3: Best Lights and Lighting Equipment for YouTube Videos
Consumer-level camera sensors are nowhere close to being as sensitive to light as our eyes. So a scene that may look sufficiently lit to our eyes may be too dark for the camera. When you’re shooting video indoors, you’ll need additional lighting equipment. Here are some of the top seventeen best lighting equipment for YouTubers.
List of the Top 5 Best On-Camera LED Lights
What is an On-Camera LED Light?
On-Camera LED lights are LED lights that can be mounted directly onto your camera’s hot/cold shoe (the little bracket on the top of a lot of DSLR cameras). On-camera LED lights are great for on-the-go YouTubers and YouTubers short on recording space because these lights are small and portable.
1. Julius Studio 160 LED Light with 4 Color Filters
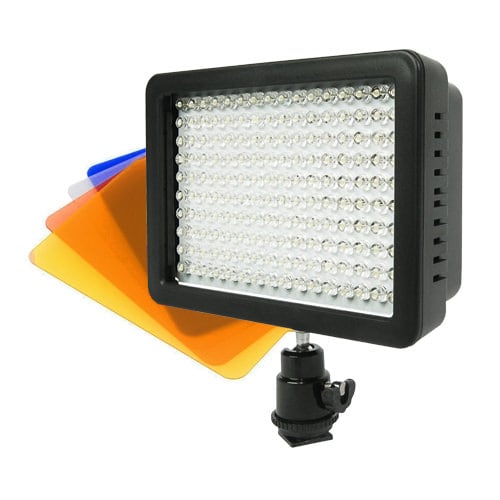
The Julius Studio 160 LED light not only can be mounted on any digital camera that has a hot/cold shoe but it can also be mounted on light stands so you can keep the same light setting even if you are moving the camera around. This lighting equipment also comes with four color filters so that you can control the color temperature of your light.
2. Viltrox L116B highest RA CRI95 LED Light Panel
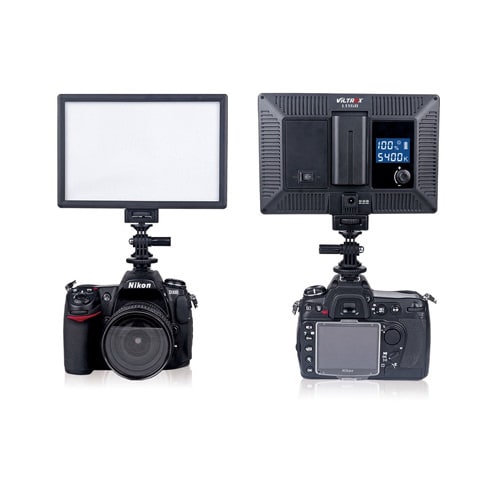
The VILTROX L116B LED light panel is a powerful piece of on-camera lighting equipment. As you can see from the back view of this light panel, you can see how much battery you have left as well as digitally set the color temperature of your light. It also features PWM light adjustment technology that reduces power consumption. As this equipment comes with an AC adapter, you can choose to use this outdoors or indoors.
3. Chromo Inc CI55000230 Macro Ring 48 LED Power Light
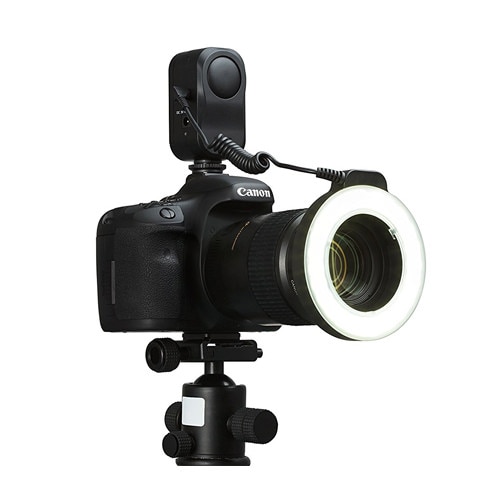
If you’re looking for an on-camera ring light, Chromo Inc’s macro ring light is a great option. This ring light mounts onto the lens of your SLR camera and its power source (two AA batteries) attaches to your camera’s hot/cold shoe. Get that nice-looking ring light reflection in your eyes as you film with this portable ring light!
4. Neewer CN-216 216PCS LED Dimmable Ultra High Power Panel
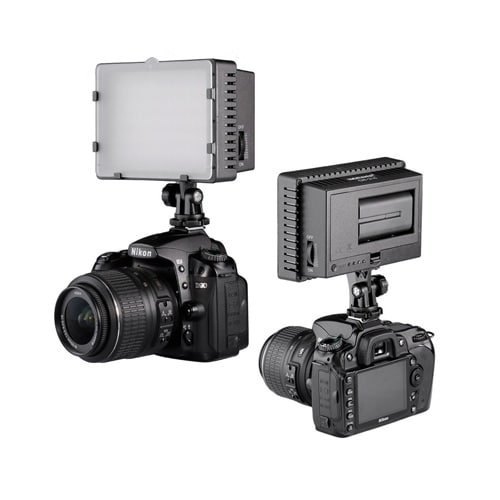
The Neewer 216 PCS LED dimmable light panel is powerful lighting equipment at a cheap price. You can adjust the color temperature of this light from 3200K up 5400K. This piece of equipment is only battery-powered, but you do have the option to either use six AA batteries or specific Sony NP series batteries, or Panasonic CGR-D16S rechargeable batteries.
5. Neewer 160 LED CN-160 Dimmable Ultra High Power Panel
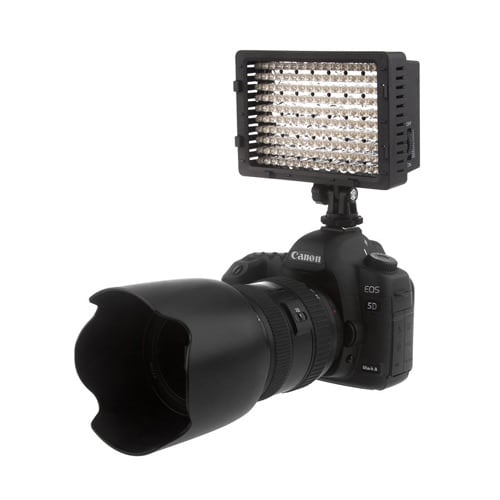
This light is Neewer’s cheaper version of the CN-216. Instead of having 216 LED light bulbs, this light has 160 LED light bulbs. Other than the number of light bulbs, the two light panels are pretty much the same.
List of the Top 5 Best LED Ring Lights
LED ring lights are called ring lights because of their ring-like shape. The opening in the ring allows you to position your camera right in the center of this lighting equipment. These lights are great if you don’t have a lot of space.
1. Diva Ring Light Super Nova
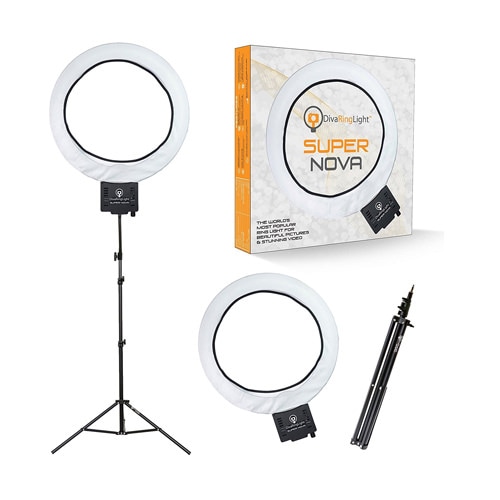
The Diva ring light is a great ring light for divas, make-up artists, and anyone else wanting to look good right in front of the camera! This LED ring light has a dimming knob so that you can adjust the brightness of your light. It also comes with a cloth for you to diffuse your light (so that your light will be softer) and a gooseneck and z-bracket attachment if you want to use your camera and ring light with just one tripod.
2. Prismatic Halo Ring Light
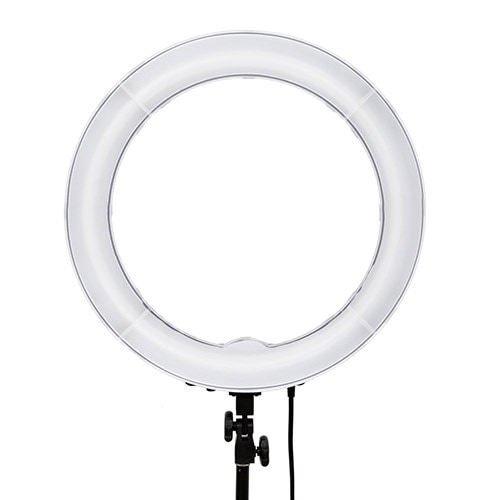
The Prismatic Halo ring light is another great ring light option. It comes with a canvas travel bag, making it easier to store away or take around with you. The 110-120 VAC, 5400K light bulb produces light that can be dimmed as well. The Prismatic Halo Ring kit doesn’t include a light stand.
3. Neewer Dimmable 18” Ring Light
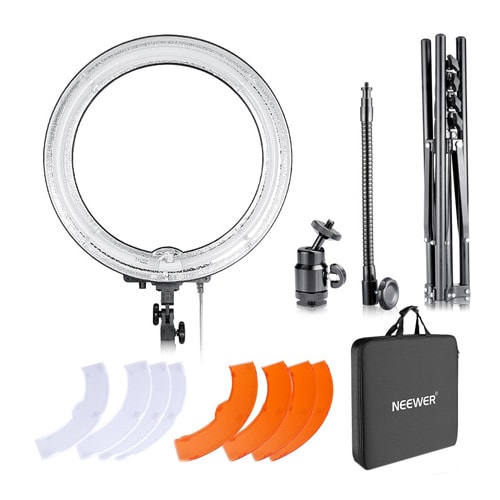
The 18-inch light ring uses fluorescent light. In addition, this kit includes a 59-inch light stand as well as white and orange filters and a hot shoe adapter that extends the capabilities of this affordable LED ring light kit.
4. FalconEyes DVR-300
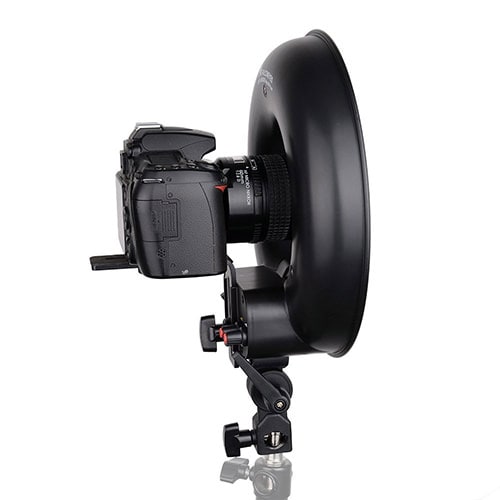
With 300 pcs LED and 150 yellow color and 150 white-color lights, FalconEyes DVR-300 is one of the best ring lights currently available on the market. It also features two control dials that enable you to adjust the color of the light the device produces and a white diffuser that makes the light softer.
5. Neewer 14″ Ring Light
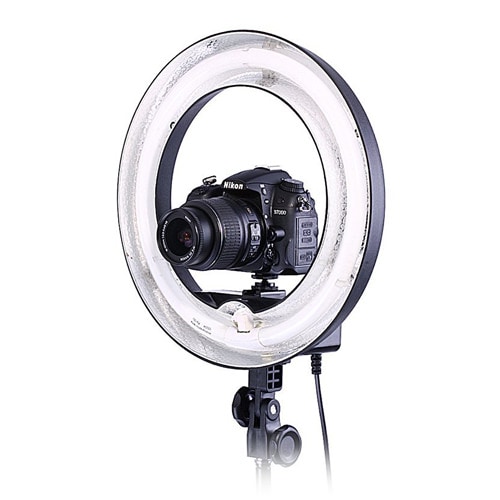
The 10-inch inner rim diameter may seem small when compared with larger ring lights that offer more room to operate. The Neewer Camera Ring Light is undimmable and has 50W power. The ring light uses an AC adapter, which makes it difficult to use when filming outside of a studio.
List of the Top 2 Best Softbox Video Lights
A softbox is commonly used by photographers and videographers to simulate natural light. This effect is achieved with the aid of a diffusion panel that is placed around the light source that produces continuous light. Softboxes are often less expensive than other professional lighting equipment which makes them a great option if you are working on a budget.
1. StudioFX 2400 Watt Softbox
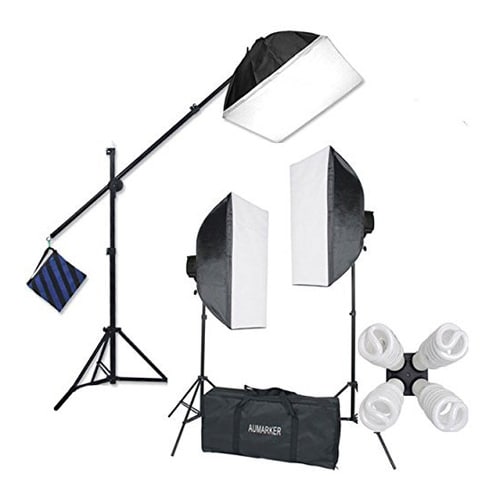
This lighting system contains two 16x24-inch softboxes and an overhead hair light boom softbox. The stands for all three softboxes are included in the kit. Each light head is capable of holding up to four bulbs.
2. Fancierstudio 2400 Watt Professional Lighting Kit
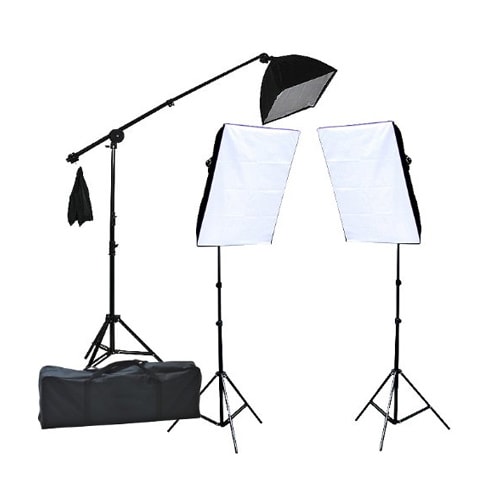
This is a standard light setup you want to use when recording interviews, product reviews, or vlogs. It contains two 16x24-inch and one 16x16-inch softbox light that all have their own stands. Each lighthead can hold four 5500K fluorescent or daylight bulbs that are perfectly suited for work in studio conditions.
List of the Top 5 Best Umbrella Video Lights
Unlike ring lights or softboxes that provide directional light, the umbrella video lights basically bounce the light off a reflecting surface onto a subject and enable you to get a more balanced light in your videos. They are often combined with other lighting equipment to create natural scenes without hard shadows.
1. LimoStudio 700W Photography Softbox Light Lighting Kit
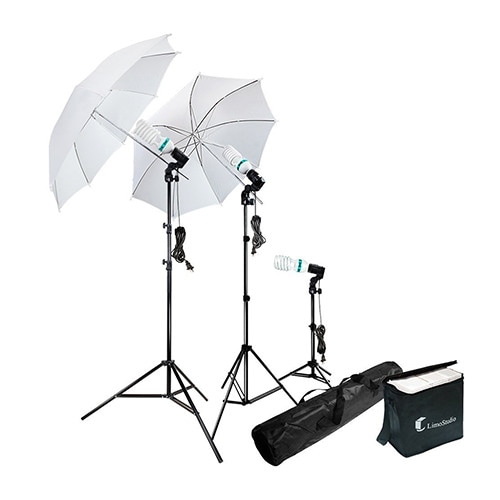
In addition to three lamps (two white umbrellas with 86-inch light stands and one 28-inch light stand), this kit also comes with three 45W CFL bulbs. The lamps can be tilted upward or downward, so you can find the best light position for your shot. The 9-foot cords can be used with standard 110/120V USA sockets.
2. Neewer 8.5ft x 10ft Background With 600W Umbrella Kit
Besides featuring two umbrellas and two softboxes, this kit also includes a 6x9 feet background that is perfectly suited for video production in a home-based studio. This umbrella kit uses 45W bulbs that generate natural light and have an approximate color value of 5500K. However, both umbrellas and softboxes can hold just one bulb.
3. Emart 600W Studio Photography Photo/Video Portrait Kit
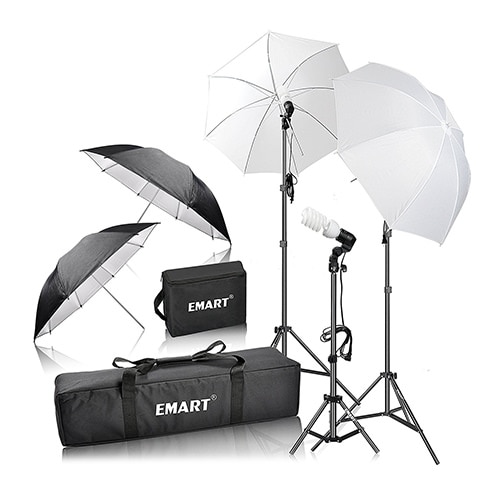
Chances are that you won’t need much more than what this photo/video kit has to offer. Emart’s 600W kit includes two white and two black/silver 33-inch umbrellas as well as two 83-inch light stands and a smaller 33-inch light stand. The heavy-duty carry case can store the entire kit.
4. LINCO 600W Photography/Video Continuous Lighting Kit
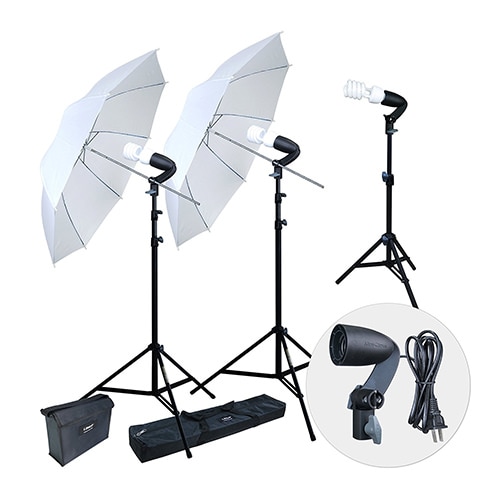
The Linco 600W continuous lighting kit contains two white translucent umbrellas that generate soft light, which is quite useful if you want to get even skin tones in your videos. The kit has three lamps that use 5500K 40W bulbs and light stands you can easily carry to any filming location.
5. Emart 1575W Umbrella Lighting Kit With Translucent White & Black/Silver & Black/Gold
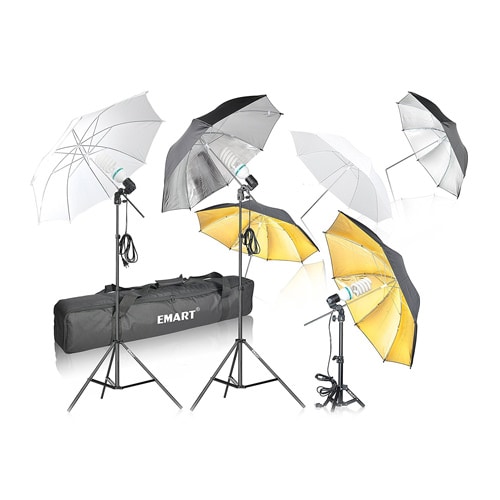
The greatest advantage of this Emart 1575 W Lightning kit is the three pairs of 33-inch diameter translucent/white, black/silver, and black/gold umbrellas. The 105W daylight bulbs provide enough light to work even under the most difficult light conditions, while the lightweight stands enable you to use this kit outside of your studio.
Besides the best lighting equipment, we have also summarized some tips and tricks for lighting , you should check it as well. If you find the video lighting isn’t good after recording the video, you can still improve it by adjusting brightness in post-production. Wondershare Filmora video editor features the Auto enhance feature, which can adjust the video color and brightness with one click. You can download the free trial to try it out.


Richard Bennett
Richard Bennett is a writer and a lover of all things video.
Follow @Richard Bennett
Richard Bennett
Mar 27, 2024• Proven solutions
Great lighting is important if you want people to watch your YouTube videos from start to finish. Viewers want to be able to see you clearly and will click away if they cannot. Natural light works great, and it’s cheap, so if it is possible you might want to consider vlogging outside. Of course, not every type of vlog is suited to the outdoors.
Unfortunately, it is unlikely you will be able to get good quality light from the lamps and ceiling lights in your home. Floor lamps can be useful for filling shadows or backlighting but are not usually powerful enough to use as your main light. Natural light is, so one way you can get around needing a lot of lighting equipment is to use a window as your main light. This is not always possible, though. If you are going to vlog from inside your house then there is a good chance you will need to invest in some lighting equipment.
- Part 1: Best Types of Lightning Equipment for YouTube Videos
- Part 2: What Should Good Lighting Equipment Feature?
- Part 3: Best Lights and Lighting Equipment for YouTube Video Shooting
Part 1: Best Types of Lightning Equipment for YouTube Videos
Every video no matter how long or short depends on light, more than anything else. The natural light sources are often not powerful enough to light a scene you’re trying to capture, so to avoid having to deal with underexposed footage, the best solution is to use artificial lighting. Even if you want the light in your video to be completely natural, you still have to figure out a way to get rid of shadows, which brings us back to different types of lighting equipment that can be used to increase the quality of the footage you’re producing.
1. Softbox Lights
Shooting videos with only natural light will put a lot of challenges in front of you, and the best way to overcome them is to use softbox lights. These natural light emulators mimic the natural light by using diffusion panels to make the light look softer and less artificial.
Softbox lights enable you to direct light to the exact spot in the shot, and they make lighting subjects and particular parts of a scene much easier. Softboxes are available in all shapes and sizes at very reasonable prices, and they are a standard part of the equipment used for the production of YouTube videos.
2. Umbrella Lights
The newcomers to the world of YouTube video production are going to love using these lights. The umbrella lights provide a much broader source of light than the softbox lights and they are frequently used to light the entire scene. You can also add extra light on the video’s subject if you’re looking to get a more balanced shot.
They are portable and quite handy if you often shoot in different locations since you can easily pack and carry them to wherever you plan on shooting your next YouTube video.
3. Ring Lights
Although they are most frequently used for fashion and beauty videos, ring lights are a great option whenever you need to make sure that the subjects of the video are perfectly lit. These circular lights have an amount in the center, so the camera’s point of view is identical to the direction from which the light is coming.
Ring lights are powerful enough to provide light for an entire scene, and they also work nicely as a catch or fill light. Some of the most popular YouTubers like Casy Neistat or PewDiePie use ring lights in their videos.
Part 2: What Should Good Lighting Equipment Feature?
Now that you know which types of lights are commonly used on YouTube video sets, you can start looking at models that best fit your demands. There are thousands of different studio lights on the market, but only the best offer features that make the light setup process easier and faster. So before buying your lighting equipment, you should make sure that it has the following features.
1. Adjustable Beam Spread
The equipment you use should allow you to control how wide the light is spreading. This is particularly useful when you want to light just one subject in the shot while keeping the rest in the dark. Lights with an adjustable beam spread to give you versatility and enable you to adapt to a wider range of scenes.
2. The Height of the Light Stand
Most lighting kits include stands, but not all stands allow you to change the height at which the light is positioned. This can largely limit your options on the set, which is why you need to check if the stand is adjustable. You’ll also want to do a background check on the stand’s durability, because low-quality stands may cause damage to the lights and other equipment.
3. Portability
How portable your lighting equipment should be is directly related to the genre of YouTube videos you want to produce. If you are planning on shooting in studio conditions, then portability is not such an important factor, but if you want to shoot at a different location every day then portability becomes something you simply must consider.
4. Accessories
Most lightning kits include a number of handy accessories that help you achieve better results. Reflectors, barn doors, diffusers, scrims, and mounting accessories are all commonly featured in high-quality lighting kits, and you shouldn’t buy a kit that doesn’t offer at least some of the accessories we mentioned here.
5. All About Reflectors/Diffusers
White reflectors are used to simply bounce light. Silver reflectors make light a bit colder-looking, and gold reflectors give things a slightly warmer, more glamourous, look. Black and translucent ‘reflectors’ are not really for bouncing light. The black reflector blocks light, which is useful if you are trying to focus your main light so it is only lighting you and not everything behind you. The translucent reflector is actually a diffuser. Diffusers are usually set up between you and your main light to soften it and make it easier on your eyes.
Reflectors are used to bounce light towards your subject. They are great for filling shadows created by your main light. This reflector is five reflectors in one: silver, gold, black, white, and translucent.
Part 3: Best Lights and Lighting Equipment for YouTube Videos
Consumer-level camera sensors are nowhere close to being as sensitive to light as our eyes. So a scene that may look sufficiently lit to our eyes may be too dark for the camera. When you’re shooting video indoors, you’ll need additional lighting equipment. Here are some of the top seventeen best lighting equipment for YouTubers.
List of the Top 5 Best On-Camera LED Lights
What is an On-Camera LED Light?
On-Camera LED lights are LED lights that can be mounted directly onto your camera’s hot/cold shoe (the little bracket on the top of a lot of DSLR cameras). On-camera LED lights are great for on-the-go YouTubers and YouTubers short on recording space because these lights are small and portable.
1. Julius Studio 160 LED Light with 4 Color Filters
The Julius Studio 160 LED light not only can be mounted on any digital camera that has a hot/cold shoe but it can also be mounted on light stands so you can keep the same light setting even if you are moving the camera around. This lighting equipment also comes with four color filters so that you can control the color temperature of your light.
2. Viltrox L116B highest RA CRI95 LED Light Panel
The VILTROX L116B LED light panel is a powerful piece of on-camera lighting equipment. As you can see from the back view of this light panel, you can see how much battery you have left as well as digitally set the color temperature of your light. It also features PWM light adjustment technology that reduces power consumption. As this equipment comes with an AC adapter, you can choose to use this outdoors or indoors.
3. Chromo Inc CI55000230 Macro Ring 48 LED Power Light
If you’re looking for an on-camera ring light, Chromo Inc’s macro ring light is a great option. This ring light mounts onto the lens of your SLR camera and its power source (two AA batteries) attaches to your camera’s hot/cold shoe. Get that nice-looking ring light reflection in your eyes as you film with this portable ring light!
4. Neewer CN-216 216PCS LED Dimmable Ultra High Power Panel
The Neewer 216 PCS LED dimmable light panel is powerful lighting equipment at a cheap price. You can adjust the color temperature of this light from 3200K up 5400K. This piece of equipment is only battery-powered, but you do have the option to either use six AA batteries or specific Sony NP series batteries, or Panasonic CGR-D16S rechargeable batteries.
5. Neewer 160 LED CN-160 Dimmable Ultra High Power Panel
This light is Neewer’s cheaper version of the CN-216. Instead of having 216 LED light bulbs, this light has 160 LED light bulbs. Other than the number of light bulbs, the two light panels are pretty much the same.
List of the Top 5 Best LED Ring Lights
LED ring lights are called ring lights because of their ring-like shape. The opening in the ring allows you to position your camera right in the center of this lighting equipment. These lights are great if you don’t have a lot of space.
1. Diva Ring Light Super Nova
The Diva ring light is a great ring light for divas, make-up artists, and anyone else wanting to look good right in front of the camera! This LED ring light has a dimming knob so that you can adjust the brightness of your light. It also comes with a cloth for you to diffuse your light (so that your light will be softer) and a gooseneck and z-bracket attachment if you want to use your camera and ring light with just one tripod.
2. Prismatic Halo Ring Light
The Prismatic Halo ring light is another great ring light option. It comes with a canvas travel bag, making it easier to store away or take around with you. The 110-120 VAC, 5400K light bulb produces light that can be dimmed as well. The Prismatic Halo Ring kit doesn’t include a light stand.
3. Neewer Dimmable 18” Ring Light
The 18-inch light ring uses fluorescent light. In addition, this kit includes a 59-inch light stand as well as white and orange filters and a hot shoe adapter that extends the capabilities of this affordable LED ring light kit.
4. FalconEyes DVR-300
With 300 pcs LED and 150 yellow color and 150 white-color lights, FalconEyes DVR-300 is one of the best ring lights currently available on the market. It also features two control dials that enable you to adjust the color of the light the device produces and a white diffuser that makes the light softer.
5. Neewer 14″ Ring Light
The 10-inch inner rim diameter may seem small when compared with larger ring lights that offer more room to operate. The Neewer Camera Ring Light is undimmable and has 50W power. The ring light uses an AC adapter, which makes it difficult to use when filming outside of a studio.
List of the Top 2 Best Softbox Video Lights
A softbox is commonly used by photographers and videographers to simulate natural light. This effect is achieved with the aid of a diffusion panel that is placed around the light source that produces continuous light. Softboxes are often less expensive than other professional lighting equipment which makes them a great option if you are working on a budget.
1. StudioFX 2400 Watt Softbox
This lighting system contains two 16x24-inch softboxes and an overhead hair light boom softbox. The stands for all three softboxes are included in the kit. Each light head is capable of holding up to four bulbs.
2. Fancierstudio 2400 Watt Professional Lighting Kit
This is a standard light setup you want to use when recording interviews, product reviews, or vlogs. It contains two 16x24-inch and one 16x16-inch softbox light that all have their own stands. Each lighthead can hold four 5500K fluorescent or daylight bulbs that are perfectly suited for work in studio conditions.
List of the Top 5 Best Umbrella Video Lights
Unlike ring lights or softboxes that provide directional light, the umbrella video lights basically bounce the light off a reflecting surface onto a subject and enable you to get a more balanced light in your videos. They are often combined with other lighting equipment to create natural scenes without hard shadows.
1. LimoStudio 700W Photography Softbox Light Lighting Kit
In addition to three lamps (two white umbrellas with 86-inch light stands and one 28-inch light stand), this kit also comes with three 45W CFL bulbs. The lamps can be tilted upward or downward, so you can find the best light position for your shot. The 9-foot cords can be used with standard 110/120V USA sockets.
2. Neewer 8.5ft x 10ft Background With 600W Umbrella Kit
Besides featuring two umbrellas and two softboxes, this kit also includes a 6x9 feet background that is perfectly suited for video production in a home-based studio. This umbrella kit uses 45W bulbs that generate natural light and have an approximate color value of 5500K. However, both umbrellas and softboxes can hold just one bulb.
3. Emart 600W Studio Photography Photo/Video Portrait Kit
Chances are that you won’t need much more than what this photo/video kit has to offer. Emart’s 600W kit includes two white and two black/silver 33-inch umbrellas as well as two 83-inch light stands and a smaller 33-inch light stand. The heavy-duty carry case can store the entire kit.
4. LINCO 600W Photography/Video Continuous Lighting Kit
The Linco 600W continuous lighting kit contains two white translucent umbrellas that generate soft light, which is quite useful if you want to get even skin tones in your videos. The kit has three lamps that use 5500K 40W bulbs and light stands you can easily carry to any filming location.
5. Emart 1575W Umbrella Lighting Kit With Translucent White & Black/Silver & Black/Gold
The greatest advantage of this Emart 1575 W Lightning kit is the three pairs of 33-inch diameter translucent/white, black/silver, and black/gold umbrellas. The 105W daylight bulbs provide enough light to work even under the most difficult light conditions, while the lightweight stands enable you to use this kit outside of your studio.
Besides the best lighting equipment, we have also summarized some tips and tricks for lighting , you should check it as well. If you find the video lighting isn’t good after recording the video, you can still improve it by adjusting brightness in post-production. Wondershare Filmora video editor features the Auto enhance feature, which can adjust the video color and brightness with one click. You can download the free trial to try it out.
Richard Bennett
Richard Bennett is a writer and a lover of all things video.
Follow @Richard Bennett
Also read:
- 2024 Approved Becoming a Master Unboxer Strategies and Insights for Success
- [New] Become a Profitable Channel with YTP2024 Mastery
- [New] Dynamic and Simple Building a Subscriber Button for YouTube Using Filmora
- Trailblazers Designing Marvel's Digital Playground
- In 2024, Crafting Comedy The Art of Parody Videos
- Youtube's Glamour Guild Comprehensive Style Compendium
- [Updated] How to Edit YouTube Videos in Windows Movie Maker
- IGTV VS YouTube Should Video Content Creators Use One Platform or The Other?
- In 2024, Essential Guide to Writing Click-Worthy Youtube Titles
- Unveiling the Path to Your YouTube Comments on Devices
- [New] Enhancing Clarity & Comprehensibility Adding On-Screen Captions in Video Projects
- The Ultimate Guide to Cost-Free CGI Mastery via 4 YouTube Experts' Insights
- In 2024, Enhancing YouTube Beauty Mastering Video Color Dynamics
- In 2024, Era's Endwatchers Top YouTube Viewership
- Optimal Video Balance Top Stabilizer Brands
- In 2024, Cutting-Edge Editing A Roadmap for High-Quality YouTube Sounds
- 2024 Approved Efficient Editing for Quick YouTube Content
- Ultimate Guide to Beauty on YouTube - Gear, Makeup Tutorials, and More
- In 2024, Elevate Your Channel Vision Selecting Ideal Content Strategies
- [Updated] Digital Artisans Gathering Haven
- [New] Cut Costs, Boost Creativity Learn the Secrets of Green Screen Artistry From 4 Leading Educators
- Smooth Streaming Elite Stabilizers Reviewed
- Master YouTube Monetization Tips to Boost Income via Shorts
- Accelerating or Slowing Down YouTube Videos Playback for 2024
- YouTube Ad Artistry at Its Peak Discover the Elite
- Cozy Up Your Videos Best Winter Bg's Revealed for 2024
- [New] Elevating Video Marketing with YouTube Thumbnails
- Enhance Video Production - 7 Best Free Sounds for Editors for 2024
- [Updated] Best Screen Recorder for YouTube
- In 2024, Ensuring Authenticity of Your YouTube Account
- Creating High-Impact YT Cover Images for 2024
- Optimizing Profits on YouTube Studio for All-Device Users
- 2024 Approved Essential Free Tools Convert YouTube Audio to MP3 on iPhone
- 2024 Approved Capture Chill Vibes Top Winter Bg Ideas for YT
- [Updated] Downloading YouTube's Iconic Icons via Web, Windows/Mac Methods
- Clearing Up Confusion Understanding Digital Rights Management (DRM) for 2024
- How to Choose Between Youtubers' Game Entrance Tutorials (Cost Included?)
- 2024 Approved Becoming a Billionaire on the Blockchain Non-Ad Profits on YouTube
- 2024 Approved Crafting Comedy The Art of Parody Videos
- In 2024, Ace Your Reel Rankings by Following Leading TikTok Strategies
- Streaming Showdown Twitch's Challenge to YouTube
- [Updated] Prime Fareless Streaming & Recording Software
- [Updated] In 2024, Ultimate Guide for Du Recorder Features and Review
- In 2024, Top 12 Prominent Vivo T2x 5G Fingerprint Not Working Solutions
- New Detailed Vimeo Video Overview Featuring Aspect Ratio
- Updated Control Playback Speed in Premiere Pro for 2024
- [Updated] Decoding App Dynamics An In-Depth Analysis of TikTok & Snap's Similarities for 2024
- In 2024, How to use Pokemon Go Joystick on Realme C55? | Dr.fone
- New In 2024, 7 Best Voice Editing Apps for Android Users
- [New] Accessing Your Twitter History for 2024
- [Updated] 2024 Approved Secrets for HD Streaming on the World's Largest Social Network
- In 2024, The Ultimate Guide to Free Video Looping Software for Windows and Mac
- Visual Voyage 7 Iconic Collage Strategies
- How To Restore Missing Contacts Files from Motorola Moto G04.
- In 2024, Top 12 Prominent Samsung Galaxy A14 4G Fingerprint Not Working Solutions
- Sci-Fi Virtual Horizons A Selection of Epic Movies in the Metaverse Realm
- [Updated] Innovative Solutions Exceeding Standard FBX Recorders for 2024
- A Comprehensive Guide to iCloud Unlock From iPhone 14 Pro Max Online
- 8 Ultimate Fixes for Google Play Your ZTE Blade A73 5G Isnt Compatible | Dr.fone
- In 2024, For People Wanting to Mock GPS on Oppo A58 4G Devices | Dr.fone
- Is GSM Flasher ADB Legit? Full Review To Bypass Your Infinix Phone FRP Lock
- Can't play MP4 files on Galaxy S23
- In 2024, AddROM Bypass An Android Tool to Unlock FRP Lock Screen For your Motorola Defy 2
- New Group Thunderous Applause Trend
- [New] In 2024, Direct Sharing Twitch Live Links for Facebook Friends
- New In 2024, Final Cut Pro X Title Tutorial A Step-by-Step Guide
- [Updated] Tasty Treats From Popular TikTok Chefs for 2024
- In 2024, Where Is the Best Place to Catch Dratini On Vivo Y27s | Dr.fone
- Title: "8 Unbeatable Zero-Price Software Choices For Online Media Makers"
- Author: Brian
- Created at : 2024-05-25 11:15:57
- Updated at : 2024-05-26 11:15:57
- Link: https://youtube-video-recordings.techidaily.com/8-unbeatable-zero-price-software-choices-for-online-media-makers/
- License: This work is licensed under CC BY-NC-SA 4.0.
