
:max_bytes(150000):strip_icc():format(webp)/laptop-2443739-5b55bc7c46e0fb00378df55b.jpg)
"2024 Approved EpicEditor Hub Innovative PC Cutting with Tunes"
EpicEditor Hub: Innovative PC Cutting with Tunes
The online world is steadily shifting from static photos to videos and it is quite evident from the social media users. Everyone prefers uploading short videos with music to get more attention rather than uploading a collection of photos. You can join multiple video clips and add background music as well as make a slideshow video with audio. You will require a video editor with music to get the job done.
There are different types of video editors available where you can upload photos and video clips along with songs and music. You turn them into an eye-catching music video instantly with different video effects and animations. Starting from online video editors with music to standalone video editing software, here is the list of the top 10 best video editors for creating and editing videos with music like a professional.
Part 1. Best music video editors for PC
1. Filmora
System compatibility: Windows 11/10/8/7 and Mac
Rating: 4.7/5
Wondershare Filmora is the best video editor with music. It is a premium software where you get all the features and functionalities you need to make and edit music videos like a pro. The software lets you capture screen video, webcam video, external audio as well as voiceover. Therefore, you can use your own music or song in the background of your video.
When it comes to video editing, all the standard tools are available for music video creation. There are loads of transitions, effects, elements, audio and titles available. Besides, there is a dedicated stock media library available. You can import and export different file formats and publish 4K videos as well. Here are the top features of Wondershare Filmora.
For Win 7 or later (64-bit)
For macOS 10.12 or later
- Drag and drop all media files for video creation.
- Easy timeline for organizing media files and editing them quickly.
- Crop, trim, split, cut, and combine media files.
- Wide range of video transitions and audio effects.
- Different motion elements, titles, and stock media files.
- Keyframing, noise removal, video stabilization options.
- Super intuitive user interface for all users.

2. Windows Movie Maker
System compatibility: Windows 11, 10
Rating: 4.0/5
If you are Windows user and you are looking for a free video editor with song, Windows Movie Maker is the perfect app you can get from Microsoft Store. Even though it comes free, the video editor is quite powerful. You can crop, trim, join video clips and add text and music to your video. There are image filters available for photo enhancement as well as transitions to apply in the video.
There are in-built music tracks available and it supports importing a wide range of media files. You can avail animated pan and zoom feature for photos and adjust volume and speed. There is also a Pro version available that supports 4K video and better project management as well as advanced tools. Here are the top features of Windows Movie Maker.
- Rotate, trim, flip, and join video clips to make music video.
- Make video from photos and add in-built or external music files.
- Add titles, credits, texts, stickers, as well as pan-zoom animation.
- Wide range of transition effects and photo filters available.
- Supports importing and exporting different file formats.
- Pro version supports 4K resolution and offers exclusive quick tools.

3. Blender
System compatibility: Windows 11, 10, 8.1 macOS 10.13+, Linux.
Rating: 4.5/5
If you are looking for an open-source video editor, Blender is the best choice. It is completely free to use and it comes with all the standard features for creating and editing music videos. The software is particularly popular for modelling, sculpting, rendering and creating animation-based videos. The video editor contains 32 slots where you can add your media files to create the video.
Blender allows you to change video speed, adjust different layers in the videos and add preferred transitions. Moreover, there are masks and filters available to enhance video content. The advance options of audio mixing and keyframing will surely come handy for advanced users. Here are the top features of Blender video editor.
- Cut, split, trim, and join videos clips.
- Color grading, photo filters and custom text options.
- Add effects, transitions, and animations to your video.
- Live visualization options for advanced users.
- Motion tracking, scene stabilization and compositing options.

4. Adobe Premiere Pro
System compatibility: Windows 10 and 11.
Rating: 4.5/5
Adobe Premiere Pro is the best video editor for professionals. The software has a slightly steep learning curve and it requires a high-end computer. Therefore, it is useful for you when you are serious about making professional-quality music video. In fact, Adobe Premiere Pro is widely used in the music video and video creation industry.
Adobe Premiere Pro is the perfect combination of standard and advanced video editing options. You can edit various video files at the same time. In fact, it is perfect for a team to work on your music video files. You can edit VR videos, multi-cam videos as well 3D videos. You can edit your photos, video clips and audio files perfectly as per your requirements. Here are the top features of Adobe Premiere Pro.
- Trim, split, crop, merge, adjust speed, color correction options.
- Edit video clips and audio files minutely with comparison view.
- Auto color correction, auto reframe, and configurable user interface.
- Editing advanced videos like VR and 3D as well as advance audio editor.
- Supports importing and exporting different media file formats.

5. Final Cut Pro
System compatibility: macOS 10.14 or higher
Rating: 4.4/5
Final Cut Pro for Mac users is equivalent to Adobe Premium Pro for Windows users. It is widely used by video creators to edit your videos and add effects and audio to get the desired result. You get the standard as well as the advanced video editing options and features. You can publish your music video at high resolution, and the software takes minimum time for rendering.
Final Cut Pro allows editing 3D, VR, multi-cam, and 360-degree videos. There are loads of effects, filters, and presets available to apply to your video clips and photos to create a music video. The presence of cinematic mode and object tracker could be useful for creating out-of-the-box videos. Here are the top features of Final Cut Pro.
- Trim, split, crop, change speed, color correction, and multi-cam video editing.
- Amazing cinematic mode to enhance music video content and quality.
- Add external music file and edit the music file as required.
- Proper organization tool for team to work collaboratively.
- Background rendering feature saves a lot of time in video processing.
- Publish your music video in high resolution without long processing time.

7. Clido
System compatibility: Windows, Mac, Linux, Android and iOS.
Rating: 4.5/5
Clido is an online platform where you get different tools for video editing. It is a premium online video editor with music and hence, it is suitable for all those who want to edit video with music on the go. There is no need to download any software and you can merge, compress, resize, cut and crop video as per your requirements.
You can even rotate and adjust speed to create slow-motion videos. To create your music video, you have to opt for its video maker where you can use photos, video clips, GIFs, and music. You can edit the duration for photos and video clips as per your preference. There is also a slideshow maker available for instant video creation with your photos. Here are the top features of Clido that you should be aware of.
- Flip, loop, reverse, crop, resize, and merge video clips.
- Create slideshow videos and add music of your choice instantly.
- Wide range of presets and video filters.
- Change aspect ratios to make videos for different platforms.
- Super intuitive user interface and secure platform.
- Compatible with popular browsers and suitable for PC and phone users

8. Adobe Express
System compatibility: Windows, Mac, Linux, Android, and iOS.
Rating: 4.5/5
Adobe Express is an online video editor with song that is compatible with popular browsers and all devices. You can create stunning music videos in a few minutes. There are various templates available to get started and finish your stunning music video in a few steps. There is a wide range of stock images available from Adobe. You get access to effects, textures, overlays, and filters to enhance video quality.
You can also remove background from your photos to improve video content. There are various graphical elements available to add to your video. You can resize your video to be compatible with online platforms and different devices. The software allows you to play with texts and titles by offering various customization options. Here are the top features of Adobe Express.
- Loads of video templates for quick video creation.
- Resize photos, convert to different formats, and remove background.
- Trim and crop video clips, convert to GIFs, resize as required.
- Access to stock media library of Adobe and experiment with text.
- Make video for different online platforms and different devices.

9. VideoPad
System compatibility: Windows 11, 10, 8, 7, Vista and XP & Mac OS X 10.5 or above.
Rating: 4.1/5
VideoPad from NCH Software is a simple but powerful video editor. You can create stunning music videos and edit them as per your requirements. The user interface is suitable for beginners and you can avail different video effects and transitions to apply to your video. There are also dedicated audio tools available to edit audio and music files.
The software supports editing 360-degree and 3D videos. In fact, it supports over 60 video file formats for importing them. The software is equally useful in video optimization and you can share the edited video on different online platforms as per your preference. Here are the top features of VideoPad.
- Standard video and audio editing options available.
- Mix music track, add audio effects, and record your narration.
- Wide range of templates for intro, outro and others for branding.
- Supports up to 4K resolution and lossless export.
- Video optimization, stabilization, color correction, and change speed.
- Upload videos directly to YouTube, Vimeo, and Flickr and cloud platforms.

Part 2. How to make a music video on my own?
In order to make a music video file, you will need a video editor, video clips or photos, and background music. We recommend Wondershare Filmora as the best video editor for music videos. Transfer the video clips or photos with which you want to make the music video from your phone to your computer. Choose and download the music file that you would want to add to the background of your video. You can also record your own song or music and use the same for background music. Here are the steps to make a music video on your own.
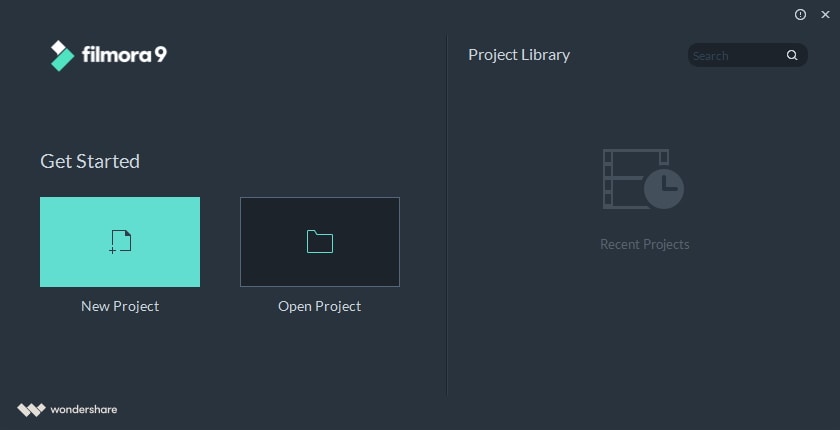
Step 1: Download and install Filmora as per your operating system. Launch the software and click on New Project.
Step 2: Drag and drop the video clips, photos, music and audio files on Project Media folder.
Step 3: Drag and drop the video clips or photos on Timeline and arrange them in order as you want in your video. You can stretch the duration of the photos and videos as per your requirements.

Step 4: Go to Transition option at the top bar and drag and drop the transition of your choice on the photos or video clips so that the transition is eye-catching and eye-soothing.

Step 5: Drag and drop the music file from Project Media folder on the Timeline below the photos or video clips. You can stretch or trim the music track to suit the video length. Check out Audio, Effects, Elements and Titles section at the top bar so that you can incorporate them in your music video to be more appealing and engaging.

Step 6: Preview the music video on Filmora and click on Export button to save it on your hard drive as per your selected file format.

Part 3. Related FAQs
1. How do I add music to video editor on PC?
Different video editor offers different options to add music. Some allow you to drag and drop music file from your hard drive to video editor directly. Otherwise, you have to browse and go to the location and select the music file. Online video editor also allows uploading music file from cloud storage.
2. What software is best for editing music videos?
Wondershare Filmora is the best video editor for editing music videos. This is because it is a premium software with all the features and functionalities that you need to edit your music video. The user interface is intuitive for everyone to enhance video content and quality.
3. What is the best app to put music to videos?
InShot is the best app to put music to videos for Android users. For iOS users, Video Maker with Music Editor is the best app to use where all the required features are readily available.
For macOS 10.12 or later
- Drag and drop all media files for video creation.
- Easy timeline for organizing media files and editing them quickly.
- Crop, trim, split, cut, and combine media files.
- Wide range of video transitions and audio effects.
- Different motion elements, titles, and stock media files.
- Keyframing, noise removal, video stabilization options.
- Super intuitive user interface for all users.
2. Windows Movie Maker
System compatibility: Windows 11, 10
Rating: 4.0/5
If you are Windows user and you are looking for a free video editor with song, Windows Movie Maker is the perfect app you can get from Microsoft Store. Even though it comes free, the video editor is quite powerful. You can crop, trim, join video clips and add text and music to your video. There are image filters available for photo enhancement as well as transitions to apply in the video.
There are in-built music tracks available and it supports importing a wide range of media files. You can avail animated pan and zoom feature for photos and adjust volume and speed. There is also a Pro version available that supports 4K video and better project management as well as advanced tools. Here are the top features of Windows Movie Maker.
- Rotate, trim, flip, and join video clips to make music video.
- Make video from photos and add in-built or external music files.
- Add titles, credits, texts, stickers, as well as pan-zoom animation.
- Wide range of transition effects and photo filters available.
- Supports importing and exporting different file formats.
- Pro version supports 4K resolution and offers exclusive quick tools.
3. Blender
System compatibility: Windows 11, 10, 8.1 macOS 10.13+, Linux.
Rating: 4.5/5
If you are looking for an open-source video editor, Blender is the best choice. It is completely free to use and it comes with all the standard features for creating and editing music videos. The software is particularly popular for modelling, sculpting, rendering and creating animation-based videos. The video editor contains 32 slots where you can add your media files to create the video.
Blender allows you to change video speed, adjust different layers in the videos and add preferred transitions. Moreover, there are masks and filters available to enhance video content. The advance options of audio mixing and keyframing will surely come handy for advanced users. Here are the top features of Blender video editor.
- Cut, split, trim, and join videos clips.
- Color grading, photo filters and custom text options.
- Add effects, transitions, and animations to your video.
- Live visualization options for advanced users.
- Motion tracking, scene stabilization and compositing options.
4. Adobe Premiere Pro
System compatibility: Windows 10 and 11.
Rating: 4.5/5
Adobe Premiere Pro is the best video editor for professionals. The software has a slightly steep learning curve and it requires a high-end computer. Therefore, it is useful for you when you are serious about making professional-quality music video. In fact, Adobe Premiere Pro is widely used in the music video and video creation industry.
Adobe Premiere Pro is the perfect combination of standard and advanced video editing options. You can edit various video files at the same time. In fact, it is perfect for a team to work on your music video files. You can edit VR videos, multi-cam videos as well 3D videos. You can edit your photos, video clips and audio files perfectly as per your requirements. Here are the top features of Adobe Premiere Pro.
- Trim, split, crop, merge, adjust speed, color correction options.
- Edit video clips and audio files minutely with comparison view.
- Auto color correction, auto reframe, and configurable user interface.
- Editing advanced videos like VR and 3D as well as advance audio editor.
- Supports importing and exporting different media file formats.
5. Final Cut Pro
System compatibility: macOS 10.14 or higher
Rating: 4.4/5
Final Cut Pro for Mac users is equivalent to Adobe Premium Pro for Windows users. It is widely used by video creators to edit your videos and add effects and audio to get the desired result. You get the standard as well as the advanced video editing options and features. You can publish your music video at high resolution, and the software takes minimum time for rendering.
Final Cut Pro allows editing 3D, VR, multi-cam, and 360-degree videos. There are loads of effects, filters, and presets available to apply to your video clips and photos to create a music video. The presence of cinematic mode and object tracker could be useful for creating out-of-the-box videos. Here are the top features of Final Cut Pro.
- Trim, split, crop, change speed, color correction, and multi-cam video editing.
- Amazing cinematic mode to enhance music video content and quality.
- Add external music file and edit the music file as required.
- Proper organization tool for team to work collaboratively.
- Background rendering feature saves a lot of time in video processing.
- Publish your music video in high resolution without long processing time.
7. Clido
System compatibility: Windows, Mac, Linux, Android and iOS.
Rating: 4.5/5
Clido is an online platform where you get different tools for video editing. It is a premium online video editor with music and hence, it is suitable for all those who want to edit video with music on the go. There is no need to download any software and you can merge, compress, resize, cut and crop video as per your requirements.
You can even rotate and adjust speed to create slow-motion videos. To create your music video, you have to opt for its video maker where you can use photos, video clips, GIFs, and music. You can edit the duration for photos and video clips as per your preference. There is also a slideshow maker available for instant video creation with your photos. Here are the top features of Clido that you should be aware of.
- Flip, loop, reverse, crop, resize, and merge video clips.
- Create slideshow videos and add music of your choice instantly.
- Wide range of presets and video filters.
- Change aspect ratios to make videos for different platforms.
- Super intuitive user interface and secure platform.
- Compatible with popular browsers and suitable for PC and phone users
8. Adobe Express
System compatibility: Windows, Mac, Linux, Android, and iOS.
Rating: 4.5/5
Adobe Express is an online video editor with song that is compatible with popular browsers and all devices. You can create stunning music videos in a few minutes. There are various templates available to get started and finish your stunning music video in a few steps. There is a wide range of stock images available from Adobe. You get access to effects, textures, overlays, and filters to enhance video quality.
You can also remove background from your photos to improve video content. There are various graphical elements available to add to your video. You can resize your video to be compatible with online platforms and different devices. The software allows you to play with texts and titles by offering various customization options. Here are the top features of Adobe Express.
- Loads of video templates for quick video creation.
- Resize photos, convert to different formats, and remove background.
- Trim and crop video clips, convert to GIFs, resize as required.
- Access to stock media library of Adobe and experiment with text.
- Make video for different online platforms and different devices.
9. VideoPad
System compatibility: Windows 11, 10, 8, 7, Vista and XP & Mac OS X 10.5 or above.
Rating: 4.1/5
VideoPad from NCH Software is a simple but powerful video editor. You can create stunning music videos and edit them as per your requirements. The user interface is suitable for beginners and you can avail different video effects and transitions to apply to your video. There are also dedicated audio tools available to edit audio and music files.
The software supports editing 360-degree and 3D videos. In fact, it supports over 60 video file formats for importing them. The software is equally useful in video optimization and you can share the edited video on different online platforms as per your preference. Here are the top features of VideoPad.
- Standard video and audio editing options available.
- Mix music track, add audio effects, and record your narration.
- Wide range of templates for intro, outro and others for branding.
- Supports up to 4K resolution and lossless export.
- Video optimization, stabilization, color correction, and change speed.
- Upload videos directly to YouTube, Vimeo, and Flickr and cloud platforms.
Part 2. How to make a music video on my own?
In order to make a music video file, you will need a video editor, video clips or photos, and background music. We recommend Wondershare Filmora as the best video editor for music videos. Transfer the video clips or photos with which you want to make the music video from your phone to your computer. Choose and download the music file that you would want to add to the background of your video. You can also record your own song or music and use the same for background music. Here are the steps to make a music video on your own.
Step 1: Download and install Filmora as per your operating system. Launch the software and click on New Project.
Step 2: Drag and drop the video clips, photos, music and audio files on Project Media folder.
Step 3: Drag and drop the video clips or photos on Timeline and arrange them in order as you want in your video. You can stretch the duration of the photos and videos as per your requirements.
Step 4: Go to Transition option at the top bar and drag and drop the transition of your choice on the photos or video clips so that the transition is eye-catching and eye-soothing.
Step 5: Drag and drop the music file from Project Media folder on the Timeline below the photos or video clips. You can stretch or trim the music track to suit the video length. Check out Audio, Effects, Elements and Titles section at the top bar so that you can incorporate them in your music video to be more appealing and engaging.
Step 6: Preview the music video on Filmora and click on Export button to save it on your hard drive as per your selected file format.
Part 3. Related FAQs
1. How do I add music to video editor on PC?
Different video editor offers different options to add music. Some allow you to drag and drop music file from your hard drive to video editor directly. Otherwise, you have to browse and go to the location and select the music file. Online video editor also allows uploading music file from cloud storage.
2. What software is best for editing music videos?
Wondershare Filmora is the best video editor for editing music videos. This is because it is a premium software with all the features and functionalities that you need to edit your music video. The user interface is intuitive for everyone to enhance video content and quality.
3. What is the best app to put music to videos?
InShot is the best app to put music to videos for Android users. For iOS users, Video Maker with Music Editor is the best app to use where all the required features are readily available.
The Importance of Proper YouTube Thumbnail Size for Successful Engagement
Best YouTube Thumbnail Size: How to Make a Thumbnail for YouTube in 2024

Benjamin Arango
Mar 27, 2024• Proven solutions
You must have heard the phrase, Never judge a book by its cover. But actually, we do judge everything by its cover. The same is the case with Youtube videos. No matter how good the content of your video is if you are unable to convey that with the thumbnail of your video, it will not bring any good to your channel. If you are looking forward to growing your channel and attracting more viewers, then having an appealing and eye-catching thumbnail is one of the most important factors. There are several things to be considered while creating a custom thumbnail if you want to make your videos look stunning and engaging. By following all these points, you can increase the chances of your channel’s growth.
In this article, we have 5 chapters for you:
- Best YouTube Thumbnail Size
- How Important is a Custom Thumbnail?
- Best Practices From Experiences
- How to Make a Fortnite Thumbnail
- How to Add a Custom Thumbnail to Your Video
Best YouTube Thumbnail Size
Being a content creator, you never know which device is being used by the viewer to watch your videos. It can be a smartphone, laptop, pc, or smart TV. It is very important to keep all these devices in mind while choosing a Youtube thumbnail size. For the best possible results, consider the following points while making a thumbnail for your Youtube videos.
- To cover all the devices perfectly, set the thumbnail resolution to 1280x720
- Save the thumbnail in JPG, GIF, or PNG format
- Try not to cross the 2MB limit
- Make sure to use a 16:9 aspect ratio for perfect results throughout the devices

How Important is a Custom Thumbnail?
Custom Thumbnail is a tool through which the viewers can understand everything about a video. It tells the viewers what to expect from a video, what not to expect, and what the video is all about. no matter if you create amazing content, if the thumbnail is not good enough to covey that to the viewers, all your hard work will be of no use and will not bring any good to your channel and its growth. According to Google ,90% of best-performing videos have custom thumbnails. It shows the importance of custom thumbnails.

Best Practice From Experiences
Now, since we know the importance of having a custom thumbnail, it is important to know how to make a thumbnail for Youtube look perfect, appealing, and eye-catching at the same time. There are some points to be considered while creating a thumbnail for Youtube. We will provide you with the best practices that we have learned throughout our journey of using Youtube and growing it from zero.
7 best practices can help you make your Youtube thumbnail stand out from the crowd and make its way out.
In a world full of machines and computers, people love to listen and interact with people instead of computer-generated voices and a voice without a face. Showing your face on a Youtube thumbnail makes it more appealing to users to click and listen to the person who is being shown in the thumbnail. Humans are more inclined towards faces. When there is a human element in a video, it increases its effectiveness. Check out the pics below, which one are you most likely to click through?

With your face, it is necessary to put some text on your Youtube thumbnail to let viewers know what this video is all about without clicking or watching it. Don’t use fancy fonts on Youtube thumbnail. It makes it hard for the viewers to read and understand what to expect in the video, especially for those watching YouTube on their 5 inches screen smartphone, ultimately decreasing the chances of your video being clicked and watched. I personally recommend you to use give these fonts a go while making YouTube thumbnail.

If you have ever noticed, Youtube thumbnails are very small in size, making it hard for viewers to notice any small elements. According to YouTube , more than 70% of Youtube watch time comes from mobile devices. While adding text in a thumbnail, instead of using sentences, make sure to use only words and make them large in size that can easily be noticed on small screens. Summurise your video in no more than 5 words.


When we navigate to a Youtube thumbnail and place the cursor on it, it shows us two icons, “Watch Later” and “Add to Queue,” located on its right size. Come on, you don’t want your beautiful thumbnail that cost you a few hours be covered. To avoid these icons from hiding your important stuff of thumbnail, make sure to put everything on the right side of your thumbnail.

Try to make all your thumbnails follow the same style. Following the same style for all your Youtube thumbnails will make your channel look unique and all your videos identical. It will be easy for viewers to identify your videos when they see them. It gives your channel a touch of its unique brand.

To make your Youtube thumbnail more appealing to the viewers, add circles and arrows to grab viewers’ attention to something very important in the video. It will increase the curiosity in the viewers and make them click your videos to learn more.

This whole process seems to be very hectic and time taking, but do you know, you can do everything on just one software? There is no need to edit a video in a different software then make a thumbnail in another software. With Filmora X, you can perform all these tasks on a single platform with so many amazing features. Whether you want to remove the background of your image or add attractive titles to it, Filmora X has got you covered.
It is one of the old tricks that so many people on Youtube use. It undoubtedly brings you clicks and more views, but once the viewer realizes that you have used irrelevant pictures or texts to attract them**. I**n reality, your video doesn’t contain any information related to it, you are going to lose their trust. They are never going to click on your videos again. Even if you don’t use such a trick anymore. Try to avoid such activities. Avoiding such activities can make your channel grow in the long term. Only use the text and images that are relevant to your content and stick to that.
Do you know that Youtube can show a 3-second preview of your video when someone hovers the cursor over it? It is one of the best ways to show the viewers the content of your video even when they don’t click on your video. These three seconds will help them decide whether to click on your video or not. This preview is selected by the system from the first half of your video according to its relevance and similarity with the topic. That’s why it is very important to add related information in the first half of the video, otherwise, Youtube will choose it randomly. If the preview is not selected for two days, it means your video is not eligible for it.

How to Make a Fortnite Thumbnail Super Fast and Free?
Many of you might be interested in how to make a fortnite thumbnail, so here it is. To make a Fortnite thumbnail for free, we are going to use Filmora X. Filmora X contains all kinds of features and elements that are required for a perfect and eye-catching thumbnail. To get started, make sure to download and install the latest version of Filmora X.
- Before we start making Fortnite Thumbnails, we have to take a screenshot of the gameplay. Open Fortnite and go to the Career tab. Here you will find Replays.

- It contains all your recent gameplays. We can use it to take a screenshot. If you are using a console, you will find 10 recent gameplays here. But if you are a PC user, you can find the last 100 gameplays. Select the gameplay you want to take a screenshot from.

- For our preferred angle, choose “Drone Free Camera” mode from the bottom right corner of the screen. It will allow us to use our preferred angle without any restriction. Choose an angle and take a screenshot.

- Open Filmora X, make sure to select the 16:9 screen ratio. Import the screenshot that you have taken from Fortnite.

- Place it into the timeline to start working on it.

- Now to separate the character from the background, go to the Effects. Under effects, you can find a tab named AI Portraits. Click on AI Portrait. Now drag the Human Segmentation and drop it on the screenshot in the timeline.

- It will ask you to purchase it. But there is no need to do that. Just hit Try It.

- This effect will remove the background of your screenshot.

- Now you can add a background of your choice. You can upload an image or choose a simple color from Filmora’s Media tab and drag it below the screenshot in the timeline.

- To add text to the screenshot, go to Titles. Here you can find a wide range of different and unique titles to choose from for your Fortnite Thumbnail. Choose any of the titles and place them accordingly.

- To make it more attractive, we can add icons and other elements from Filmora’s Element tab. You can also download the stickers from the internet and use them.

- After completing the thumbnail, click on the Snapshot icon located below the preview tab of Filmora. Or press “CTRL+ALT+S”. It will save a screenshot into the media panel of Filmora.

- Right-click on the screenshot and navigate to “Reveal in Explorer”. It will open the folder that contains all the screenshots taken from Filmora. Now you can use it as a Fortnite Thumbnail.

How to Add a Custom YouTube Thumbnail to Your Video in YouTube
Once you have successfully created a custom thumbnail, you can use it in your videos on Youtube.
- Open Youtube Studio and upload your video. While uploading the video, you can see a section named “Thumbnail”. Under this section, click on “Upload Thumbnail”.

- Select the thumbnail that you have made. Just like the one Fortnite thumbnail that we have created using Filmora X.

- The thumbnail will be uploaded and attached to the video. Now you can process all the settings and publish the video.

Conclusion
Thumbnail is the first thing that helps the viewer decide whether to click on a video or ignore it. Which increases the importance of having a well-structured and attractive thumbnail. By following the above guide, you can make an astonishing and clickable thumbnail in no time. For better and quick results, we recommend you using Filmora X. It allows you to perform all the tasks from video editing to thumbnail creation on a single platform.


Benjamin Arango
Benjamin Arango is a writer and a lover of all things video.
Follow @Benjamin Arango
Benjamin Arango
Mar 27, 2024• Proven solutions
You must have heard the phrase, Never judge a book by its cover. But actually, we do judge everything by its cover. The same is the case with Youtube videos. No matter how good the content of your video is if you are unable to convey that with the thumbnail of your video, it will not bring any good to your channel. If you are looking forward to growing your channel and attracting more viewers, then having an appealing and eye-catching thumbnail is one of the most important factors. There are several things to be considered while creating a custom thumbnail if you want to make your videos look stunning and engaging. By following all these points, you can increase the chances of your channel’s growth.
In this article, we have 5 chapters for you:
- Best YouTube Thumbnail Size
- How Important is a Custom Thumbnail?
- Best Practices From Experiences
- How to Make a Fortnite Thumbnail
- How to Add a Custom Thumbnail to Your Video
Best YouTube Thumbnail Size
Being a content creator, you never know which device is being used by the viewer to watch your videos. It can be a smartphone, laptop, pc, or smart TV. It is very important to keep all these devices in mind while choosing a Youtube thumbnail size. For the best possible results, consider the following points while making a thumbnail for your Youtube videos.
- To cover all the devices perfectly, set the thumbnail resolution to 1280x720
- Save the thumbnail in JPG, GIF, or PNG format
- Try not to cross the 2MB limit
- Make sure to use a 16:9 aspect ratio for perfect results throughout the devices
How Important is a Custom Thumbnail?
Custom Thumbnail is a tool through which the viewers can understand everything about a video. It tells the viewers what to expect from a video, what not to expect, and what the video is all about. no matter if you create amazing content, if the thumbnail is not good enough to covey that to the viewers, all your hard work will be of no use and will not bring any good to your channel and its growth. According to Google ,90% of best-performing videos have custom thumbnails. It shows the importance of custom thumbnails.
Best Practice From Experiences
Now, since we know the importance of having a custom thumbnail, it is important to know how to make a thumbnail for Youtube look perfect, appealing, and eye-catching at the same time. There are some points to be considered while creating a thumbnail for Youtube. We will provide you with the best practices that we have learned throughout our journey of using Youtube and growing it from zero.
7 best practices can help you make your Youtube thumbnail stand out from the crowd and make its way out.
In a world full of machines and computers, people love to listen and interact with people instead of computer-generated voices and a voice without a face. Showing your face on a Youtube thumbnail makes it more appealing to users to click and listen to the person who is being shown in the thumbnail. Humans are more inclined towards faces. When there is a human element in a video, it increases its effectiveness. Check out the pics below, which one are you most likely to click through?
With your face, it is necessary to put some text on your Youtube thumbnail to let viewers know what this video is all about without clicking or watching it. Don’t use fancy fonts on Youtube thumbnail. It makes it hard for the viewers to read and understand what to expect in the video, especially for those watching YouTube on their 5 inches screen smartphone, ultimately decreasing the chances of your video being clicked and watched. I personally recommend you to use give these fonts a go while making YouTube thumbnail.
If you have ever noticed, Youtube thumbnails are very small in size, making it hard for viewers to notice any small elements. According to YouTube , more than 70% of Youtube watch time comes from mobile devices. While adding text in a thumbnail, instead of using sentences, make sure to use only words and make them large in size that can easily be noticed on small screens. Summurise your video in no more than 5 words.
When we navigate to a Youtube thumbnail and place the cursor on it, it shows us two icons, “Watch Later” and “Add to Queue,” located on its right size. Come on, you don’t want your beautiful thumbnail that cost you a few hours be covered. To avoid these icons from hiding your important stuff of thumbnail, make sure to put everything on the right side of your thumbnail.
Try to make all your thumbnails follow the same style. Following the same style for all your Youtube thumbnails will make your channel look unique and all your videos identical. It will be easy for viewers to identify your videos when they see them. It gives your channel a touch of its unique brand.
To make your Youtube thumbnail more appealing to the viewers, add circles and arrows to grab viewers’ attention to something very important in the video. It will increase the curiosity in the viewers and make them click your videos to learn more.
This whole process seems to be very hectic and time taking, but do you know, you can do everything on just one software? There is no need to edit a video in a different software then make a thumbnail in another software. With Filmora X, you can perform all these tasks on a single platform with so many amazing features. Whether you want to remove the background of your image or add attractive titles to it, Filmora X has got you covered.
It is one of the old tricks that so many people on Youtube use. It undoubtedly brings you clicks and more views, but once the viewer realizes that you have used irrelevant pictures or texts to attract them**. I**n reality, your video doesn’t contain any information related to it, you are going to lose their trust. They are never going to click on your videos again. Even if you don’t use such a trick anymore. Try to avoid such activities. Avoiding such activities can make your channel grow in the long term. Only use the text and images that are relevant to your content and stick to that.
Do you know that Youtube can show a 3-second preview of your video when someone hovers the cursor over it? It is one of the best ways to show the viewers the content of your video even when they don’t click on your video. These three seconds will help them decide whether to click on your video or not. This preview is selected by the system from the first half of your video according to its relevance and similarity with the topic. That’s why it is very important to add related information in the first half of the video, otherwise, Youtube will choose it randomly. If the preview is not selected for two days, it means your video is not eligible for it.
How to Make a Fortnite Thumbnail Super Fast and Free?
Many of you might be interested in how to make a fortnite thumbnail, so here it is. To make a Fortnite thumbnail for free, we are going to use Filmora X. Filmora X contains all kinds of features and elements that are required for a perfect and eye-catching thumbnail. To get started, make sure to download and install the latest version of Filmora X.
- Before we start making Fortnite Thumbnails, we have to take a screenshot of the gameplay. Open Fortnite and go to the Career tab. Here you will find Replays.
- It contains all your recent gameplays. We can use it to take a screenshot. If you are using a console, you will find 10 recent gameplays here. But if you are a PC user, you can find the last 100 gameplays. Select the gameplay you want to take a screenshot from.
- For our preferred angle, choose “Drone Free Camera” mode from the bottom right corner of the screen. It will allow us to use our preferred angle without any restriction. Choose an angle and take a screenshot.
- Open Filmora X, make sure to select the 16:9 screen ratio. Import the screenshot that you have taken from Fortnite.
- Place it into the timeline to start working on it.
- Now to separate the character from the background, go to the Effects. Under effects, you can find a tab named AI Portraits. Click on AI Portrait. Now drag the Human Segmentation and drop it on the screenshot in the timeline.
- It will ask you to purchase it. But there is no need to do that. Just hit Try It.
- This effect will remove the background of your screenshot.
- Now you can add a background of your choice. You can upload an image or choose a simple color from Filmora’s Media tab and drag it below the screenshot in the timeline.
- To add text to the screenshot, go to Titles. Here you can find a wide range of different and unique titles to choose from for your Fortnite Thumbnail. Choose any of the titles and place them accordingly.
- To make it more attractive, we can add icons and other elements from Filmora’s Element tab. You can also download the stickers from the internet and use them.
- After completing the thumbnail, click on the Snapshot icon located below the preview tab of Filmora. Or press “CTRL+ALT+S”. It will save a screenshot into the media panel of Filmora.
- Right-click on the screenshot and navigate to “Reveal in Explorer”. It will open the folder that contains all the screenshots taken from Filmora. Now you can use it as a Fortnite Thumbnail.
How to Add a Custom YouTube Thumbnail to Your Video in YouTube
Once you have successfully created a custom thumbnail, you can use it in your videos on Youtube.
- Open Youtube Studio and upload your video. While uploading the video, you can see a section named “Thumbnail”. Under this section, click on “Upload Thumbnail”.
- Select the thumbnail that you have made. Just like the one Fortnite thumbnail that we have created using Filmora X.
- The thumbnail will be uploaded and attached to the video. Now you can process all the settings and publish the video.
Conclusion
Thumbnail is the first thing that helps the viewer decide whether to click on a video or ignore it. Which increases the importance of having a well-structured and attractive thumbnail. By following the above guide, you can make an astonishing and clickable thumbnail in no time. For better and quick results, we recommend you using Filmora X. It allows you to perform all the tasks from video editing to thumbnail creation on a single platform.
Benjamin Arango
Benjamin Arango is a writer and a lover of all things video.
Follow @Benjamin Arango
Also read:
- [Updated] Boost Your Channels' Following by a Thousand
- Bridge Gaps in Generations of Viewers 6 Interactive Tests to Find Your YouTube Match for 2024
- Turn Your Shorts Into Cash Effective Monetization Techniques
- Accelerate/Decelerate Your YouTube Videos A Step-by-Step Guide for 2024
- Enhancing Content Strategy with Targeted Tagging
- Music Manifesto Constructing Your Signature YouTube Playlists
- Toddler Tycoon Turned Teen Titan The Income of a Kid Star
- [Updated] Charting Your Financial Course The 3-Step Methodology for Estimating YouTube Income
- Revisiting Youtube's Archive Two Proven Watch Strategies
- Crafting Success Pushing Your Video Into Top Charts for 2024
- Softening Edges Strategic Lighting for Content Creators
- Chuckle Fest The Ultimate List of Hilarious YouTube Personalities
- [Updated] Brush Up Your Youtube Videos with Color Correction
- Audio Amplified Today's Hits Backdropping YT Shorts
- 2024 Approved DIY Templates for Affordable YouTube Intros
- Do Paid Followers Impact Channel Popularity for 2024
- 2024 Approved Elevating Video Reach The Role of Smart Backlinking Techniques
- [New] Double Down on YouTube Visibility (2 Quick Methods)
- [New] Best Practices for Adding Content Enhancements (Cards)
- No-Cost Sound Transformation Ultimate 10 YouTube Tools
- [Updated] Ensuring Authenticity as You Aspire for One Million Video Watches
- In 2024, Channeling Musical Charm Crafting Custom Playlists on Youtube
- In 2024, Elevate Your Soundbites Insights for YouTube Short Tunes
- [Updated] Crucial Details for Deciding on a YouTube TV Subscription
- Effective Ways to Watch Multiple YouTube Videos at One Time
- [Updated] 10+ Incredible Free YouTube Intro Makers
- Refine Your Beauty Videos with Youtube's Palette Tweaking
- Does Spending on YouTube Followers Really Amplify Your Presence for 2024
- [Updated] Discovering Success Through the Most Effective 15 YouTube Themes
- Disabling YouTube Shorts for Good A Simple Approach for 2024
- [New] Apex Chart Analyst Master Video Popularity
- From Novice to Vlogger Professional Video Making on Mobile Devices
- 2024 Approved Audiences in Motion Analyzers
- 2024 Approved Customizing Your Watch The Art of Altering YouTube Video Pace
- [Updated] Celebratory Moments Captured A List of the Most Beautiful Wedding Videos (8)
- Professional Thumbnail Creation for YouTube (macOS Style)
- Amplify Your YT Engagement with Multi-Stream Techniques
- [New] Beyond VidCon - A Guide to the Most Important YouTube Events
- [New] Breaking Barriers Increasing Viewership on YouTube
- [Updated] Enhancing Viewership with Informative YouTube Video Captions
- [New] Engaging Stories, Expanding Audiences Top Three Methods
- 2024 Approved Does Recording Your Viewed YouTube Content Violate Laws?
- In 2024, 5 Tips to Get More Views with YouTube Optimization [Free Checklist]
- [Updated] 8 Essential Tools for Your YouTube-to-AVI Needs
- Channel Conclusion Mastery - Makers & Templates for Best Practices for 2024
- [Updated] How to Create and Merge Stunning HDR Images in Lightroom
- In 2024, Where Is the Best Place to Catch Dratini On Sony Xperia 5 V | Dr.fone
- In 2024, How to Bypass FRP from Xiaomi Redmi Note 13 Pro+ 5G?
- In 2024, 5 Best Online MP3 Tag Editor Websites That You Cant Miss
- 2024 Approved The Law of Lyrics on Instagram Platforms
- [New] Jotunheim Raid The War of the Worlds
- [New] In 2024, The Hottest Meme Battles Reddit & Twitter's Leaders
- 2024 Approved Discovering the Chirping Noise of Crickets
- New The 10 Best Batman Anime Movies- 2024 Updated
- Easy steps to recover deleted music from Honor Magic 6
- In 2024, A Closer Examination of Google's AR Stickers and Competitors
- Title: "2024 Approved EpicEditor Hub Innovative PC Cutting with Tunes"
- Author: Brian
- Created at : 2024-05-25 11:13:56
- Updated at : 2024-05-26 11:13:56
- Link: https://youtube-video-recordings.techidaily.com/2024-approved-epiceditor-hub-innovative-pc-cutting-with-tunes/
- License: This work is licensed under CC BY-NC-SA 4.0.
