

"2024 Approved Conquering the Labyrinth of Lesser-Known YouTube Content"
Conquering the Labyrinth of Lesser-Known YouTube Content
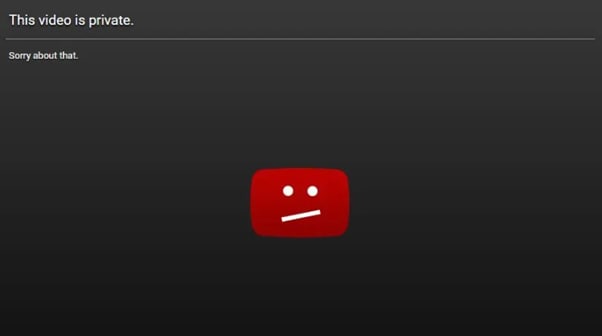
You may have noticed that some videos in your YouTube playlist are unavailable. This is because the platform allows content creators to categorize their videos into public, private, or unlisted based on their preferences.
To help you uncover the content that you otherwise wouldn’t have access to, we’ve compiled a detailed guide to show you how to find YouTube hidden videos. We’ve also explained why so many unlisted videos are now labeled as private.
So, let’s get started with our guide without any further delay!
4 Types of Videos on YouTube
Firstly, let’s learn about the background of the types of YouTube videos. YouTube videos fall into the following four broad categories:
Public Videos: YouTube contains videos on many themes and topics. It makes it impossible to watch all uploaded content under a specific category.
So, whenever you search for a video or theme, a list of content is displayed in the search result: “Public Videos.” It means that they are visible to everyone around the globe (depending on the terms and conditions). Moreover, you can share, like, unlike, download, or add these videos to your playlists for later watching.
Private Videos: Private videos on YouTube can only be seen by people invited by the person who uploaded the video. This means that only those with access to the video’s shareable link can watch it.
Private videos are not visible to the public or to people who are not logged into YouTube. Hence, it is a great way to share sensitive or personal information with a select group.
Unlisted Video Unlisted videos on YouTube are not publicly visible on the site. They can only be seen by people who have the URL. This category works as a bridge between private and public videos. It is accessible only through sharable links without appealing in any YouTube public playlist or search result.
You might upload an unlisted video to YouTube if you do not want everyone to see it. However, you still want to share it with specific people, like your friends or family. You might also use an unlisted video to test out a new idea before making it public on the video-sharing platform.
Age-Restricted Videos: Age-restricted videos on YouTube are not suitable for all audiences. It may contain content that includes violence, profanity, sexual content, and other inappropriate material. YouTube requires that users be at least 18 years old to view these types of videos.
If you search on YouTube and come across an age-restricted video, you will be asked to confirm your age before viewing its content.

How To Find Unlisted YouTube Videos
Now that we’ve learned about the four types of YouTube content, let’s discuss how you can find unlisted YouTube videos:
How To Find Other People’s Unlisted YouTube Videos?
Since unavailable videos in YouTube playlists are hidden from general public viewers, you cannot find them on YouTube or Google search results.
However, the following workaround can help you watch these YouTube videos without facing much trouble:
Step 1: First, open a browser on your PC and visit the Unlisted Videos website. This platform contains over 600,000 unlisted YouTube videos from 2016 and earlier. You can also submit your unlisted video on the site.

Step 2: Use the search bar at the top of your screen to search for other people’s YouTube playlists. You can also click the “All Video” or “Random Videos” option to find the hidden content of a user.
How To See Unlisted Videos on My YouTube Channel?
To see your unlisted videos on your YouTube channel, do the following steps in sequence:
Step 1: In the first step, install the YouTube Studio app on your mobile device or visit its website using a browser on your computer. Next, launch the app and sign in to your channel’s account using your email and password.
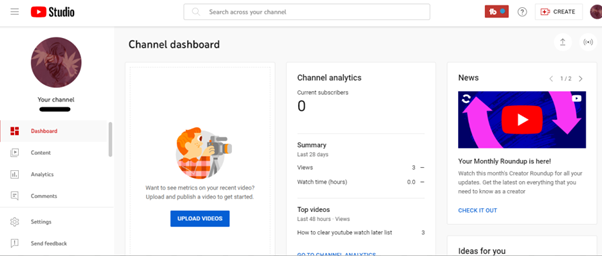
Step 2: In the next step, tap/ click the “Content” tab and tap/click the “Funnel” icon at the top of the video list to access the visibility options.
Step 3:
- Now, choose the “Visibility” option.
- Select “Unlisted” to change the visibility.
- Click the “Save” option to apply changes.
- See the hidden videos on your channel.

Since YouTube has marked the videos uploaded before 2017 as private as of July 2021, you can find your old unlisted videos under the “Private” list. To access it, choose “Private” as the visibility option.
How To Find Unlisted YouTube Videos with Google
Sometimes, unlisted YouTube videos appear on Google when someone shares the link to them on a public forum or website.
To confirm this, open a browser on your computer or a mobile device, head to the Google website, and search for your query. With some luck, you can find these unlisted YouTube videos in the search results.
You May Want to Know: Why Are So Many Unlisted Videos Now Private?
All unlisted videos uploaded to YouTube before January 2017 were switched to private. Therefore, if you have any older unlisted videos added to your Playlist or embedded on your website, you won’t be able to access them now.
However, the channel’s owner can restore access to the video by switching it back to unlisted or public. If now, the video will be labeled as “Private” indefinitely or until its settings are changed.
Conclusion
In this detailed guide, we’ve explored the four types of videos on YouTube and how to find YouTube hidden videos in three different ways. We’ve also explained why so many videos are now listed as “Private” and inaccessible.
Hopefully, you’ve found this article helpful and can now access the unlisted videos on YouTube without hassle.
You may have noticed that some videos in your YouTube playlist are unavailable. This is because the platform allows content creators to categorize their videos into public, private, or unlisted based on their preferences.
To help you uncover the content that you otherwise wouldn’t have access to, we’ve compiled a detailed guide to show you how to find YouTube hidden videos. We’ve also explained why so many unlisted videos are now labeled as private.
So, let’s get started with our guide without any further delay!
4 Types of Videos on YouTube
Firstly, let’s learn about the background of the types of YouTube videos. YouTube videos fall into the following four broad categories:
Public Videos: YouTube contains videos on many themes and topics. It makes it impossible to watch all uploaded content under a specific category.
So, whenever you search for a video or theme, a list of content is displayed in the search result: “Public Videos.” It means that they are visible to everyone around the globe (depending on the terms and conditions). Moreover, you can share, like, unlike, download, or add these videos to your playlists for later watching.
Private Videos: Private videos on YouTube can only be seen by people invited by the person who uploaded the video. This means that only those with access to the video’s shareable link can watch it.
Private videos are not visible to the public or to people who are not logged into YouTube. Hence, it is a great way to share sensitive or personal information with a select group.
Unlisted Video Unlisted videos on YouTube are not publicly visible on the site. They can only be seen by people who have the URL. This category works as a bridge between private and public videos. It is accessible only through sharable links without appealing in any YouTube public playlist or search result.
You might upload an unlisted video to YouTube if you do not want everyone to see it. However, you still want to share it with specific people, like your friends or family. You might also use an unlisted video to test out a new idea before making it public on the video-sharing platform.
Age-Restricted Videos: Age-restricted videos on YouTube are not suitable for all audiences. It may contain content that includes violence, profanity, sexual content, and other inappropriate material. YouTube requires that users be at least 18 years old to view these types of videos.
If you search on YouTube and come across an age-restricted video, you will be asked to confirm your age before viewing its content.
How To Find Unlisted YouTube Videos
Now that we’ve learned about the four types of YouTube content, let’s discuss how you can find unlisted YouTube videos:
How To Find Other People’s Unlisted YouTube Videos?
Since unavailable videos in YouTube playlists are hidden from general public viewers, you cannot find them on YouTube or Google search results.
However, the following workaround can help you watch these YouTube videos without facing much trouble:
Step 1: First, open a browser on your PC and visit the Unlisted Videos website. This platform contains over 600,000 unlisted YouTube videos from 2016 and earlier. You can also submit your unlisted video on the site.
Step 2: Use the search bar at the top of your screen to search for other people’s YouTube playlists. You can also click the “All Video” or “Random Videos” option to find the hidden content of a user.
How To See Unlisted Videos on My YouTube Channel?
To see your unlisted videos on your YouTube channel, do the following steps in sequence:
Step 1: In the first step, install the YouTube Studio app on your mobile device or visit its website using a browser on your computer. Next, launch the app and sign in to your channel’s account using your email and password.
Step 2: In the next step, tap/ click the “Content” tab and tap/click the “Funnel” icon at the top of the video list to access the visibility options.
Step 3:
- Now, choose the “Visibility” option.
- Select “Unlisted” to change the visibility.
- Click the “Save” option to apply changes.
- See the hidden videos on your channel.
Since YouTube has marked the videos uploaded before 2017 as private as of July 2021, you can find your old unlisted videos under the “Private” list. To access it, choose “Private” as the visibility option.
How To Find Unlisted YouTube Videos with Google
Sometimes, unlisted YouTube videos appear on Google when someone shares the link to them on a public forum or website.
To confirm this, open a browser on your computer or a mobile device, head to the Google website, and search for your query. With some luck, you can find these unlisted YouTube videos in the search results.
You May Want to Know: Why Are So Many Unlisted Videos Now Private?
All unlisted videos uploaded to YouTube before January 2017 were switched to private. Therefore, if you have any older unlisted videos added to your Playlist or embedded on your website, you won’t be able to access them now.
However, the channel’s owner can restore access to the video by switching it back to unlisted or public. If now, the video will be labeled as “Private” indefinitely or until its settings are changed.
Conclusion
In this detailed guide, we’ve explored the four types of videos on YouTube and how to find YouTube hidden videos in three different ways. We’ve also explained why so many videos are now listed as “Private” and inaccessible.
Hopefully, you’ve found this article helpful and can now access the unlisted videos on YouTube without hassle.
How to Make Your YouTube Animated Subscribe Button Easily With Filmora
How to Make Your YouTube Animated Subscribe Button Easily With Filmora 
Richard Bennett
Mar 27, 2024• Proven solutions
The main goal of every content creator is to increase its audience to expand its reach and views. To do so, it’s essential to provide something unique and different to the viewer. Without providing them the content they are looking for, it is impossible to grow your channel and reach. Once your content is ready and you are getting many views, it is essential to make these potential viewers your permanent viewers. The animated subscribe button will help you achieve this goal. While your viewers are watching your videos, you must remind them about subscribing to your channel for receiving such incredible content in the future. Subscribe animation plays a vital role in converting your viewers into subscribers.
There are so many platforms on the internet from where you can get Youtube subscribe button animation free, and you can also purchase these subscribe png gifs. But creating your own animated subscribe button can make you stand out from the crowd and make your videos unique and exclusive. Because it enables you to design it the way you want according to your brand, so, let’s create your own subscribe animation using Wondershare Filmora .
Step-By-Step guide
Step 1: To get started,open Filmora X. On your upper left corner, click on the “Sample Colors,” select the Green color and drag it to Video Track into the timeline. We are using a Green background to easily remove it using the green screen feature in Filmora to use it in our future projects after exporting it, without creating it again. Adjust the duration of this track according to your requirement. In my case, I am trying to make an animated subscribe button of 5 seconds.
Step 2: Lock this track by clicking on the lock icon to work on subscribe animation without disturbing the background easily.
Step 3: Now it’s time to design the subscribe png gif. Go to the Sample colors again and drag the red color into the time above the green background.
Step 4: Double click on the red color in the timeline and adjust its size. Make it look like a subscribe button that is a rectangle and place it at the bottom center of the background. You can put it anywhere you want it to appear in your future videos.
Step 5: Now, let’s add Subscribe text into the button. Go to the Title and select any style that you like. “Basic 6” will work perfectly fine for this purpose. Drag and drop it into the timeline above all tracks.
Step 6: Double click on the Title on the timeline and edit it with “Subscribe” and place it under the red rectangle and click OK.
Step 7: We have put a cursor that can click on the animated subscribe button. You can use Google Search to find a transparent cursor. Make sure to save it in png format. Download it and import it into Filmora.
Step 8: Drag and drop the cursor into the timeline and place it above all the other three tracks to make it prominent. Adjust the size of the cursor place it on the Subscribe button where you want it to appear.
Step 9: Now, it’s time to animate the design using keyframes. First of all, let’s animate the red rectangle. Double click on the red color on the timeline. Go to the ‘Animation’ tab and then click ‘Customize.’ Move to the 1 second in the timeline and click ‘Add.’
Step 10: Now go back to the beginning in the timeline and adjust the scale to 0%. It will make the rectangle pop up when you play the clip.
Step 11: Text needs to be animated as well to match it with the rectangle. Double click on the text in the timeline and click ‘ADVANCED.’
Step 12: In this Advance text editor, go to the ‘Animation’ tab and select any animation that you like. On the timeline under the preview screen, adjusts the dark areas according to the time you set on the rectangle, which was 1 second. We want the text to appear on the screen in 1 second, like the rectangle. Also, adjust the ending time when you want the text to disappear again. We have set it on 4 seconds. Which means it will start to fade after 4 seconds.
Step 13: Now, to animate the mouse cursor, we will use the same process we used for a rectangle that is key framing. Double click on the cursor track on the timeline and move the time on your timeline to a point when you want the cursor to appear. Now add a key frame by clicking ‘Add’.
Step 14: Now jump back to a point in your timeline, when the cursor will start appearing from outside the screen. Move the cursor outside the screen from where you want it to start moving toward the subscribe animation.
Step 15: To animate the click of the cursor, move ahead a little bit into your timeline and scale down the cursor to around 70%. Move it a little further and scale it up to 100%.
Step 16: You can add the sound of mouse click to make it more realistic. You can find this sound anywhere on the internet. Download it and import it into Filmora. Now place it into the timeline where it can match the movement of the cursor.
Step 17: Now it’s time to make this subscribe animation button disappear. Move forward into the time to the end, at around 4 seconds. Double click on the red button in the timeline and add a key frame at its actual scale.
Step 18: After that, move further in the timeline to the end and make its scale 0. It will make it disappear.
Step 19: Do the same with the cursor. Double click on the cursor in the time and add a key frame at its actual position.
Step 20: Move ahead when you want it to disappear. Move the cursor out of the screen and click ‘OK’.
Step 21: Your Subscribe png gif is ready to be exported and used in your videos. Click on export and choose from various formats and options to choose from while exporting it.
You may also like: How to Get People to Subscribe Channel
Conclusion:Your own Animated Subscribe Button is ready to be used in your future videos and projects. This is a ready-to-use subscribe button that can be easily used using the green screen effect in Filmora. Just import the clip, remove the green screen, and you are good to go. You can also customize this Subscribe Animation using your channel and more. Keep experimenting with new things using Filmora.


Richard Bennett
Richard Bennett is a writer and a lover of all things video.
Follow @Richard Bennett
Richard Bennett
Mar 27, 2024• Proven solutions
The main goal of every content creator is to increase its audience to expand its reach and views. To do so, it’s essential to provide something unique and different to the viewer. Without providing them the content they are looking for, it is impossible to grow your channel and reach. Once your content is ready and you are getting many views, it is essential to make these potential viewers your permanent viewers. The animated subscribe button will help you achieve this goal. While your viewers are watching your videos, you must remind them about subscribing to your channel for receiving such incredible content in the future. Subscribe animation plays a vital role in converting your viewers into subscribers.
There are so many platforms on the internet from where you can get Youtube subscribe button animation free, and you can also purchase these subscribe png gifs. But creating your own animated subscribe button can make you stand out from the crowd and make your videos unique and exclusive. Because it enables you to design it the way you want according to your brand, so, let’s create your own subscribe animation using Wondershare Filmora .
Step-By-Step guide
Step 1: To get started,open Filmora X. On your upper left corner, click on the “Sample Colors,” select the Green color and drag it to Video Track into the timeline. We are using a Green background to easily remove it using the green screen feature in Filmora to use it in our future projects after exporting it, without creating it again. Adjust the duration of this track according to your requirement. In my case, I am trying to make an animated subscribe button of 5 seconds.
Step 2: Lock this track by clicking on the lock icon to work on subscribe animation without disturbing the background easily.
Step 3: Now it’s time to design the subscribe png gif. Go to the Sample colors again and drag the red color into the time above the green background.
Step 4: Double click on the red color in the timeline and adjust its size. Make it look like a subscribe button that is a rectangle and place it at the bottom center of the background. You can put it anywhere you want it to appear in your future videos.
Step 5: Now, let’s add Subscribe text into the button. Go to the Title and select any style that you like. “Basic 6” will work perfectly fine for this purpose. Drag and drop it into the timeline above all tracks.
Step 6: Double click on the Title on the timeline and edit it with “Subscribe” and place it under the red rectangle and click OK.
Step 7: We have put a cursor that can click on the animated subscribe button. You can use Google Search to find a transparent cursor. Make sure to save it in png format. Download it and import it into Filmora.
Step 8: Drag and drop the cursor into the timeline and place it above all the other three tracks to make it prominent. Adjust the size of the cursor place it on the Subscribe button where you want it to appear.
Step 9: Now, it’s time to animate the design using keyframes. First of all, let’s animate the red rectangle. Double click on the red color on the timeline. Go to the ‘Animation’ tab and then click ‘Customize.’ Move to the 1 second in the timeline and click ‘Add.’
Step 10: Now go back to the beginning in the timeline and adjust the scale to 0%. It will make the rectangle pop up when you play the clip.
Step 11: Text needs to be animated as well to match it with the rectangle. Double click on the text in the timeline and click ‘ADVANCED.’
Step 12: In this Advance text editor, go to the ‘Animation’ tab and select any animation that you like. On the timeline under the preview screen, adjusts the dark areas according to the time you set on the rectangle, which was 1 second. We want the text to appear on the screen in 1 second, like the rectangle. Also, adjust the ending time when you want the text to disappear again. We have set it on 4 seconds. Which means it will start to fade after 4 seconds.
Step 13: Now, to animate the mouse cursor, we will use the same process we used for a rectangle that is key framing. Double click on the cursor track on the timeline and move the time on your timeline to a point when you want the cursor to appear. Now add a key frame by clicking ‘Add’.
Step 14: Now jump back to a point in your timeline, when the cursor will start appearing from outside the screen. Move the cursor outside the screen from where you want it to start moving toward the subscribe animation.
Step 15: To animate the click of the cursor, move ahead a little bit into your timeline and scale down the cursor to around 70%. Move it a little further and scale it up to 100%.
Step 16: You can add the sound of mouse click to make it more realistic. You can find this sound anywhere on the internet. Download it and import it into Filmora. Now place it into the timeline where it can match the movement of the cursor.
Step 17: Now it’s time to make this subscribe animation button disappear. Move forward into the time to the end, at around 4 seconds. Double click on the red button in the timeline and add a key frame at its actual scale.
Step 18: After that, move further in the timeline to the end and make its scale 0. It will make it disappear.
Step 19: Do the same with the cursor. Double click on the cursor in the time and add a key frame at its actual position.
Step 20: Move ahead when you want it to disappear. Move the cursor out of the screen and click ‘OK’.
Step 21: Your Subscribe png gif is ready to be exported and used in your videos. Click on export and choose from various formats and options to choose from while exporting it.
You may also like: How to Get People to Subscribe Channel
Conclusion:Your own Animated Subscribe Button is ready to be used in your future videos and projects. This is a ready-to-use subscribe button that can be easily used using the green screen effect in Filmora. Just import the clip, remove the green screen, and you are good to go. You can also customize this Subscribe Animation using your channel and more. Keep experimenting with new things using Filmora.
Richard Bennett
Richard Bennett is a writer and a lover of all things video.
Follow @Richard Bennett
Also read:
- 2024 Approved Complete Guide to Aspect Ratios About YouTube Videos/Shorts/Ads
- In 2024, 10 Essential Tips for Achieving Wealth Through YouTube Video Views
- [Updated] Amplifying Engagement with Leading YouTube Ranks Top 8 Apps
- Thriving in the FreeFire Arena with Pro Gamers' Guide
- Affordable Strategies for Engaging YouTube Opening & End Titles for 2024
- 2024 Approved ClipCraft Designer
- In 2024, 6 Ingenious Sites Brimming With Customizable YouTube Themes
- Unleash HD Playback with AV1 on YouTube
- Meme-Making Maven The Tale of Jake Paul's Youtube Triumph
- 2024 Approved Best Soundshapers for Content Makers on YouTube
- 2024 Approved Embarking on Style & Niche Discovery Journey
- Elevate Video Exposure Mastering the Art of Appropriate Tags
- Critical ASMR Series to Experience for 2024
- Video Enhancement Incorporating YouTube Into Slides
- Explore Unrestricted Stock Content in Key 4 Video Channels
- [Updated] Direct Transfer of YouTube Playlists - Stepwise Processing
- Assessing the Impact of Purchased View Count on Channels
- 2024 Approved ASMR Audio Excellence High-Quality Mic Recommendations
- In 2024, Build Your Brand with Dynamic Haul Videography
- Channel Surge Strategy Using YouTube Outros for Rapid Expansion
- Stepwise Strategies to Perfect YouTube Trailers by Filmora
- In 2024, Crafting Video Magic with iMovie, Directed to YouTube
- Elevate Your Fitness Routine - Top 10 Yoga Streams Unveiled for 2024
- Premier Cutting Suites on Linux Systems
- Elevate Your Content with These 10 Reaction Wonders
- [New] Dominate Search Results Essential Tips for Optimizing YouTube Videos
- The Future of Youtube Branding Top Titles for Video Content Creators (Limited to 156 Characters)
- 2024 Approved Ace Your Viewing Experience Onboarding AV1 in YouTube
- [New] Build a Thriving Biz Channel Proven Strategies and Examples
- Cultivating an Audience Naturally - YouTube's Way for 2024
- Snappy Sharing Uploading and Publishing Short Videos Online
- Updated 2024 Approved Virtual Error Sounds Library 2023 – Complimentary Access and Downloads
- Two Ways to Track My Boyfriends Vivo X100 Pro without Him Knowing | Dr.fone
- [New] Mastering the Art of Screensaver Recording with Mobizen Technology
- The Ultimate Guide for Beyond-ShareX Review
- [New] Elite Cameras for Windows 11 - Pro Review of the Latest Gear
- 2024 Approved Best Zero-Cost MOD Video Editors 2023 Edition
- Tracking and Boosting Identifying the Best Tools for Instagram Analysis for 2024
- Revolutionizing Work with Windows 10 Innovations
- In 2024, How To Reset the Security Questions of Your Apple ID From Your iPhone 7
- 2024 Approved Crafting Compelling Podcast Intro Videos
- Fixes for Apps Keep Crashing on Motorola Moto G24 | Dr.fone
- [Updated] Digital Training Footage for 2024
- [Updated] A Beginner's Guide to Advanced Techniques in GoPro Studio
- Game On Top 10 Gaming Personalities on TikTok
- Getting the Pokemon Go GPS Signal Not Found 11 Error in Honor X50 GT | Dr.fone
- [New] How to Share the Screen with Zoom for 2024
- [New] 2024 Approved Streamline Your Slide Share Experience with Webcam
- Ultimate Guide on Vivo X Flip FRP Bypass
- [Updated] 2024 Approved Effective Method for Adding Music to Facebook (iPhone)
- The Ultimate Guide to Choosing an Audio Converter for 2024
- Updated From Start to Finish Flipping a Clip in Final Cut Pro in 4 Steps for 2024
- Title: "2024 Approved Conquering the Labyrinth of Lesser-Known YouTube Content"
- Author: Brian
- Created at : 2024-06-26 00:20:47
- Updated at : 2024-06-27 00:20:47
- Link: https://youtube-video-recordings.techidaily.com/2024-approved-conquering-the-labyrinth-of-lesser-known-youtube-content/
- License: This work is licensed under CC BY-NC-SA 4.0.
