
:max_bytes(150000):strip_icc()/GettyImages-1224253590-cc71f316793a46ec9498c4aeff6b4994.jpg)
"2024 Approved Conquer Your Audience The #Top 5 YouTube Strategies for Brands"
Conquer Your Audience: The #Top 5 YouTube Strategies for Brands
YouTube is undoubtedly the most famous video sharing platform in the world. More than 5 billion videos are watched every single minute on YouTube. And the ever-growing user base has propelled YouTube to the status of 2nd most popular social media platform in the world, and the second most visited website after Google in 2021.
YouTube marketing is great for both businesses and individuals who want to make careers out of YouTube. Many businesses make use of YouTube ads to get their products to their customers and it’s really effective. However, you can make more organic traffic using YouTube video marketing. With a successful YouTube video marketing strategy, you can generate leads without any ad investments.
And in this guide, we will discuss some YouTube video marketing tips that will help you get more subscribers and build your brand outreach.
Tip #1: Create A Roadmap Leading To Your Main Goal
A roadmap is basically a level by level approach to your vision. Instead of just looking at the end plan, you are building your platform up through short attainable goals. There is immense power in setting short term goals. Some serious questions that you should ask yourself are:
Step 1: Start with the question of why you need a YouTube channel in the first place! Decide on what your channel should be about and how the viewers are going to benefit from it.
Step 2: The next step is to prepare a content plan. Here must decide the type of videos and how often it will be published on your channel.
Step 3: What is your target in terms of subscribers and traffic conversion. Do you plan to take the audience to a separate landing or are you planning on making money solely from YouTube?
Planning out such specifics will help you build your platform gradually to the main goal.
Tip #2: Do tests within your strategy
Understanding the audience preferences is paramount to the success of YouTube channels. There are some important tests that you can do to understand the genre that you are targeting.
a. Test video duration
Nobody likes to see a 2 hour long YouTube video unless it’s super interesting. Thankfully, there have been studies that have been conducted to measure the audience reaction to videos of different lengths.
By default, when you create a YouTube account, the maximum upload length is restricted to just 15 minutes. You can go past this limit by verifying your account on YouTube.
When you look at the most trending videos on YouTube, they generally fall within 10 minutes. The average video size on YouTube is 4.4 minutes .
For example, let us look at YouTube videos that explain the same concept, but with different video lengths and see if the audience engagement differs with the videos. we have ensured that both videos are from channels who have a similar subscriber count in order to eliminate disproportionality that arises from viewer base.
This video gives an excellent explanation of the string theory. The Video is From TED-Ed and you can see the audience response in the comments where they praise Physicist Brian Greene for his talk. Note that the video has 2.4 million views.
Now, look at the above video that explains String Theory in less than half the time from TED-Ed. Notice how the video has more than four times the views with an impressive 10 million views. It comes to show that if you can condense your content in such a way that you can get the maximum meaning across in minimum time, you will rack up more views!
b. Test different formats/scenarios
Having a monotonous nature throughout your videos can be quite tiring for the viewer after some time. Make sure to mix things up a bit by introducing new types of video formats or scenarios that keeps the users engaged.
Such a format change will also be invaluable in testing the audience reaction to the different types of videos that you make. These new formats can be in the form of a separate video series that is different from your main content. It can also be something that directly engages the viewers like a live video stream, Ask Me Anything or Q&A type of content, etc.
For example, let us take one among the most popular cooking channels on YouTube – Tasty. If you were to browse through their content, you can see how they got their fame with cookery videos that are short and sweet like the one below:
However, they do not just stick to that same format all the time. you can also see how they mix in lengthier videos of different format. For example:
And many videos that aren’t specifically cooking at all!
And it is evident that these new formats have also become crowd favorites. Now do all their videos hit the 1 million mark? No, that just shows they are constantly testing out the waters go ahead with what works and discard what doesn’t!
c. Try Giveaways and gifts
You can boost the viewership and subscriber count for your channel by setting up occasional giveaways or gifts to the viewers. Make sure that you set the winning criteria to have the viewers subscribe to the channel.
For example, let’s take another popular YouTube channel Unbox Therapy. On Jun 27, 2018, the channel did an announcement that they were giving 106 OnePlus 6 smartphones!
And the result of the announcement was evident in the subscribers count.
From June 23rd to June 27th, 2018, Unbox therapy had gained 12,583 subscribers. However, from the announcement date that is June 27th to June 30th, 2018, the channel saw an increase of a whopping 52,173 subscribers ! Till date, the video has over 14 million views
We do not advise you to try this out when you are just starting your YouTube career. Only venture out to such investments when you are stable when it comes to earnings.
Tip#3: Ask your audience for Feedback
All your videos must be created with the audience in mind. However, sometimes what you may think would work might not fit well with the audience. Hence, it is imperative that you understand their likes and dislikes.
And the best way to improve your videos is to take suggestions from the audience themselves. You can ask them specific questions on how to improve your videos or what they want to see in your future creations. Take notes on what they have to offer and start building your content taking in those suggestions.
There is also another facet to incorporating audience feedback as it projects your YouTube channel to be responsive to the audience, something that is vital to building a strong and loyal viewer base on YouTube.
Tip #4: Analyse your YouTube videos traffic sources
YouTube has made it easier for you to track the sources from which your videos are getting the views. Sign in to YouTube Studio Beta and the click Reach from the Analytics menu provided on the left panel. Now click on Traffic source types.
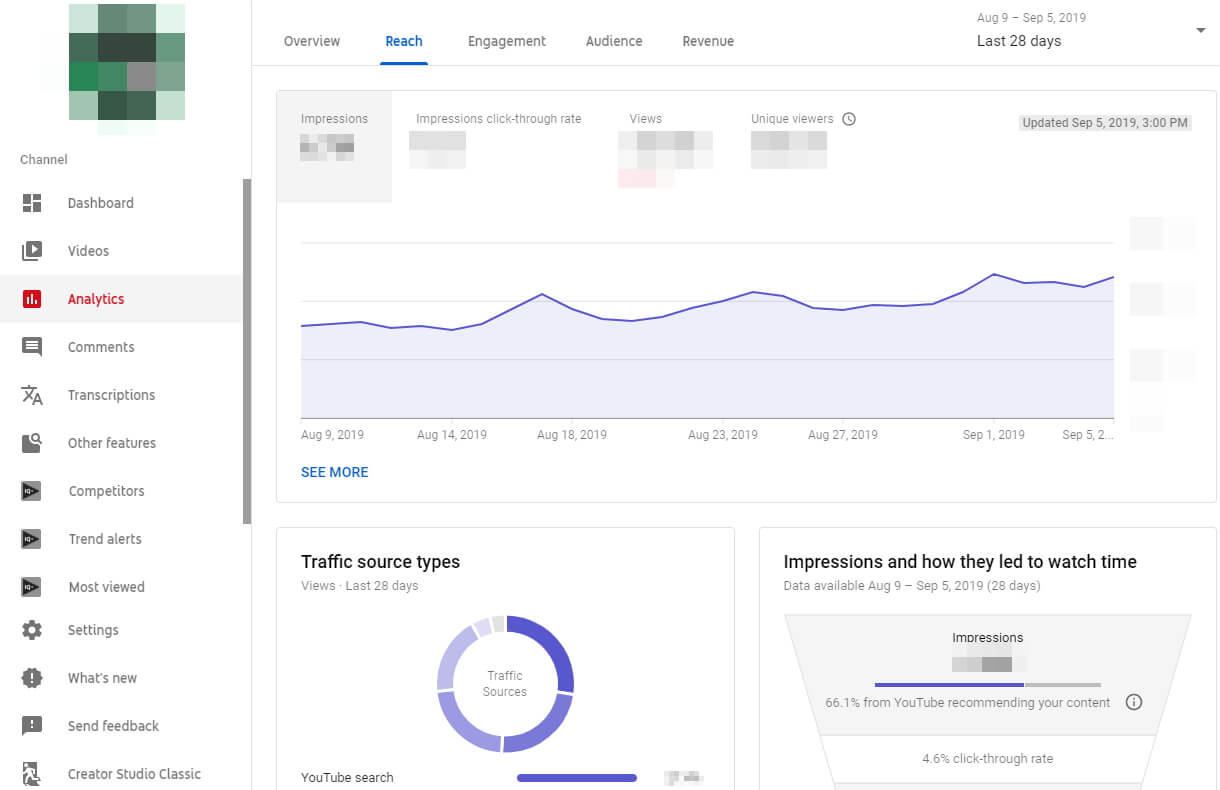
In this window, you can see the different sources that led viewers to your video. Generally, it can be a mix of websites, YouTube recommendation’s, YouTube search, etc. Metrics like Watch Time gives you an idea of how long viewers watch your videos and Audience Retention shows how consistent they are at watching them. These are just two of the many metrics you can use to your advantage.
Analyzing YouTube videos will help you structure your future videos in a way that it is more susceptible to being clicked.
Tip #5: Track the effectiveness of your videos
You must have an eye on the metrics that your videos garner over the days. While the number of views, likes, and dislikes are great indicators in determining the popularity of the videos, but there are many more factors at play.
Your video ranking is important as it determines the position of your videos when a keyword is typed into the search box. The ranks are calculated by the YouTube algorithm, but you have a certain degree of power in raising the ranks by leveraging the following parameters of the video;
Thumbnail: The first thing that the viewer is going it see when they are browsing through a list of videos is the thumbnail. Make sure that it is attractive and stands out!
Title: The next element that gets the most attention from both the user and the YouTube algorithm is the title. Ensure that the main keyword you are targeting is included in the title.
Description: This is where you can play a lot with keywords, both short and long tail. Be very descriptive about your video, but do not just use a big chunk of text. The description must be succinct and informative. It can also have links to your landing page or sponsors.
Tags: Tags are words or phrases that are used to help YouTube better understand the video. Make sure the tags that you are giving are related to the video that they represent.
Category: YouTube has some predefined categories and the videos that you upload must be put in the right one to get maximum reach.
Subtitles: Subtitles do not carry much weight in terms of SEO or ranking, but they are a much-appreciated addition in the audience point of view.
Yes, it can be quite meticulous but the results are worth the effort. Having a rank tracker like the one from SE Ranking or Tubebuddy can be quite handy at times like these. The software basically tracks everything about your videos and presents them in a neatly organized dashboard, which is cuts the effort significantly for YouTube marketers.
Do not leave the video by itself to garner views, it often fails to register any results because elements like the title, description and the keywords play an important role in getting the videos to the users.
You may also like: How to Convert YouTube to MP4 Safely? [Step by Step Guide] >>
Tip #6: Choose a suitable video creator
Creating attractive videos is a key to make success in Youtube video marketing. So you will need to have a suitable video editor to help you. There are quite a few choices in marketing now, such as Adobe Premiere Pro. However, there is a better choice for most average users - Filmora Video Editor , which provides powerful video editing features and huge transitions, effects, and filters resources.
To know more about Filmora Video Editor, visit its page: https://filmora.wondershare.com/video-editor/

Conclusion
YouTube marketing has evolved over the years to a point where you need a carefully crafted plan to have a successful YouTube career. In this guide, we have mentioned some useful YouTube marketing tips that will help you alo12ng the way.
The greatest takeaway from this guide should be that you must be patient and have persistence. Do not stop what you are doing just because you didn’t see any results on day one. Keep the fire burning and you will reach there in no time!
This video gives an excellent explanation of the string theory. The Video is From TED-Ed and you can see the audience response in the comments where they praise Physicist Brian Greene for his talk. Note that the video has 2.4 million views.
Now, look at the above video that explains String Theory in less than half the time from TED-Ed. Notice how the video has more than four times the views with an impressive 10 million views. It comes to show that if you can condense your content in such a way that you can get the maximum meaning across in minimum time, you will rack up more views!
b. Test different formats/scenarios
Having a monotonous nature throughout your videos can be quite tiring for the viewer after some time. Make sure to mix things up a bit by introducing new types of video formats or scenarios that keeps the users engaged.
Such a format change will also be invaluable in testing the audience reaction to the different types of videos that you make. These new formats can be in the form of a separate video series that is different from your main content. It can also be something that directly engages the viewers like a live video stream, Ask Me Anything or Q&A type of content, etc.
For example, let us take one among the most popular cooking channels on YouTube – Tasty. If you were to browse through their content, you can see how they got their fame with cookery videos that are short and sweet like the one below:
However, they do not just stick to that same format all the time. you can also see how they mix in lengthier videos of different format. For example:
And many videos that aren’t specifically cooking at all!
And it is evident that these new formats have also become crowd favorites. Now do all their videos hit the 1 million mark? No, that just shows they are constantly testing out the waters go ahead with what works and discard what doesn’t!
c. Try Giveaways and gifts
You can boost the viewership and subscriber count for your channel by setting up occasional giveaways or gifts to the viewers. Make sure that you set the winning criteria to have the viewers subscribe to the channel.
For example, let’s take another popular YouTube channel Unbox Therapy. On Jun 27, 2018, the channel did an announcement that they were giving 106 OnePlus 6 smartphones!
And the result of the announcement was evident in the subscribers count.
From June 23rd to June 27th, 2018, Unbox therapy had gained 12,583 subscribers. However, from the announcement date that is June 27th to June 30th, 2018, the channel saw an increase of a whopping 52,173 subscribers ! Till date, the video has over 14 million views
We do not advise you to try this out when you are just starting your YouTube career. Only venture out to such investments when you are stable when it comes to earnings.
Tip#3: Ask your audience for Feedback
All your videos must be created with the audience in mind. However, sometimes what you may think would work might not fit well with the audience. Hence, it is imperative that you understand their likes and dislikes.
And the best way to improve your videos is to take suggestions from the audience themselves. You can ask them specific questions on how to improve your videos or what they want to see in your future creations. Take notes on what they have to offer and start building your content taking in those suggestions.
There is also another facet to incorporating audience feedback as it projects your YouTube channel to be responsive to the audience, something that is vital to building a strong and loyal viewer base on YouTube.
Tip #4: Analyse your YouTube videos traffic sources
YouTube has made it easier for you to track the sources from which your videos are getting the views. Sign in to YouTube Studio Beta and the click Reach from the Analytics menu provided on the left panel. Now click on Traffic source types.
In this window, you can see the different sources that led viewers to your video. Generally, it can be a mix of websites, YouTube recommendation’s, YouTube search, etc. Metrics like Watch Time gives you an idea of how long viewers watch your videos and Audience Retention shows how consistent they are at watching them. These are just two of the many metrics you can use to your advantage.
Analyzing YouTube videos will help you structure your future videos in a way that it is more susceptible to being clicked.
Tip #5: Track the effectiveness of your videos
You must have an eye on the metrics that your videos garner over the days. While the number of views, likes, and dislikes are great indicators in determining the popularity of the videos, but there are many more factors at play.
Your video ranking is important as it determines the position of your videos when a keyword is typed into the search box. The ranks are calculated by the YouTube algorithm, but you have a certain degree of power in raising the ranks by leveraging the following parameters of the video;
Thumbnail: The first thing that the viewer is going it see when they are browsing through a list of videos is the thumbnail. Make sure that it is attractive and stands out!
Title: The next element that gets the most attention from both the user and the YouTube algorithm is the title. Ensure that the main keyword you are targeting is included in the title.
Description: This is where you can play a lot with keywords, both short and long tail. Be very descriptive about your video, but do not just use a big chunk of text. The description must be succinct and informative. It can also have links to your landing page or sponsors.
Tags: Tags are words or phrases that are used to help YouTube better understand the video. Make sure the tags that you are giving are related to the video that they represent.
Category: YouTube has some predefined categories and the videos that you upload must be put in the right one to get maximum reach.
Subtitles: Subtitles do not carry much weight in terms of SEO or ranking, but they are a much-appreciated addition in the audience point of view.
Yes, it can be quite meticulous but the results are worth the effort. Having a rank tracker like the one from SE Ranking or Tubebuddy can be quite handy at times like these. The software basically tracks everything about your videos and presents them in a neatly organized dashboard, which is cuts the effort significantly for YouTube marketers.
Do not leave the video by itself to garner views, it often fails to register any results because elements like the title, description and the keywords play an important role in getting the videos to the users.
You may also like: How to Convert YouTube to MP4 Safely? [Step by Step Guide] >>
Tip #6: Choose a suitable video creator
Creating attractive videos is a key to make success in Youtube video marketing. So you will need to have a suitable video editor to help you. There are quite a few choices in marketing now, such as Adobe Premiere Pro. However, there is a better choice for most average users - Filmora Video Editor , which provides powerful video editing features and huge transitions, effects, and filters resources.
To know more about Filmora Video Editor, visit its page: https://filmora.wondershare.com/video-editor/
Conclusion
YouTube marketing has evolved over the years to a point where you need a carefully crafted plan to have a successful YouTube career. In this guide, we have mentioned some useful YouTube marketing tips that will help you alo12ng the way.
The greatest takeaway from this guide should be that you must be patient and have persistence. Do not stop what you are doing just because you didn’t see any results on day one. Keep the fire burning and you will reach there in no time!
Adding Clear Timestamps to Your YouTube Channel’s Live Streams
How to Add Timestamps on YouTube Video Link?

Richard Bennett
Mar 27, 2024• Proven solutions
It is a well-known fact that internet users have a short interest span, about just eight seconds. This attention span applies to all internet platforms including YouTube. YouTube is the second largest and most visited search engine after Google. It provides users with information through engaging and eye-catchy videos. However, certain videos are longer where only a particular section of the video holds the important information. Viewers tend to skip the long videos and if you do not want this to happen to you, you can link to that specific part on your video adding value for your channel viewers with a link known as the YouTube Timestamp link.
When you have a Timestamp link on your video, you can help your viewers directly reach the specific time in the video. This helps avoid the viewers from losing interest or to search for the key part in your video themselves.
Here in this article, we will explain Timestamp links, how to add Timestamp to YouTube video links, and what are the benefits of Timestamp.
- Part 1: YouTube Timestamp Links Introduction
- Part 2: Adding a Timestamp to YouTube Video Link on Desktop
- Part 3: How to Share Specific Parts of YouTube Video
- part 4: Getting YouTube Timestamp Link on Mobile
- Part 5: FAQ About YouTube Timestamps
Part 1: What is YouTube Timestamp Links
In this fast-paced world where viewers have limited time at hand, YouTube Timestamp links are extremely helpful. These links are anchor text or video hyperlinks found either in the description beneath the video or at the video link end.

The Timestamps links allow you to put a link to a key moment in your YouTube video allowing the viewers and subscribers to view the video at the precise time specified. Your YouTube video maybe half an hour long or maybe your users do not have the time now or forget to later watch your video, but when you add Timestamp to the YouTube link, you provide them ways to get to the content quickly enhancing the user experience.
In addition to this, you can even provide a reference in minutes and hours where necessary. The YouTube Timestamp link acts as a guide that directs viewers to the part of the video, which is most relevant to them without having to watch the entire video.
Part 2: How to Add a Timestamp to YouTube Video Link on Desktop?
In the following section, I will show you how to add timestamp to YouTube video link in several ways.
Use YouTube’s Share Feature
Using YouTube’s share feature is the simplest way to add Timestamp to YouTube videos. Here are easy steps to follow to do this.
- Open the YouTube video on your desktop that you want to share.
- Play the video or navigate the timeline and stop at the key moment you wish to apply the timestamp to.
- Now click on the Share button, a pop-up will appear. Under the URL, you will see a small box indicating Start at. The Timestamp is generated automatically, but you can adjust it.

- Copy the updated URL with Timestamp to share the video or click on the social sharing icons to do so.
- When your viewers click on this URL, the video will begin at the specified Timestamp.
Use the Browser URL to add Timestamp manually
You can add Timestamp manually as well. Follow the step-by-step guide below to add a Timestamp manually.
- Open your YouTube video in a browser on your desktop and then find the URL in the browser’s address bar.
- Enter the specific time you want the viewers to watch the video from at the end of the video URL.
You can add time manually in two ways depending on the URL.
?t=As or
&t=As
“youtu.be/” Format
If your YouTube video link is a youtu.be format, then just add ?t=As at the end of the video link. The A denotes the seconds at which you want the viewer to watch your video. The time can also be specified in minutes and seconds and when you want to do that just add ?t=AmBs. For instance, ?t=2m40s.
“youtube.com/” Format
When your YouTube video link has a youtube.com format, the adjustment starts with an ampersand. &t=As or &t=AmBs is what you can use. If you are looking to add the Timestamp at 2m40s, just add “&t=2m40s at the end of the video URL.
Whenever anybody uses the URL with Timestamp, the video will start from the specified time.
However, when adding a Timestamp manually, always leave include whole numbers. For example, if the time starts at 4m, use 4 and not 04.
Copy video URL at current time
You can use YouTube’s built-in feature to share the key parts of your YouTube video. Follow the steps here.
- Visit YouTube and open the video you want to add Timestamp link to.
- Play the video or navigate the timeline to reach the specific part you like to use in Timestamp.
- Now either press Ctrl + click or right-click anywhere on the video. A pop-up opens where you can see various texts, click on the Copy video URL at current time and share the link.

- Anyone who clicks on this link will be instantly transported to the exact segment of your YouTube video.
Part 3: How to Share Specific Parts of Videos with Vibby and Get YouTube Link with Timestamp
The above-mentioned methods to add and send YouTube link with timestamp are quick and easy, but they have a few limitations. If you need more control and share highlighted parts of YouTube video without cutting the video, you need to use a third-party tool known as Vibby.
Vibby allows you to not only share specific parts of videos from YouTube but other platforms as well like Vimeo and Twitch. With the tool, you can clip multiple sections of the video and share them with others.
- To get started, signup either with mail, Google, Twitter, Facebook, or Twitch account.
- Once signed in, go to Create vib at the top left corner and then paste the URL of the YouTube video you would like to share and then click on the Start button.

- Your video will load in the Vibby editor, now click on Highlight the parts to share.
- Here you will see the Start highlight button, jump 5-sec option, option to switch between HD and SD video quality, and volume control button. Navigate to the part you want to share and click on Start highlight.

- When you reach the end of the part, click on Finish highlight. Repeat the process to highlight multiple parts of the video. All the highlighted parts will appear in a list on the right side of the screen.
- Add a description to each part and format it, you have the option to preview before hitting the Save vib button.
- Name the vib and assign a category and then publish it to Vibby or make it a private vib.
- You get a dedicated link to your vib with the ability to embed it on your website or blog.
In this way, you can share the highlights of the YouTube video or Vimeo video easily.
Part 4: How to Get YouTube Timestamp Link on iPhone and Android?
Linking to specific YouTube Timestamp Link is straightforward on both iPhone and Android.
- Go to YouTube and select the video you want to share.
- Move through the progress bar of the video to reach the key part and click on the Share button.
- A pop-up menu appears, highlight the URL and click on the Copy button.
- Paste the URL and manually add the Timestamp using the steps mentioned in add a Timestamp manually.
Part 5: Is Timestamp Beneficial for your Video?
Timestamping your YouTube videos may decrease the watch time, but it enhances the user experience, and they want to see more of your videos. Apart from this, adding Timestamps to your videos make your videos discoverable through Google search. YouTube and Google will reward you for the videos in form of a high search engine ranking.
Bonus: How to Add YouTube Timestamp Link in YouTube Video Description
Adding a YouTube Timestamp link in your video description is easy. Here are the steps to do so.
- Go to your YouTube channel and select the video you want to add Timestamp to and then navigate to the description below it.
- Edit the description by clicking on the Edit Video button.
- You are redirected to the Video Details page. Here write 0:00 at the first part of the timecode, and then continue with the time of the key part of the video you want to add the Timestamp to in 2:40 format. You can add more Timestamp as well and then click on the Save button.

- Reload the video page and you will see auto-generated Timestamp Links at the specific time you provided in the description.
Note: You need to add at least three timestamps which are 10 seconds or longer in order to add timestamps successfully.
Conclusion
As much as possible YouTubers want to make videos short and to the point. However, if a video needs to be longer, you can still help users navigate through to find what is important to them by adding Timestamp to YouTube link or Timestamp the YouTube descriptions. This can help your viewers jump straight to the interesting part in the video, rather than viewing the entire video saving their time and boost user experience.
Richard Bennett
Richard Bennett is a writer and a lover of all things video.
Follow @Richard Bennett
Richard Bennett
Mar 27, 2024• Proven solutions
It is a well-known fact that internet users have a short interest span, about just eight seconds. This attention span applies to all internet platforms including YouTube. YouTube is the second largest and most visited search engine after Google. It provides users with information through engaging and eye-catchy videos. However, certain videos are longer where only a particular section of the video holds the important information. Viewers tend to skip the long videos and if you do not want this to happen to you, you can link to that specific part on your video adding value for your channel viewers with a link known as the YouTube Timestamp link.
When you have a Timestamp link on your video, you can help your viewers directly reach the specific time in the video. This helps avoid the viewers from losing interest or to search for the key part in your video themselves.
Here in this article, we will explain Timestamp links, how to add Timestamp to YouTube video links, and what are the benefits of Timestamp.
- Part 1: YouTube Timestamp Links Introduction
- Part 2: Adding a Timestamp to YouTube Video Link on Desktop
- Part 3: How to Share Specific Parts of YouTube Video
- part 4: Getting YouTube Timestamp Link on Mobile
- Part 5: FAQ About YouTube Timestamps
Part 1: What is YouTube Timestamp Links
In this fast-paced world where viewers have limited time at hand, YouTube Timestamp links are extremely helpful. These links are anchor text or video hyperlinks found either in the description beneath the video or at the video link end.
The Timestamps links allow you to put a link to a key moment in your YouTube video allowing the viewers and subscribers to view the video at the precise time specified. Your YouTube video maybe half an hour long or maybe your users do not have the time now or forget to later watch your video, but when you add Timestamp to the YouTube link, you provide them ways to get to the content quickly enhancing the user experience.
In addition to this, you can even provide a reference in minutes and hours where necessary. The YouTube Timestamp link acts as a guide that directs viewers to the part of the video, which is most relevant to them without having to watch the entire video.
Part 2: How to Add a Timestamp to YouTube Video Link on Desktop?
In the following section, I will show you how to add timestamp to YouTube video link in several ways.
Use YouTube’s Share Feature
Using YouTube’s share feature is the simplest way to add Timestamp to YouTube videos. Here are easy steps to follow to do this.
- Open the YouTube video on your desktop that you want to share.
- Play the video or navigate the timeline and stop at the key moment you wish to apply the timestamp to.
- Now click on the Share button, a pop-up will appear. Under the URL, you will see a small box indicating Start at. The Timestamp is generated automatically, but you can adjust it.
- Copy the updated URL with Timestamp to share the video or click on the social sharing icons to do so.
- When your viewers click on this URL, the video will begin at the specified Timestamp.
Use the Browser URL to add Timestamp manually
You can add Timestamp manually as well. Follow the step-by-step guide below to add a Timestamp manually.
- Open your YouTube video in a browser on your desktop and then find the URL in the browser’s address bar.
- Enter the specific time you want the viewers to watch the video from at the end of the video URL.
You can add time manually in two ways depending on the URL.
?t=As or
&t=As
“youtu.be/” Format
If your YouTube video link is a youtu.be format, then just add ?t=As at the end of the video link. The A denotes the seconds at which you want the viewer to watch your video. The time can also be specified in minutes and seconds and when you want to do that just add ?t=AmBs. For instance, ?t=2m40s.
“youtube.com/” Format
When your YouTube video link has a youtube.com format, the adjustment starts with an ampersand. &t=As or &t=AmBs is what you can use. If you are looking to add the Timestamp at 2m40s, just add “&t=2m40s at the end of the video URL.
Whenever anybody uses the URL with Timestamp, the video will start from the specified time.
However, when adding a Timestamp manually, always leave include whole numbers. For example, if the time starts at 4m, use 4 and not 04.
Copy video URL at current time
You can use YouTube’s built-in feature to share the key parts of your YouTube video. Follow the steps here.
- Visit YouTube and open the video you want to add Timestamp link to.
- Play the video or navigate the timeline to reach the specific part you like to use in Timestamp.
- Now either press Ctrl + click or right-click anywhere on the video. A pop-up opens where you can see various texts, click on the Copy video URL at current time and share the link.
- Anyone who clicks on this link will be instantly transported to the exact segment of your YouTube video.
Part 3: How to Share Specific Parts of Videos with Vibby and Get YouTube Link with Timestamp
The above-mentioned methods to add and send YouTube link with timestamp are quick and easy, but they have a few limitations. If you need more control and share highlighted parts of YouTube video without cutting the video, you need to use a third-party tool known as Vibby.
Vibby allows you to not only share specific parts of videos from YouTube but other platforms as well like Vimeo and Twitch. With the tool, you can clip multiple sections of the video and share them with others.
- To get started, signup either with mail, Google, Twitter, Facebook, or Twitch account.
- Once signed in, go to Create vib at the top left corner and then paste the URL of the YouTube video you would like to share and then click on the Start button.
- Your video will load in the Vibby editor, now click on Highlight the parts to share.
- Here you will see the Start highlight button, jump 5-sec option, option to switch between HD and SD video quality, and volume control button. Navigate to the part you want to share and click on Start highlight.
- When you reach the end of the part, click on Finish highlight. Repeat the process to highlight multiple parts of the video. All the highlighted parts will appear in a list on the right side of the screen.
- Add a description to each part and format it, you have the option to preview before hitting the Save vib button.
- Name the vib and assign a category and then publish it to Vibby or make it a private vib.
- You get a dedicated link to your vib with the ability to embed it on your website or blog.
In this way, you can share the highlights of the YouTube video or Vimeo video easily.
Part 4: How to Get YouTube Timestamp Link on iPhone and Android?
Linking to specific YouTube Timestamp Link is straightforward on both iPhone and Android.
- Go to YouTube and select the video you want to share.
- Move through the progress bar of the video to reach the key part and click on the Share button.
- A pop-up menu appears, highlight the URL and click on the Copy button.
- Paste the URL and manually add the Timestamp using the steps mentioned in add a Timestamp manually.
Part 5: Is Timestamp Beneficial for your Video?
Timestamping your YouTube videos may decrease the watch time, but it enhances the user experience, and they want to see more of your videos. Apart from this, adding Timestamps to your videos make your videos discoverable through Google search. YouTube and Google will reward you for the videos in form of a high search engine ranking.
Bonus: How to Add YouTube Timestamp Link in YouTube Video Description
Adding a YouTube Timestamp link in your video description is easy. Here are the steps to do so.
- Go to your YouTube channel and select the video you want to add Timestamp to and then navigate to the description below it.
- Edit the description by clicking on the Edit Video button.
- You are redirected to the Video Details page. Here write 0:00 at the first part of the timecode, and then continue with the time of the key part of the video you want to add the Timestamp to in 2:40 format. You can add more Timestamp as well and then click on the Save button.
- Reload the video page and you will see auto-generated Timestamp Links at the specific time you provided in the description.
Note: You need to add at least three timestamps which are 10 seconds or longer in order to add timestamps successfully.
Conclusion
As much as possible YouTubers want to make videos short and to the point. However, if a video needs to be longer, you can still help users navigate through to find what is important to them by adding Timestamp to YouTube link or Timestamp the YouTube descriptions. This can help your viewers jump straight to the interesting part in the video, rather than viewing the entire video saving their time and boost user experience.
Richard Bennett
Richard Bennett is a writer and a lover of all things video.
Follow @Richard Bennett
Also read:
- [Updated] Amplify Your Content Two Approaches to Skyrocket Traffic
- The Complete Analyst's Toolkit for Tracking YouTube Audiences & Money Flow
- Swift Circulation of Playlists on YouTube
- 2024 Approved Build Your Brand with Dynamic Haul Videography
- In 2024, Content Creation Conundrum Where to Go?
- Evaluating TSeries' Business Model with YouTube Viewership Metrics
- Excelling at Content Creation A Guide to Gamers' Success
- [New] Channel Your Inner DJ Discover These Innovative 20 Music Sources on YouTube
- Essential Listings for Easy Access to YouTube Intro Files for 2024
- Spotlight Secrets Perfecting Vlogger Lights
- Enhancing Engagement Essential Video Formats for YouTube Viewers for 2024
- Cost-Effective Recorder Selections for YouTube Vloggers for 2024
- [Updated] Dive Into Video Production Mastering Green Screens on YT
- [New] Bite-Sized Broadcasting Maintaining Quality in Quick Posts
- [New] Elevate Your Channel Ranking with These 11 SEO Secrets
- [New] Evolving Channels 8 Fastest Video Climbers
- [Updated] Building a Sports Channel via macOS Step by Step Guide
- Mastering Sony Vegas YouTube Video Editing Basics
- Turning Vlogging Into Cash Essential Steps
- In 2024, Dominating the YouTube Sphere Key Strategies for Top-Tier Presence
- Ascending with ASMR Top Strategies for Video Creation for 2024
- Key Strategies in Building Successful YouTube Shorts Templates
- Acquire No-Cost Sounds for Videos & Podcasts!
- In 2024, Chuckles Galore Navigate the Best 15 Comedic YouTube Crews
- 2024 Approved Creating Profit on YouTube The Ultimate List of Top Business Channels
- In 2024, Best Stream Tech Innovative Hardware & Software Guide for Youtubers
- Empowered by Numbers Decoding YouTube Analytics for 2024
- [New] Do YouTubers Get Paid Monthly?
- Critical ASMR Video Elements to Note for 2024
- [New] Crafting Your YouTube Content for Specific Crowds
- Beyond Mainstream A List of 6 Exclusive Icon & Logo Providers
- Strategies for Amplifying Your YT Viewership Quickly
- 2024 Approved Crafting Captivating ASMR Scenes Techniques for Successful Recording
- Mastering Your Videos Top YouTube-Friendly Cameras
- Content Distribution Excellence Vimeo vs YouTube
- [New] Echoing Ethos with Closing Credits
- Mastering Fair Use Navigating YouTube Copyright Challenges
- In 2024, Creating an Athletic Channel on Apple Hardware
- Safeguarding Against Scams as You Seek to Amass One Million YouTube Watches
- 2024 Approved Beat Procrastination with Instant Access to Your Youtube Favorites
- [Updated] Cutting-Edge Camera Technology For YouTube Stars
- [New] Conquer & Cease The Unremovable Guide to Youtube Shorts
- In 2024, 4 Ways to Transfer Music from Vivo Y78t to iPhone | Dr.fone
- A Perfect Guide To Remove or Disable Google Smart Lock On Honor V Purse
- [New] Revealing MyCam’s True Recording Potential for 2024
- How To Change Motorola Edge 2023 Lock Screen Password?
- Ideal Tools for Eradicating TikTok Identity Badges for 2024
- [New] Muting Background Noise in Skype Sessions for 2024
- Easy Guide to HTC FRP Bypass With Best Methods
- New Some Techniques for Creating Animated Logo That Few People Know About
- The Complete Breakdown of Game Capture in Overwatch for 2024
- How to Mirror PC Screen to Nubia Red Magic 8S Pro+ Phones? | Dr.fone
- Prank Your Friends! Easy Ways to Fake and Share Google Maps Location On Apple iPhone XR | Dr.fone
- [Updated] The Art of Visual Storytelling in Your Instagram Highlight Images for 2024
- Ideal Cameras Boosting Podcast Clarity
- How to Transfer from Apple iPhone 8 to iPhone 8/X/11 | Dr.fone
- Edit and Send Fake Location on Telegram For your Motorola Edge 40 Pro in 3 Ways | Dr.fone
- [Updated] 2024 Approved Masterful Screen Capture Services
- In 2024, How to Track Xiaomi 13T Pro Location by Number | Dr.fone
- [Updated] Top 10 Pioneering Free Screen Recorder Applications for Mac
- Fake the Location to Get Around the MLB Blackouts on Vivo S18 | Dr.fone
- 2024 Approved Synchronizing Audio with Visual Media The QuickTime Method
- In 2024, Forgot Pattern Lock? Heres How You Can Unlock Xiaomi Redmi Note 12 Pro+ 5G Pattern Lock Screen
- How to rescue lost call logs from Oppo Reno 11F 5G
- Reset iTunes Backup Password Of Apple iPhone 15 Plus Prevention & Solution
- How to Easily Hard reset my Tecno Spark 10 Pro | Dr.fone
- [Updated] Best Screen Recorder for Everyday Users
- 2024 Approved Minecraft Homes Innovative & Stylish Designs
- In 2024, What Does Enter PUK Code Mean And Why Did The Sim Get PUK Blocked On Motorola G24 Power Device
- 2024 Approved Top-Rated Free MPEG Video Joining Software
- [New] In 2024, From Viewer to Victor Step-by-Step Windows PC Guide for High-Quality Live Recording
- In 2024, A Step-by-Step Guide on Using ADB and Fastboot to Remove FRP Lock from your Vivo Y100 5G
- How to Hide/Fake Snapchat Location on Your Vivo V27 Pro | Dr.fone
- Updated 9 Top-Notch Free Online Movie Creators for 2024
- In 2024, Becoming an Unboxing Star Strategies for Viral, Engaging TikTok Videos
- Updated The Ultimate Guide to Animated Video Making on Android and iOS
- [Updated] Transcoding Vimeo to MP3 Audio File
- Title: "2024 Approved Conquer Your Audience The #Top 5 YouTube Strategies for Brands"
- Author: Brian
- Created at : 2024-05-25 11:04:41
- Updated at : 2024-05-26 11:04:41
- Link: https://youtube-video-recordings.techidaily.com/2024-approved-conquer-your-audience-the-top-5-youtube-strategies-for-brands/
- License: This work is licensed under CC BY-NC-SA 4.0.
