"2024 Approved Channel Visuals Hub Icon & Banner Crafting Tips"
Channel Visuals Hub: Icon & Banner Crafting Tips
YouTube Channel Art: How to Make Banners, Icons, and Thumbnails?

Shanoon Cox
Oct 26, 2023• Proven solutions
YouTube channel art refers to your banner, icon, and watermark along with the thumbnails of your videos. Creating custom channel art is a great way to express yourself and communicate the tone of your videos.
YouTube supports JPG, GIF, BMP, and PNG files for channel art, although they do not allow animated GIFs.
Part 1: Top Sites for YouTube Channel Art
You can make your channel art in Photoshop, or another photo editing program, but there are also some excellent tools online which you can access for free. Here are two of the best:
Canva.com
Canva has templates for YouTube banners as well as a variety of stock images. You can also upload and edit your own images on Canva. It is a free service, but they do have some premium features which cost $1 each. Canva has a desktop version and an iPad app.
PicMonkey.com
PicMonkey lets you import images from your computer or social media accounts, edit them, and use them in templates for YouTube banners or other kinds of social media graphics. It’s free to use, but you can only access their more advanced editing tools if you buy a paid subscription for either $4.99 a month, or $2.75 a month for a year.
Part 2: Banners
Your banner is the header for your channel page. Its dimensions are 2560 x 1440 px.
Not all of your banner will be visible on all devices. The full 2560 x 1440 px image will only be seen by viewers watching on tv screens.
Only 1546 x 423 px of your banner will be visible on computers, and this ‘safe area’ can vary for different tablets and smartphones depending on the width of their screens. Make sure any important text or logos are placed in a central location so everybody can see them.
Also, keep in mind that your icon will hover over the top left corner of your banner and that your social media icons will be located in the bottom right corner.
The file size of your banner cannot be over 4MB.
Part 3: Icons
Your icon is the avatar you use when leaving and replying to comments on YouTube. It also hovers over your banner on your channel page.
By default, your icon will be the picture associated with your Google account.
If you upload a new icon, it will render down to 98 x 98 px. So, any square image larger than 98 x 98 px will work. However, YouTube recommends you use one as large as 800 x 800 px. This will give you a sharper, higher quality, image.
Part 4: Thumbnails
Thumbnails are the images that represent your videos on your channel page and in search results.
You can browse through your video and choose a still frame you want to use as your video’s thumbnail. Or, you can upload a custom image.
Custom thumbnails should have an aspect ratio of 16:9, the same as YouTube’s video player. The files should be under 2MB and have a resolution of 1280 x 720.
To upload a custom thumbnail, select the custom thumbnail option under Video Thumbnails at the end of the video uploading process. You can also change the thumbnails of your existing videos to custom ones through Video Manager.
Remember that your thumbnail will be rendered down to a much smaller size. If you use text, like the title of your video, then you should make it really big so that it is easy to read when it gets shrunk down.
Part 5: Watermarks
A watermark is a small, usually 50 x 50 px image displayed in the bottom right corner of your video.
Watermarks protect your videos by making them harder for others to steal and take credit for.
Ideally, your watermark will be a transparent version of your logo. Try not to use more than three colors – you do not want your watermark to distract your viewers.
If you add a branding watermark through YouTube then that watermark will also double as a subscribe link.
Here is how you can add a branding watermark through YouTube:
- On YouTube, go to your Creator Studio and select Branding under the Channel menu.
- Click the blue add a watermark button on the Branding page.
- An upload of a watermark window will pop up. Select your image file and click Save.
- Choose between having a start time for your watermark, making it appear only at the end of your videos, or having it there for the entire length of your videos. The popular choice is to have it visible through the entire video.
- Click Update. Your watermark will be applied to all of your videos.
If you want to find a video editing solution that empowers your imagination and creativity yet takes less effort, please try this robust and user-friendly video editing software Filmora, which is equipped with its own footage stock Wondershare Filmstock and will definitely enhance your productivity and helps you to make money by making videos much easier.


Shanoon Cox
Shanoon Cox is a writer and a lover of all things video.
Follow @Shanoon Cox
Shanoon Cox
Oct 26, 2023• Proven solutions
YouTube channel art refers to your banner, icon, and watermark along with the thumbnails of your videos. Creating custom channel art is a great way to express yourself and communicate the tone of your videos.
YouTube supports JPG, GIF, BMP, and PNG files for channel art, although they do not allow animated GIFs.
Part 1: Top Sites for YouTube Channel Art
You can make your channel art in Photoshop, or another photo editing program, but there are also some excellent tools online which you can access for free. Here are two of the best:
Canva.com
Canva has templates for YouTube banners as well as a variety of stock images. You can also upload and edit your own images on Canva. It is a free service, but they do have some premium features which cost $1 each. Canva has a desktop version and an iPad app.
PicMonkey.com
PicMonkey lets you import images from your computer or social media accounts, edit them, and use them in templates for YouTube banners or other kinds of social media graphics. It’s free to use, but you can only access their more advanced editing tools if you buy a paid subscription for either $4.99 a month, or $2.75 a month for a year.
Part 2: Banners
Your banner is the header for your channel page. Its dimensions are 2560 x 1440 px.
Not all of your banner will be visible on all devices. The full 2560 x 1440 px image will only be seen by viewers watching on tv screens.
Only 1546 x 423 px of your banner will be visible on computers, and this ‘safe area’ can vary for different tablets and smartphones depending on the width of their screens. Make sure any important text or logos are placed in a central location so everybody can see them.
Also, keep in mind that your icon will hover over the top left corner of your banner and that your social media icons will be located in the bottom right corner.
The file size of your banner cannot be over 4MB.
Part 3: Icons
Your icon is the avatar you use when leaving and replying to comments on YouTube. It also hovers over your banner on your channel page.
By default, your icon will be the picture associated with your Google account.
If you upload a new icon, it will render down to 98 x 98 px. So, any square image larger than 98 x 98 px will work. However, YouTube recommends you use one as large as 800 x 800 px. This will give you a sharper, higher quality, image.
Part 4: Thumbnails
Thumbnails are the images that represent your videos on your channel page and in search results.
You can browse through your video and choose a still frame you want to use as your video’s thumbnail. Or, you can upload a custom image.
Custom thumbnails should have an aspect ratio of 16:9, the same as YouTube’s video player. The files should be under 2MB and have a resolution of 1280 x 720.
To upload a custom thumbnail, select the custom thumbnail option under Video Thumbnails at the end of the video uploading process. You can also change the thumbnails of your existing videos to custom ones through Video Manager.
Remember that your thumbnail will be rendered down to a much smaller size. If you use text, like the title of your video, then you should make it really big so that it is easy to read when it gets shrunk down.
Part 5: Watermarks
A watermark is a small, usually 50 x 50 px image displayed in the bottom right corner of your video.
Watermarks protect your videos by making them harder for others to steal and take credit for.
Ideally, your watermark will be a transparent version of your logo. Try not to use more than three colors – you do not want your watermark to distract your viewers.
If you add a branding watermark through YouTube then that watermark will also double as a subscribe link.
Here is how you can add a branding watermark through YouTube:
- On YouTube, go to your Creator Studio and select Branding under the Channel menu.
- Click the blue add a watermark button on the Branding page.
- An upload of a watermark window will pop up. Select your image file and click Save.
- Choose between having a start time for your watermark, making it appear only at the end of your videos, or having it there for the entire length of your videos. The popular choice is to have it visible through the entire video.
- Click Update. Your watermark will be applied to all of your videos.
If you want to find a video editing solution that empowers your imagination and creativity yet takes less effort, please try this robust and user-friendly video editing software Filmora, which is equipped with its own footage stock Wondershare Filmstock and will definitely enhance your productivity and helps you to make money by making videos much easier.
Shanoon Cox
Shanoon Cox is a writer and a lover of all things video.
Follow @Shanoon Cox
Converting YouTube to GIF: A Comprehensive Online Process
GIF editor: How to Make Animated GIF Images online from YouTube Video

Richard Bennett
Mar 27, 2024• Proven solutions
YouTube videos are fun and easy to access, they deliver a very good value and you will always have fun using them. But there are situations where these videos can integrate some interesting, funny moments and this is why creating a GIF out of them can be a good idea. You can make GIF from video if you want and all you need is a good GIF editor, which is very impressive to say the least.
You May Also Like:
Royalty free music for YouTube Videos >>
Best Screen Recorders for YouTube >>
It’s not a problem to use the GIF files as a way to express yourself so using a GIF editor to create the GIF you want is not only interesting, it can also bring in front a very good value and interesting options for sure. You should totally give it a shot if you can.
Tools that can help you make gif images from YouTube video
Lots of apps can help you do this and most of them are online based. This basically means that you can create a GIF from video without that much of a hassle. All you have to do is to find the right video and the best moments, edit it and then use this video to create the GIF you want. The process is easy and fun and it will provide you with a great value for sure.
1. imgur.com
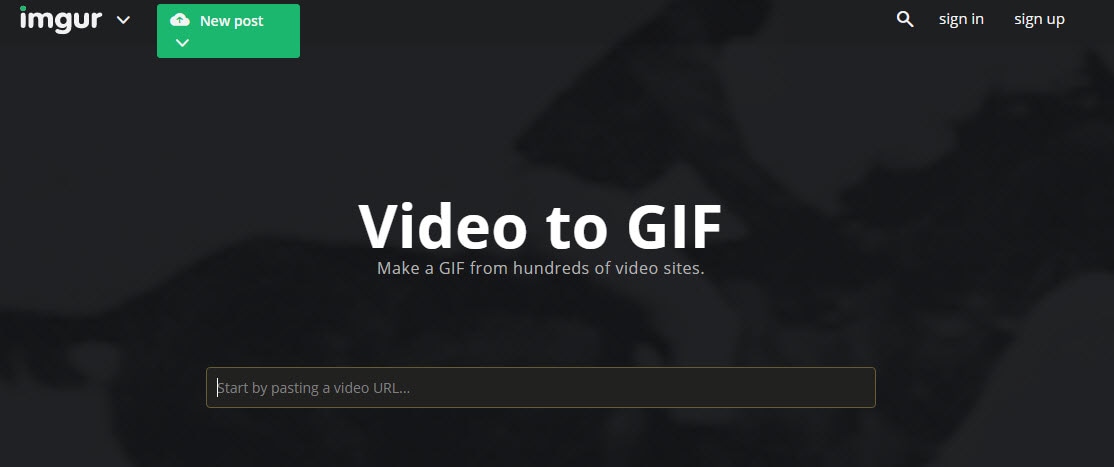
This tool requires you to add in the YouTube link and then you press Enter. Once you do that the app will do its job on its own. It’s certainly a very interesting option and one that will deliver a lot of value for all kinds of users. It’s an exciting experience for sure just because you get so much value and incredible results without that much of a hassle. You can add captions to the app which is great.
2. likeyoyo.com

Using this app is simple, you paste the URL, press Enter and then the GIF is created automatically. They integrate some share buttons and a set of tools to help you move this, but it’s not that hard to use and it’s very user friendly to be honest.
3. makeagif.com
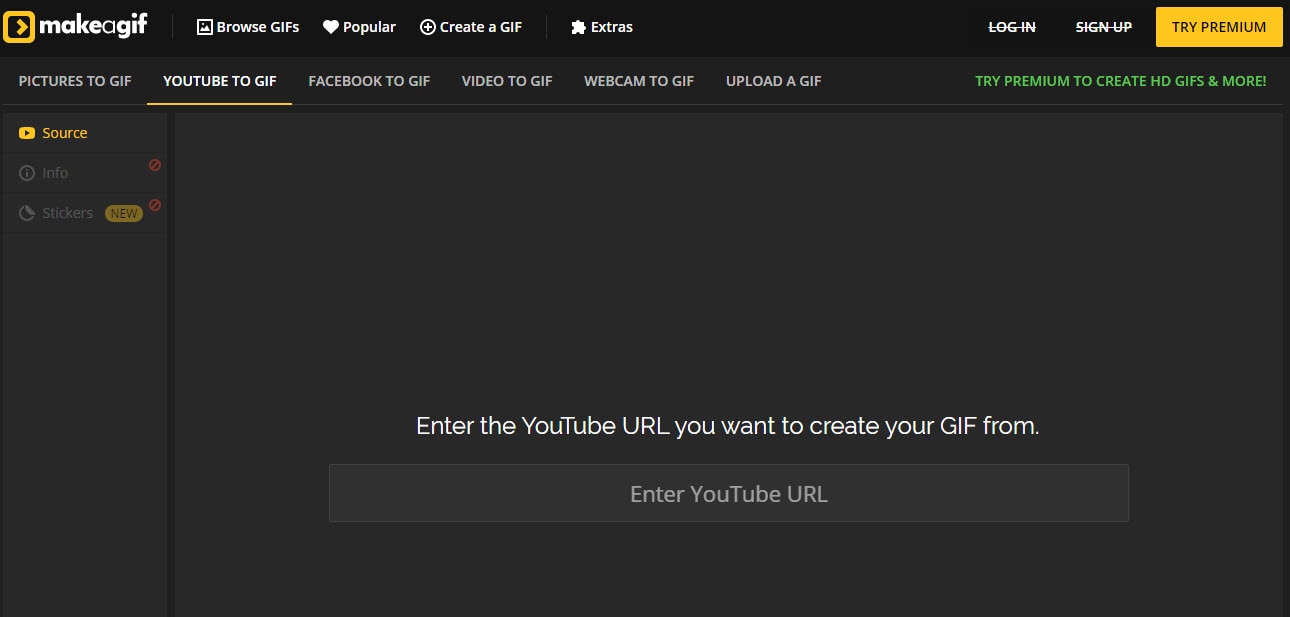
This is a great, easy to use online tool that just requires you to add in the video URL you want and then wait until it’s done. It’s certainly a great tool to use and one that will deliver a lot of value.
Add more fun on your GIF with Wondershare Filmora
Wondershare Filmora is a refined application that allows you to make GIF from video fast and with great results. It features an interesting set of tools, it’s very easy to modify and it does bring in front interesting options for sure. It’s designed with ease of use in mind and it does enable you to add in many animated effects which is always a major plus for this kind of tool.
However, if you want to make a GIF online, Filmora meme maker is your ultimate solution. It helps you make image, GIF and video memes directly without watermark. It is totally FREE to use and no sign up. You can change text size, color and position to create caption when you are editing. You can also put text inside or outside in GIF. Just with a few clicks, your GIF is done. Try it nowDownload Mac Version ](https://tools.techidaily.com/wondershare/filmora/download/ )
How to use?
Using Wondershare Filmora is actually very easy and the process is designed in order to deliver lots of value to the user without making the experience complex or boring. In fact, you just have to use the following steps in order to get the best results:
- At first you will have to import your GIF file and it allows you to bring in front immense possibilities since you can edit GIF on the fly.
- Once you have the file imported, you will need to drag that file you want to edit to the timeline.
- Double clik on the clip in the timeline. You will be able to edit GIF, you can rotate, scale or flip which is very helpful.
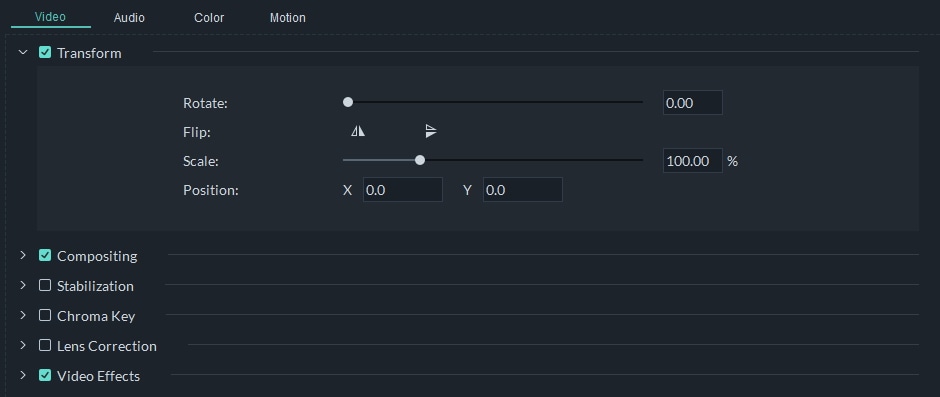
- Although it’s not mandatory, you can try to add filter to the GIF in order to make the experience more interesting.

- Lastly, when you are done with the process you can export to format GIF. This is a very good value and it will provide you with a stellar experience.

Conclusion
Using Wondershare Filmora in order to edit GIF and create GIF from video is a very good idea. The app is designed to offer some amazing features and it’s also very easy to use. If you want to take on such a task, then Wondershare Filmora is certainly the tool for you so just give it a shot and you are bound to love it
Richard Bennett
Richard Bennett is a writer and a lover of all things video.
Follow @Richard Bennett
Richard Bennett
Mar 27, 2024• Proven solutions
YouTube videos are fun and easy to access, they deliver a very good value and you will always have fun using them. But there are situations where these videos can integrate some interesting, funny moments and this is why creating a GIF out of them can be a good idea. You can make GIF from video if you want and all you need is a good GIF editor, which is very impressive to say the least.
You May Also Like:
Royalty free music for YouTube Videos >>
Best Screen Recorders for YouTube >>
It’s not a problem to use the GIF files as a way to express yourself so using a GIF editor to create the GIF you want is not only interesting, it can also bring in front a very good value and interesting options for sure. You should totally give it a shot if you can.
Tools that can help you make gif images from YouTube video
Lots of apps can help you do this and most of them are online based. This basically means that you can create a GIF from video without that much of a hassle. All you have to do is to find the right video and the best moments, edit it and then use this video to create the GIF you want. The process is easy and fun and it will provide you with a great value for sure.
1. imgur.com
This tool requires you to add in the YouTube link and then you press Enter. Once you do that the app will do its job on its own. It’s certainly a very interesting option and one that will deliver a lot of value for all kinds of users. It’s an exciting experience for sure just because you get so much value and incredible results without that much of a hassle. You can add captions to the app which is great.
2. likeyoyo.com
Using this app is simple, you paste the URL, press Enter and then the GIF is created automatically. They integrate some share buttons and a set of tools to help you move this, but it’s not that hard to use and it’s very user friendly to be honest.
3. makeagif.com
This is a great, easy to use online tool that just requires you to add in the video URL you want and then wait until it’s done. It’s certainly a great tool to use and one that will deliver a lot of value.
Add more fun on your GIF with Wondershare Filmora
Wondershare Filmora is a refined application that allows you to make GIF from video fast and with great results. It features an interesting set of tools, it’s very easy to modify and it does bring in front interesting options for sure. It’s designed with ease of use in mind and it does enable you to add in many animated effects which is always a major plus for this kind of tool.
However, if you want to make a GIF online, Filmora meme maker is your ultimate solution. It helps you make image, GIF and video memes directly without watermark. It is totally FREE to use and no sign up. You can change text size, color and position to create caption when you are editing. You can also put text inside or outside in GIF. Just with a few clicks, your GIF is done. Try it nowDownload Mac Version ](https://tools.techidaily.com/wondershare/filmora/download/ )
How to use?
Using Wondershare Filmora is actually very easy and the process is designed in order to deliver lots of value to the user without making the experience complex or boring. In fact, you just have to use the following steps in order to get the best results:
- At first you will have to import your GIF file and it allows you to bring in front immense possibilities since you can edit GIF on the fly.
- Once you have the file imported, you will need to drag that file you want to edit to the timeline.
- Double clik on the clip in the timeline. You will be able to edit GIF, you can rotate, scale or flip which is very helpful.
- Although it’s not mandatory, you can try to add filter to the GIF in order to make the experience more interesting.
- Lastly, when you are done with the process you can export to format GIF. This is a very good value and it will provide you with a stellar experience.
Conclusion
Using Wondershare Filmora in order to edit GIF and create GIF from video is a very good idea. The app is designed to offer some amazing features and it’s also very easy to use. If you want to take on such a task, then Wondershare Filmora is certainly the tool for you so just give it a shot and you are bound to love it
Richard Bennett
Richard Bennett is a writer and a lover of all things video.
Follow @Richard Bennett
Also read:
- [New] Easy Guide Turning Your Favorite YouTube Videos Into Animated GIFs
- [Updated] Anime's Best of 2023 on YouTube A Guide to Your Daily Dose
- [Updated] Elevate Your Content's Appeal How to Resize YouTube Thumbnails Right
- 2024 Approved Audio-to-Video Bridge Easy 3-Step Guide for MP3 to YouTube Uploads
- Can I Bypass a Forgotten Phone Password Of Nubia Red Magic 9 Pro+?
- Digital Chronicling of Live Audio Content on the Net
- Diving Into the World of Amazon Halo – A Fitness Tracker That Blurs Boundaries for a Comprehensive Self-Monitoring Experience.
- Embrace 9 Festive Feasts Watch Holiday Epics at Zero Cost Online
- I: Reality and Subjectivity | Free Book
- In 2024, Discovering Your Curated Collection of Tunes in YouTube's Depths
- In 2024, Unlocking YouTube's Potential 10 MPEG Conversion Tips
- In 2024, Wondering the Best Alternative to Hola On Realme 12 Pro 5G? Here Is the Answer | Dr.fone
- Jesus Of Nazareth Our Liberator | Free Book
- Troubleshooting Steps for PC Players: Resolving Armored Core 6 - Fires of Rubicon Issues
- Unlock the Potential of Your YouTube Videos with Effective End Screens
- Who Are These Titans? Top 10 YouTube Channels with Gigantic Viewership & Subs
- Title: 2024 Approved Channel Visuals Hub Icon & Banner Crafting Tips
- Author: Brian
- Created at : 2025-01-02 17:27:30
- Updated at : 2025-01-03 17:11:13
- Link: https://youtube-video-recordings.techidaily.com/2024-approved-channel-visuals-hub-icon-and-banner-crafting-tips/
- License: This work is licensed under CC BY-NC-SA 4.0.