
:max_bytes(150000):strip_icc()/Phones_GettyImages-1314284781_ORIG_d3sign._CROPPEDjpg-c1cb62860b3e4228b51aa8566e84abb0.jpg)
"2024 Approved Blueprint for Buzzing Outro"
Blueprint for Buzzing Outro
Nowadays, having a strong online presence is more important than ever. One of the best ways to do that is to create engaging content for your YouTube channel, and you can achieve this by adding a solid intro and outro to your videos.
To keep viewers engaged, the outros on your videos must be strong and captivating to make a positive impression and leave viewers wanting more.
In this article, we’ll discuss how to create news outro templates for your videos or get an editable or non-editable template online.
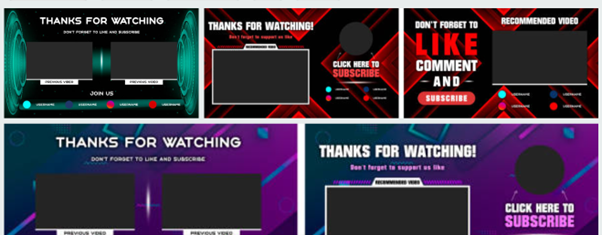
Part 1. Before Starting, Learn What Is a Good YouTube Outro?
Before we investigate where to find an appropriate News Style Outro for your video in Part 2, let’s figure out what elements a good outro should include firstly.
A good outro will typically include a call to action, such as subscribing to a channel, checking out a website, or following on social media. You can also use engaging music or make your outros visually appealing with graphics, animations, or both to keep your viewers hooked.
Furthermore, it should include a brief summary of the video, and what viewers can expect for the things to come. You can find outros templates online or make your own outstanding YouTube outros in just a few clicks.
Part 2. Recommendation: Where Can You Find News Style Outro?
Now that you’ve understood what a good YouTube outro is, you might wonder where you can find News Style outros for your videos/presentations to add a bit of flair.
Multiple platforms offer editable or non-editable news styles outros to content creators. Below we’ve recommended top websites/platforms where you can get your required templates without any issues. Some even offer non-copyright content to their users.
Editable News Outro Template Websites
An editable news outro template can provide a quick and easy way to create or customize an outro that is both professional and engaging. Here are four websites we have chosen for you to find editable news outro templates.
Filmstock
Filmstock is a platform offering free and paid editable templates for content creators. With dozens of editable templates to choose from on Filmstock , you can find the perfect news style outro for your videos in just a few clicks. First, however, you need to install Filmora on your PC to use the platform.
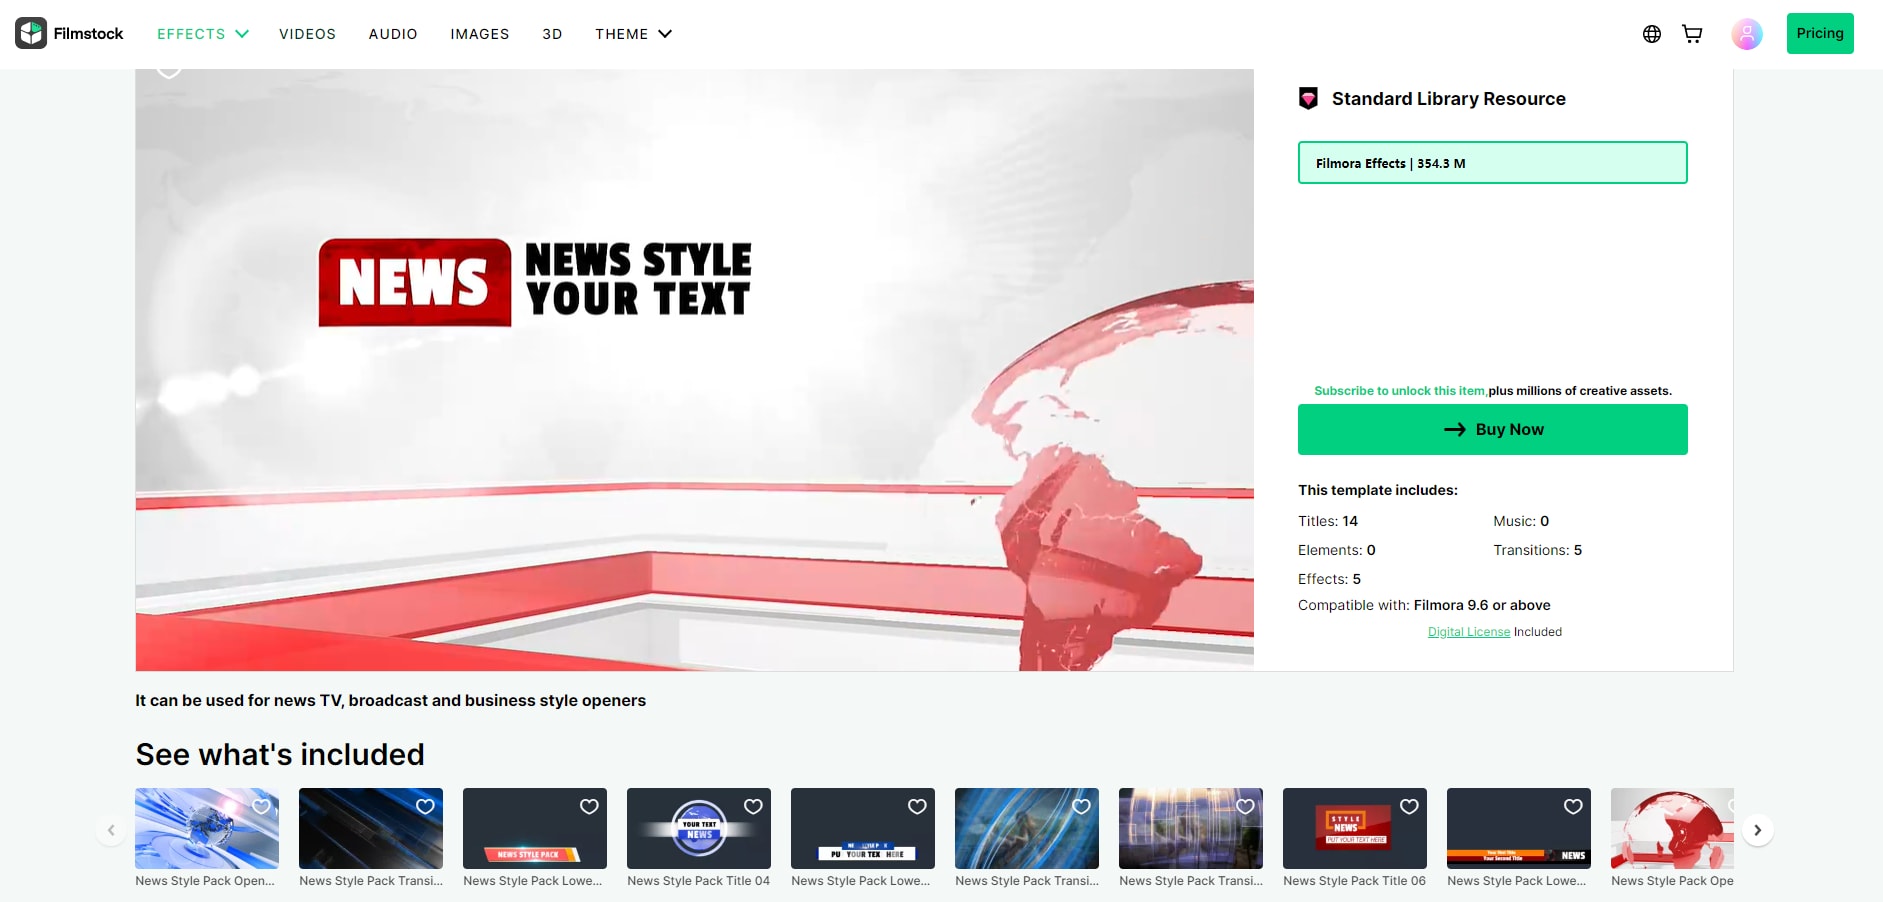
Filmora is a popular video editor with a built-in filmstock library offering hundreds of non-copyright editable templates for every occasion. With the software, you can find and add your news style outros to your videos with just a few clicks. The only disadvantage is that it isn’t completely free. The paid version offers two options: A standard plan that costs $9.99 per month and a Premium plan that will cost you $49.99 per month.
You can also find detailed video tutorials to facilitate your video creation through Filmora and Filmstock’s official YouTube Channels, as well as video sources set presentation on the two channels. Here is an example of News Set video on Filmora’s YouTube Channel. Go to watch it and check are there any ideal news outro!
Video of News Set in Filmora Effects Store
Canva
Canva is a user-friendly graphic design free and paid tool that is quickly becoming a popular choice for businesses of all sizes. Canva offers a range of templates for creating professional-looking designs.
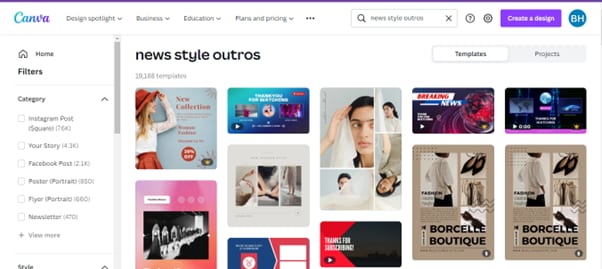
With a wide range of templates to choose from, you can easily find one that fits your needs and style. Best of all, you can create your outro template in minutes without hiring a designer or spending hours learning complex design software.
The software is easy-to-use and does not require any editor to customize and use the templates. The paid version is divided into 2 tiers: Canva Pro ($54.99 per year) and Canva for team ($84. 90/year). One disadvantage of the Canva free version is that it is limited resolution options when exporting your file.
Flexclip
Flexclip is a free, powerful, and easy-to-use online video maker that helps you create beautiful and engaging content for your business. With Flexclip, you can easily create editable news style outros for your videos from scratch or choose a template and edit it according to your requirements.
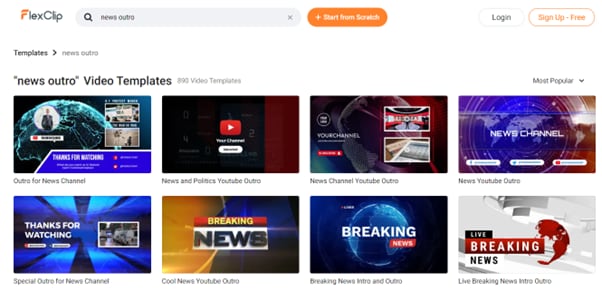
You can add text, music, elements, overlays, and branding to your templates to make them more stunning and captivating.
The platform offers 3 paid plans starting at $8.99/month. The con here is that the free version is only limited to the export quality of 480p, single royalty-free stock use, and 12 projects limit.
Placeit
Placeit is an online editor giving you the ability to create and customize your video content in no time. The editor also includes a stock image library, giving you access to several customizable templates.
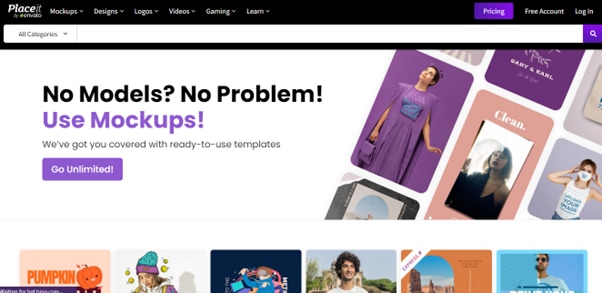
Placeit is easy to use and offers a variety of templates for different purposes, including outros for news stories, video blogs, and even gaming videos. The platform offers an unlimited subscription plan starting from $7.47 /month.
However, the design rendering process of the editor is slow, there is no AI tool, and you even cannot import fonts that are not available on the platform.
Non-Editable News Outro Template Websites
Some platforms offer non-editable high-resolution news outros that you can integrate into your videos using software programs like Filmora (guidance in Part 3), After Effects, etc.
Storyblock
Searching for high-quality templates for your next project?Storyblock is a website that comes with royalty-free, non-customizable news style outros.
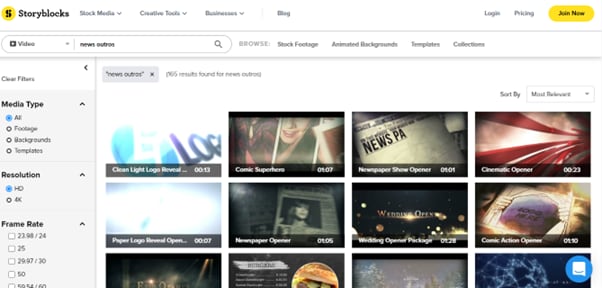
You can use these templates to create high-quality news intros and outros for your podcast or videos. The platform offers two pricing plans for individual content creators, starting at $15 per month. While businesses can customize their plans as per their requirements.
Limitations of the Storyblock are that the footage quality is very poor in the free version, and the paid versions might be tricky to avail sometimes.
Videvo
Videvo is a great resource for anyone looking for royalty-free video templates. They have over 300,000 free and premium videos, which you can download in clips or full with 4K resolution. However, their stock library is not much vast. The platform comes with a two-tier subscription plan starting from $14.99/month or $144/year.
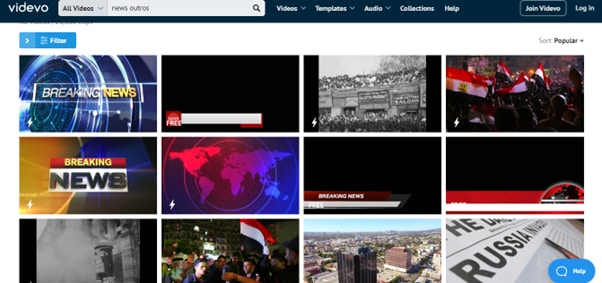
You can find templates for both commercial and non-commercial use, so whatever your needs are, Videvo is likely to have a template that will work for you, i.e., news style. Some features of the platform include high-resolution download options, numerous music, sound effects, images and videos library, and a video compression option.
Videezy
Videezy is a royalty-free video site that offers free and premium video templates. The website has a variety of options to choose from, including news style outros, all of which are geared towards creating engaging content.
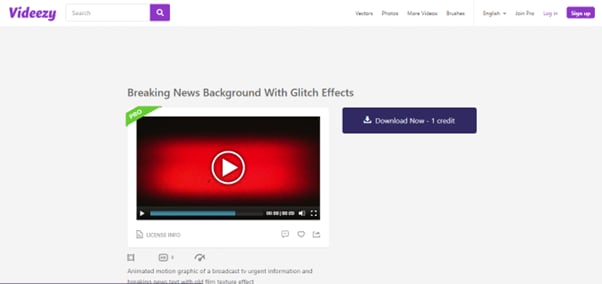
The templates are all ready-made and royalty-free. You can download them for use in your own projects and attach them to your video using any video editing app/software.
The pricing of the platform starts at $19/file, which might be expensive for some users. Moreover, in the free version, too many ads are displayed.
Shutterstock
Shutterstock has various affordable, royalty-free outro templates that you can use for your video/podcast. With a wide selection of styles and price points, this platform has the perfect content for your needs.
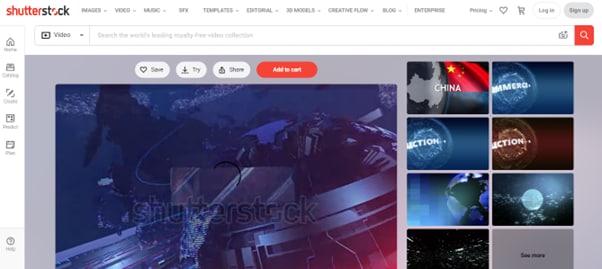
On Shutterstock, the free trial only offers 10 images, and you will be charged $0.22-$14.50/image once the trial limit is over. On the other hand, the Extended license will cost you $67.96-$99.50. The downside is that you have to purchase the content pack separately.
iStock
iStock is a premium website offering royalty-free stock photos, illustrations, and videos divided into numerous categories for easy access. The platform also offers a variety of non-editable news outro templates that you can add to your videos or podcasts.
The free trial on the platform is limited to 10 images, and after that, you will be charged $0.22-$9.90/image, while the Extended license will cost you $144-$216. The support system on the platform is slow and doesn’t respond on time.
Part 3. A Bonus Tip: How To Edit Your News Outro For Your YouTube Video?
After knowing the websites providing News Style Outro, we hope you can find an ideal outro successfully. However, how to use the material you have found, integrate it into your YouTube video, and improve the quality of it?
Like mentioned before, we highly recommend Filmora to fulfill all your editing needs and even provide royalty-free templates to use. Below are the steps to edit your news outros and make your content more appealing. Let’s start it without any hassle:
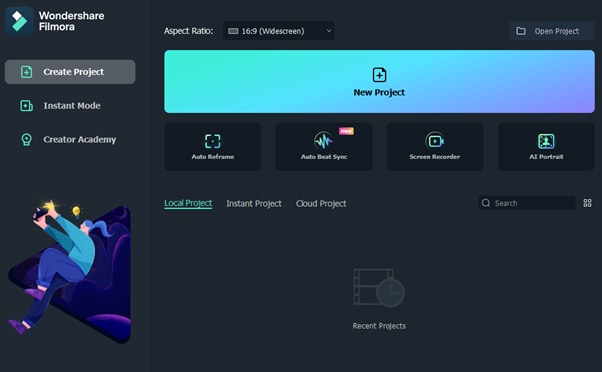
Step1 Download Filmora software from the official website and install it on your PC. Launch the software and click “New Project.”
Step2 Drag and drop your media file or import it using the “Click Here to Import Media File” option. Now, drag your file and drop it in the Timeline.
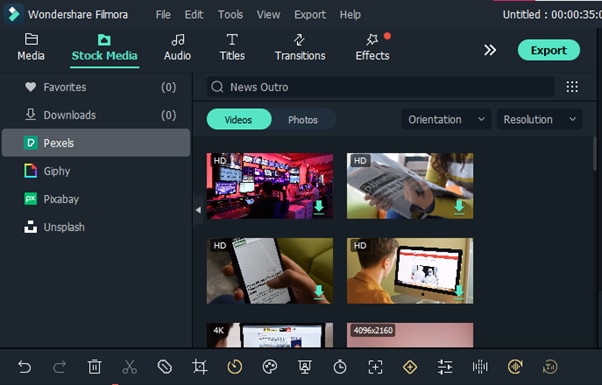
Step3 Adjust your clip in the Timeline and click the “Stock Media” option. Search for “News Outros,” select the one you like, and add it to the Timeline.
Step4 Next, adjust the template on your video, and once you are satisfied, click the “Export” option. Finally, do the necessary settings and click “Export” again or share your video directly to YouTube.
Free Download For Win 7 or later(64-bit)
Free Download For macOS 10.14 or later
Conclusion
In this article, we’ve provided a detailed guide on how to create news outro templates with simple and easy-to-follow instructions. We also discussed various platforms/editors where you can find customizable and non-customizable templates.
Hopefully, you find this guide informative and can now create strong news style outros for your videos.
Canva
Canva is a user-friendly graphic design free and paid tool that is quickly becoming a popular choice for businesses of all sizes. Canva offers a range of templates for creating professional-looking designs.
With a wide range of templates to choose from, you can easily find one that fits your needs and style. Best of all, you can create your outro template in minutes without hiring a designer or spending hours learning complex design software.
The software is easy-to-use and does not require any editor to customize and use the templates. The paid version is divided into 2 tiers: Canva Pro ($54.99 per year) and Canva for team ($84. 90/year). One disadvantage of the Canva free version is that it is limited resolution options when exporting your file.
Flexclip
Flexclip is a free, powerful, and easy-to-use online video maker that helps you create beautiful and engaging content for your business. With Flexclip, you can easily create editable news style outros for your videos from scratch or choose a template and edit it according to your requirements.
You can add text, music, elements, overlays, and branding to your templates to make them more stunning and captivating.
The platform offers 3 paid plans starting at $8.99/month. The con here is that the free version is only limited to the export quality of 480p, single royalty-free stock use, and 12 projects limit.
Placeit
Placeit is an online editor giving you the ability to create and customize your video content in no time. The editor also includes a stock image library, giving you access to several customizable templates.
Placeit is easy to use and offers a variety of templates for different purposes, including outros for news stories, video blogs, and even gaming videos. The platform offers an unlimited subscription plan starting from $7.47 /month.
However, the design rendering process of the editor is slow, there is no AI tool, and you even cannot import fonts that are not available on the platform.
Non-Editable News Outro Template Websites
Some platforms offer non-editable high-resolution news outros that you can integrate into your videos using software programs like Filmora (guidance in Part 3), After Effects, etc.
Storyblock
Searching for high-quality templates for your next project?Storyblock is a website that comes with royalty-free, non-customizable news style outros.
You can use these templates to create high-quality news intros and outros for your podcast or videos. The platform offers two pricing plans for individual content creators, starting at $15 per month. While businesses can customize their plans as per their requirements.
Limitations of the Storyblock are that the footage quality is very poor in the free version, and the paid versions might be tricky to avail sometimes.
Videvo
Videvo is a great resource for anyone looking for royalty-free video templates. They have over 300,000 free and premium videos, which you can download in clips or full with 4K resolution. However, their stock library is not much vast. The platform comes with a two-tier subscription plan starting from $14.99/month or $144/year.
You can find templates for both commercial and non-commercial use, so whatever your needs are, Videvo is likely to have a template that will work for you, i.e., news style. Some features of the platform include high-resolution download options, numerous music, sound effects, images and videos library, and a video compression option.
Videezy
Videezy is a royalty-free video site that offers free and premium video templates. The website has a variety of options to choose from, including news style outros, all of which are geared towards creating engaging content.
The templates are all ready-made and royalty-free. You can download them for use in your own projects and attach them to your video using any video editing app/software.
The pricing of the platform starts at $19/file, which might be expensive for some users. Moreover, in the free version, too many ads are displayed.
Shutterstock
Shutterstock has various affordable, royalty-free outro templates that you can use for your video/podcast. With a wide selection of styles and price points, this platform has the perfect content for your needs.
On Shutterstock, the free trial only offers 10 images, and you will be charged $0.22-$14.50/image once the trial limit is over. On the other hand, the Extended license will cost you $67.96-$99.50. The downside is that you have to purchase the content pack separately.
iStock
iStock is a premium website offering royalty-free stock photos, illustrations, and videos divided into numerous categories for easy access. The platform also offers a variety of non-editable news outro templates that you can add to your videos or podcasts.
The free trial on the platform is limited to 10 images, and after that, you will be charged $0.22-$9.90/image, while the Extended license will cost you $144-$216. The support system on the platform is slow and doesn’t respond on time.
Part 3. A Bonus Tip: How To Edit Your News Outro For Your YouTube Video?
After knowing the websites providing News Style Outro, we hope you can find an ideal outro successfully. However, how to use the material you have found, integrate it into your YouTube video, and improve the quality of it?
Like mentioned before, we highly recommend Filmora to fulfill all your editing needs and even provide royalty-free templates to use. Below are the steps to edit your news outros and make your content more appealing. Let’s start it without any hassle:
Step1 Download Filmora software from the official website and install it on your PC. Launch the software and click “New Project.”
Step2 Drag and drop your media file or import it using the “Click Here to Import Media File” option. Now, drag your file and drop it in the Timeline.
Step3 Adjust your clip in the Timeline and click the “Stock Media” option. Search for “News Outros,” select the one you like, and add it to the Timeline.
Step4 Next, adjust the template on your video, and once you are satisfied, click the “Export” option. Finally, do the necessary settings and click “Export” again or share your video directly to YouTube.
Free Download For Win 7 or later(64-bit)
Free Download For macOS 10.14 or later
Conclusion
In this article, we’ve provided a detailed guide on how to create news outro templates with simple and easy-to-follow instructions. We also discussed various platforms/editors where you can find customizable and non-customizable templates.
Hopefully, you find this guide informative and can now create strong news style outros for your videos.
Essential Tips for FREE YouTube Video Transcriptions
How to Transcribe a YouTube Video for FREE

Richard Bennett
Mar 27, 2024• Proven solutions
If you want to transcribe your videos to make the dialogs and speeches available in text format, you can use YouTube Transcribe feature that the streaming site offers for free. In this article, I’ll share with you a couple of methods to transcribe a YouTube video for free.
- Part 1: Transcribe YouTube Video Automatically for Free [2 Ways]
- Part 2: Transcribe YouTube Video to Text Online with Third-Party Service
- Part 3: Benefits of Transcribing YouTube Videos
- Part 4: YouTube Video Transcription FAQs
Part 1: How to Transcribe YouTube Video Automatically for Free [2 Ways]
Besides the basic video editing features on the YouTube platform, you can now quickly transcribe YouTube videos to the text as well. The good thing is, you can either use the automatic transcription feature that YouTube offers, or upload it manually while adjusting the timing as you go further.
Below are the two methods to transcribe your YouTube videos for free:
Method 1: Use the Automated Transcription Service on YouTube
As the name suggests, YouTube automatic transcription service works automatically. This means you don’t even have to click the ‘Transcribe’ button anymore to transcribe a YouTube video, and the website takes care of it on its own. All you need to do is, choose English as the language of the video when setting up subtitles. You can follow the instructions given below to do so:
Step 1 Upload a Video
Sign in to your YouTube account, click your profile picture from the top-right corner, and click YouTube Studio from the menu. Next, click CREATE from the upper-right corner, click Upload videos from the menu, and drag and drop a video from your computer to the Upload videos box that appears next.

Step 2 Select Transcription Language
On the Details page of the next box that appears, scroll down and click MORE OPTIONS, and select English in the Video language drop-down list under the Language, subtitles, and closed captions (CC) section.

Step 3 Publish the Video
Follow the on-screen instructions from this point to publish the video, and wait while YouTube automatically transcribes and adds the close captions to it.
Note: Depending on the duration of the clip, the time YouTube would take to transcribe may vary.
After YouTube has transcribed the video, you can download the transcription file in your preferred format. The instructions are given below explain how you can do so:
- Get to the Subtitles Window
While on the YouTube Studio page, click Subtitles from the left pane to go to the Channel subtitles page. And then click the video you want to modify.
- Get to Classic Studio
In the video subtitle page of the target video, hover mouse on the Published Automatic status under the Subtitles column, click the Options icon (with three vertical dots) that appears, and click Edit on Classic Studio.

- Download Transcription File
Click and open the Actions drop-down list from the top-left corner of the left pane, click your preferred transcription format including .vtt, .srt and .sbv from the list, and save the file on your local hard disk.

Method 2: Get YouTube Transcription when Watching
In addition, if you are watching any other video, you can make YouTube transcribe that for you as well. You can follow the instructions given below to get the YouTube video to text transcription:
Step 1: Play the Video
Go to the video on YouTube and start playing it. Make sure NOT to get to full-screen mode as doing so would hide the option to transcribe the clip.
Step 2: Enable Transcription
Click the More icon (with three horizontal dots) from under the bottom-right corner of the video player, and click Open transcript to see the video transcription in the Transcript pane that appears in the right.
Step 3: Manage Timestamps
Click the Options icon (with three vertical dots) from the top-right corner of the Transcript pane, and click Toggle timestamp to enable or disable the timestamps in the video transcription.
Limitations of Using YouTube Transcribe
Although YouTube’s automatic transcription is a decent feature that saves you a lot of time, since Google uses machine learning algorithms to convert the speech to text, the level of accuracy may vary depending on the accent of the speaker, and the clarity of the audio the video has. Also, even sometime you may not be satisfied with the end-results.
Alternatively, you can use Kapwing to transcribe a YouTube video and download the transcription file with the below step-by-step instructions:
Step 1: Add YouTube Video
Copy the URL of YouTube video you want to transcribe, go to https://www.kapwing.com/subtitles , paste the URL in the Paste a URL field, wait while Kapwing fetches the content of the video, and opens the Add subtitles to Video page.
Step 2: Transcribe the Video
Click Auto-generate from the right window, and follow the on-screen instructions to transcribe YouTube video to text.

Step 3: Download the Transcription File
Click Download SRT from the left pane, and follow the instructions from there to download the transcription file in *.srt format.

Pros
- Kapwing is free to use
- The auto-transcription process is quick and less tedious
- Kapwing also allows manual transcription and uploading of an existing *.srt file
Cons
- The auto-transcribed text might lack accuracy as the task is done by the speech-to-text tools that work in the background
You can follow the step-by-step instructions to transcribe a YouTube video and download the transcription file using Kapwing:
Step 1: Add YouTube Video
Copy the URL of YouTube video you want to transcribe, go to https://www.kapwing.com/subtitles , paste the URL in the Paste a URL field, wait while Kapwing fetches the content of the video, and opens the Add subtitles to Video page.
Step 2: Transcribe the Video
Click Auto-generate from the right window, and follow the on-screen instructions to transcribe YouTube video to text.
Step 3: Download the Transcription File
Click Download SRT from the left pane, and follow the instructions from there to download the transcription file in *.srt format.
Pros
- Kapwing is free to use
- The auto-transcription process is quick and less tedious
- Kapwing also allows manual transcription and uploading of an existing *.srt file
Cons
- The auto-transcribed text might lack accuracy as the task is done by the speech-to-text tools that work in the background
Part 3: Benefits of Transcribing YouTube Videos
You may need video transcriptions for several reasons, such as analyzing the summary of the entire speech in the video, extracting a single phrase or quote that was spoken in the clip, or making the video helpful even for those suffering from hearing impairment. When you transcribe a YouTube video, the transcript can be useful in many ways. Some of the most common benefits of transcribing a video include:
- Search Engine Optimization
When you add subtitles, the text can appear in Google search results when someone types a similar phrase in the search box. This helps get more views to your videos, thus giving your channel popularity, and you, monetary gains in the long run.
- Accent
If the speaker in the video is from a different region and is using an accent that you are not much comfortable with, you can turn on the subtitles and read the dialogs along with the video.
- Repurposing on Blogs
If you own a blog that you have embedded your video to, the transcription could be used to add text to it so the target audience can get a fair idea of what the video is all about. This is useful because many people prefer reading over watching.
YouTube Video Transcription FAQs
1. How to Transcribe YouTube Video to Text
Usually the transcription files have *.srt extension that are globally accepted and supported by almost all media players. However, there might be instances when you want to have the subtitles in plain text.
That said, to convert an SRT file to TXT, you can:
- Right-click the SRT file
- Go to Rename
- Replace srt with txt and press Enter
- Click OK on the confirmation box that appears next to convert SRT to TXT
After this, you can simply double-click the file, and read and modify the transcribed content as needed.
2. How to Edit and Upload Edited Transcript to YouTube
If you made any modifications to the transcript that was automatically generated by YouTube or any other third-party transcription tool, you can follow the steps given below to upload the new file to the YouTube video:
- Go to YouTube Studio and then to the Channel subtitles page as explained earlier
- Expand the Languages column of the target video
- Click the Options icon that appears under the Subtitles column when you hover mouse on to it
- Click Edit on Classic Studio
- On the next page, click Edit from the top-right corner

- Click to open the Actions drop-down list from the upper-left corner
- Click Upload a file
- Follow the on-screen instructions from there to upload the modified transcription file
- Click Save Changes from the top-right corner of the page when done
Conclusion
If you are looking for a quick and easy way of adding subtitles to your videos, letting YouTube transcribe for you could be a good approach. However, because these auto-generated transcriptions are created by machine learning algorithms, their accuracy cannot be counted on. Therefore, the best way to get the job done accurately is, let YouTube auto-transcribe your video, download the transcription file, make the necessary changes to it, and then upload the file back to the video.
Richard Bennett
Richard Bennett is a writer and a lover of all things video.
Follow @Richard Bennett
Richard Bennett
Mar 27, 2024• Proven solutions
If you want to transcribe your videos to make the dialogs and speeches available in text format, you can use YouTube Transcribe feature that the streaming site offers for free. In this article, I’ll share with you a couple of methods to transcribe a YouTube video for free.
- Part 1: Transcribe YouTube Video Automatically for Free [2 Ways]
- Part 2: Transcribe YouTube Video to Text Online with Third-Party Service
- Part 3: Benefits of Transcribing YouTube Videos
- Part 4: YouTube Video Transcription FAQs
Part 1: How to Transcribe YouTube Video Automatically for Free [2 Ways]
Besides the basic video editing features on the YouTube platform, you can now quickly transcribe YouTube videos to the text as well. The good thing is, you can either use the automatic transcription feature that YouTube offers, or upload it manually while adjusting the timing as you go further.
Below are the two methods to transcribe your YouTube videos for free:
Method 1: Use the Automated Transcription Service on YouTube
As the name suggests, YouTube automatic transcription service works automatically. This means you don’t even have to click the ‘Transcribe’ button anymore to transcribe a YouTube video, and the website takes care of it on its own. All you need to do is, choose English as the language of the video when setting up subtitles. You can follow the instructions given below to do so:
Step 1 Upload a Video
Sign in to your YouTube account, click your profile picture from the top-right corner, and click YouTube Studio from the menu. Next, click CREATE from the upper-right corner, click Upload videos from the menu, and drag and drop a video from your computer to the Upload videos box that appears next.
Step 2 Select Transcription Language
On the Details page of the next box that appears, scroll down and click MORE OPTIONS, and select English in the Video language drop-down list under the Language, subtitles, and closed captions (CC) section.
Step 3 Publish the Video
Follow the on-screen instructions from this point to publish the video, and wait while YouTube automatically transcribes and adds the close captions to it.
Note: Depending on the duration of the clip, the time YouTube would take to transcribe may vary.
After YouTube has transcribed the video, you can download the transcription file in your preferred format. The instructions are given below explain how you can do so:
- Get to the Subtitles Window
While on the YouTube Studio page, click Subtitles from the left pane to go to the Channel subtitles page. And then click the video you want to modify.
- Get to Classic Studio
In the video subtitle page of the target video, hover mouse on the Published Automatic status under the Subtitles column, click the Options icon (with three vertical dots) that appears, and click Edit on Classic Studio.
- Download Transcription File
Click and open the Actions drop-down list from the top-left corner of the left pane, click your preferred transcription format including .vtt, .srt and .sbv from the list, and save the file on your local hard disk.
Method 2: Get YouTube Transcription when Watching
In addition, if you are watching any other video, you can make YouTube transcribe that for you as well. You can follow the instructions given below to get the YouTube video to text transcription:
Step 1: Play the Video
Go to the video on YouTube and start playing it. Make sure NOT to get to full-screen mode as doing so would hide the option to transcribe the clip.
Step 2: Enable Transcription
Click the More icon (with three horizontal dots) from under the bottom-right corner of the video player, and click Open transcript to see the video transcription in the Transcript pane that appears in the right.
Step 3: Manage Timestamps
Click the Options icon (with three vertical dots) from the top-right corner of the Transcript pane, and click Toggle timestamp to enable or disable the timestamps in the video transcription.
Limitations of Using YouTube Transcribe
Although YouTube’s automatic transcription is a decent feature that saves you a lot of time, since Google uses machine learning algorithms to convert the speech to text, the level of accuracy may vary depending on the accent of the speaker, and the clarity of the audio the video has. Also, even sometime you may not be satisfied with the end-results.
Alternatively, you can use Kapwing to transcribe a YouTube video and download the transcription file with the below step-by-step instructions:
Step 1: Add YouTube Video
Copy the URL of YouTube video you want to transcribe, go to https://www.kapwing.com/subtitles , paste the URL in the Paste a URL field, wait while Kapwing fetches the content of the video, and opens the Add subtitles to Video page.
Step 2: Transcribe the Video
Click Auto-generate from the right window, and follow the on-screen instructions to transcribe YouTube video to text.
Step 3: Download the Transcription File
Click Download SRT from the left pane, and follow the instructions from there to download the transcription file in *.srt format.
Pros
- Kapwing is free to use
- The auto-transcription process is quick and less tedious
- Kapwing also allows manual transcription and uploading of an existing *.srt file
Cons
- The auto-transcribed text might lack accuracy as the task is done by the speech-to-text tools that work in the background
You can follow the step-by-step instructions to transcribe a YouTube video and download the transcription file using Kapwing:
Step 1: Add YouTube Video
Copy the URL of YouTube video you want to transcribe, go to https://www.kapwing.com/subtitles , paste the URL in the Paste a URL field, wait while Kapwing fetches the content of the video, and opens the Add subtitles to Video page.
Step 2: Transcribe the Video
Click Auto-generate from the right window, and follow the on-screen instructions to transcribe YouTube video to text.
Step 3: Download the Transcription File
Click Download SRT from the left pane, and follow the instructions from there to download the transcription file in *.srt format.
Pros
- Kapwing is free to use
- The auto-transcription process is quick and less tedious
- Kapwing also allows manual transcription and uploading of an existing *.srt file
Cons
- The auto-transcribed text might lack accuracy as the task is done by the speech-to-text tools that work in the background
Part 3: Benefits of Transcribing YouTube Videos
You may need video transcriptions for several reasons, such as analyzing the summary of the entire speech in the video, extracting a single phrase or quote that was spoken in the clip, or making the video helpful even for those suffering from hearing impairment. When you transcribe a YouTube video, the transcript can be useful in many ways. Some of the most common benefits of transcribing a video include:
- Search Engine Optimization
When you add subtitles, the text can appear in Google search results when someone types a similar phrase in the search box. This helps get more views to your videos, thus giving your channel popularity, and you, monetary gains in the long run.
- Accent
If the speaker in the video is from a different region and is using an accent that you are not much comfortable with, you can turn on the subtitles and read the dialogs along with the video.
- Repurposing on Blogs
If you own a blog that you have embedded your video to, the transcription could be used to add text to it so the target audience can get a fair idea of what the video is all about. This is useful because many people prefer reading over watching.
YouTube Video Transcription FAQs
1. How to Transcribe YouTube Video to Text
Usually the transcription files have *.srt extension that are globally accepted and supported by almost all media players. However, there might be instances when you want to have the subtitles in plain text.
That said, to convert an SRT file to TXT, you can:
- Right-click the SRT file
- Go to Rename
- Replace srt with txt and press Enter
- Click OK on the confirmation box that appears next to convert SRT to TXT
After this, you can simply double-click the file, and read and modify the transcribed content as needed.
2. How to Edit and Upload Edited Transcript to YouTube
If you made any modifications to the transcript that was automatically generated by YouTube or any other third-party transcription tool, you can follow the steps given below to upload the new file to the YouTube video:
- Go to YouTube Studio and then to the Channel subtitles page as explained earlier
- Expand the Languages column of the target video
- Click the Options icon that appears under the Subtitles column when you hover mouse on to it
- Click Edit on Classic Studio
- On the next page, click Edit from the top-right corner
- Click to open the Actions drop-down list from the upper-left corner
- Click Upload a file
- Follow the on-screen instructions from there to upload the modified transcription file
- Click Save Changes from the top-right corner of the page when done
Conclusion
If you are looking for a quick and easy way of adding subtitles to your videos, letting YouTube transcribe for you could be a good approach. However, because these auto-generated transcriptions are created by machine learning algorithms, their accuracy cannot be counted on. Therefore, the best way to get the job done accurately is, let YouTube auto-transcribe your video, download the transcription file, make the necessary changes to it, and then upload the file back to the video.
Richard Bennett
Richard Bennett is a writer and a lover of all things video.
Follow @Richard Bennett
Also read:
- Expand Film Length for YouTube Posting
- Studio Strategies for Video Impact and Growth
- 2024 Approved Engage, Enchant, Excel The Quintessential 5 Strategies for YouTube Marketing
- How to Make A YouTube Intro Video [2 Ways]
- [New] Channel Success Strategies A Comprehensive Guide to Spotlighting
- [New] Choose Your Perfect Wedding Tales - Youtube's Finest 8
- [Updated] Capture the Season' Wardrobe Top 5 Winter YT Scenes
- 2024 Approved Discovering Underrated Gems This Year (Films)
- 2024 Approved Audience Allure Video Marketing Strategies for YouTube Trailers via Filmora
- [New] Building Confidence Against YouTube Critiques
- 2024 Approved Digital Dollars in Motion A Side-by-Side of Vids Vs. Videos
- 2024 Approved DIY Audio Excellence No Mic Necessary
- [New] Elevate Engagement Youtube Insights for Timing
- 2024 Approved Elite Stabilization Solutions for Video Creators
- [New] Avoiding the Bottom Ranks Understanding Impactful Factors
- Channel Name Genius Brainstorming Like a Pro for 2024
- Culinary Crescendo High-Impact Food Network Monikers for 2024
- Laugh Track in the Air Parody Anthems
- On-Screen Caption Composer
- Two Simple Tweaks for Skyrocketing YouTube Traffic
- [New] Crafting a Unique Online Presence YouTube Edition
- [New] Crafting Impact The Quintessential Five YouTube Marketing Approaches
- DSLR Camera's Stand Against Mirrorless for Videographers for 2024
- In 2024, Easy Ways to Add Music to iMovie From YouTube
- In 2024, Charting a Path to Success Exploring 15 Top YouTube Beginnings
- [New] 7 Pulse-Pounding Workouts That Gain Traction on Social Media
- Reinvent Your YouTube Presence A Guide to Elevated Subscription Rates
- In 2024, Can a Brief Subscribe Boost Your Content Viewing?
- [Updated] Assessing TSeries’ Financial Outcomes From YouTube Presence
- 2024 Approved Curating Historical Wisdom The Ultimate Student-Friendly Channel List (#1-10)
- In 2024, Driving Income From Views on YouTube
- In 2024, Diving Into Popularity Top 10 YouTube Creators by Views & Subs
- [Updated] Beginning Your Journey to Digital Creation
- In 2024, Discover the Top 9 Free Online Tools to Craft Your Logo
- Cutting Edge Identifying the Best 10 Free Online Art Schools on YouTube for 2024
- Updated Revolutionize Your Workflow Best Free Mac Speech Recognition Software with No Downloads
- [Updated] In 2024, A Step-by-Step Approach to Editing Titles and Descriptions for IGTV
- New In 2024, Change Background Color in After Effects
- [Updated] In 2024, Overcoming Screen Blackouts in Recording Tools
- Step-by-Step Tutorial How To Bypass Xiaomi Redmi Note 13 Pro+ 5G FRP
- [New] Enhance Your Videography Skills with Top Tips for Mac Webcam Recording
- [New] The Best of the Best Unrivaled Business Strategy Games' Guide for 2024
- Snapshot Your Mobile Gamers' High Scores on Samsungs
- [Updated] Initiate Google Meet Using Your Gadget
- Android Screen Stuck General Oppo Find X6 Partly Screen Unresponsive | Dr.fone
- Title: "2024 Approved Blueprint for Buzzing Outro"
- Author: Brian
- Created at : 2024-05-25 11:01:08
- Updated at : 2024-05-26 11:01:08
- Link: https://youtube-video-recordings.techidaily.com/2024-approved-blueprint-for-buzzing-outro/
- License: This work is licensed under CC BY-NC-SA 4.0.
